5. Panels Cut
It is a relief… to be finished with cutting out the panels. I anticipated it would be challenging but it took much longer than I expected.
When I received the shipment of my okoume plywood back in early February I would never have guessed that it would be May 1st before I completed cutting out all of the kayak panels. My workshop is small so I had to move the materials and workbench out to the carport. Benefits of this included freedom of movement around all sides of the 16-foot long work table and plenty of fresh air circulation. Clean up of the sawdust was also easy with the use of my leaf blower. But the downside to the carport was numerous rainy spring weekends in south Louisiana. For weeks at a time the entire workbench and plywood was wrapped in plastic painter’s drop cloth to keep it dry.
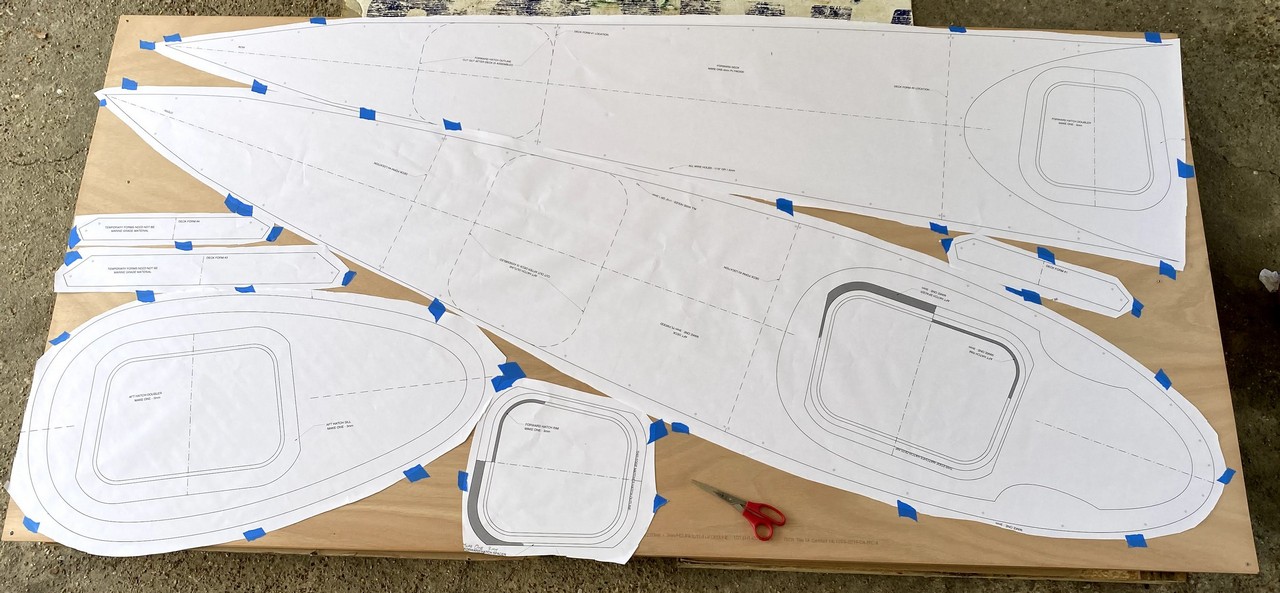
This project utilized full size plans purchased from Chesapeake Light Craft. During late March I had a weekend of good weather which allowed me to trace and cut out the deck panels from the 3 mm okoume sheets. After several more weeks of weather delays or conflicts with other springtime weekend activities, I finished cuting out the deck panels and bulkheads from the 4 mm sheets.
Tracing Hull Patterns
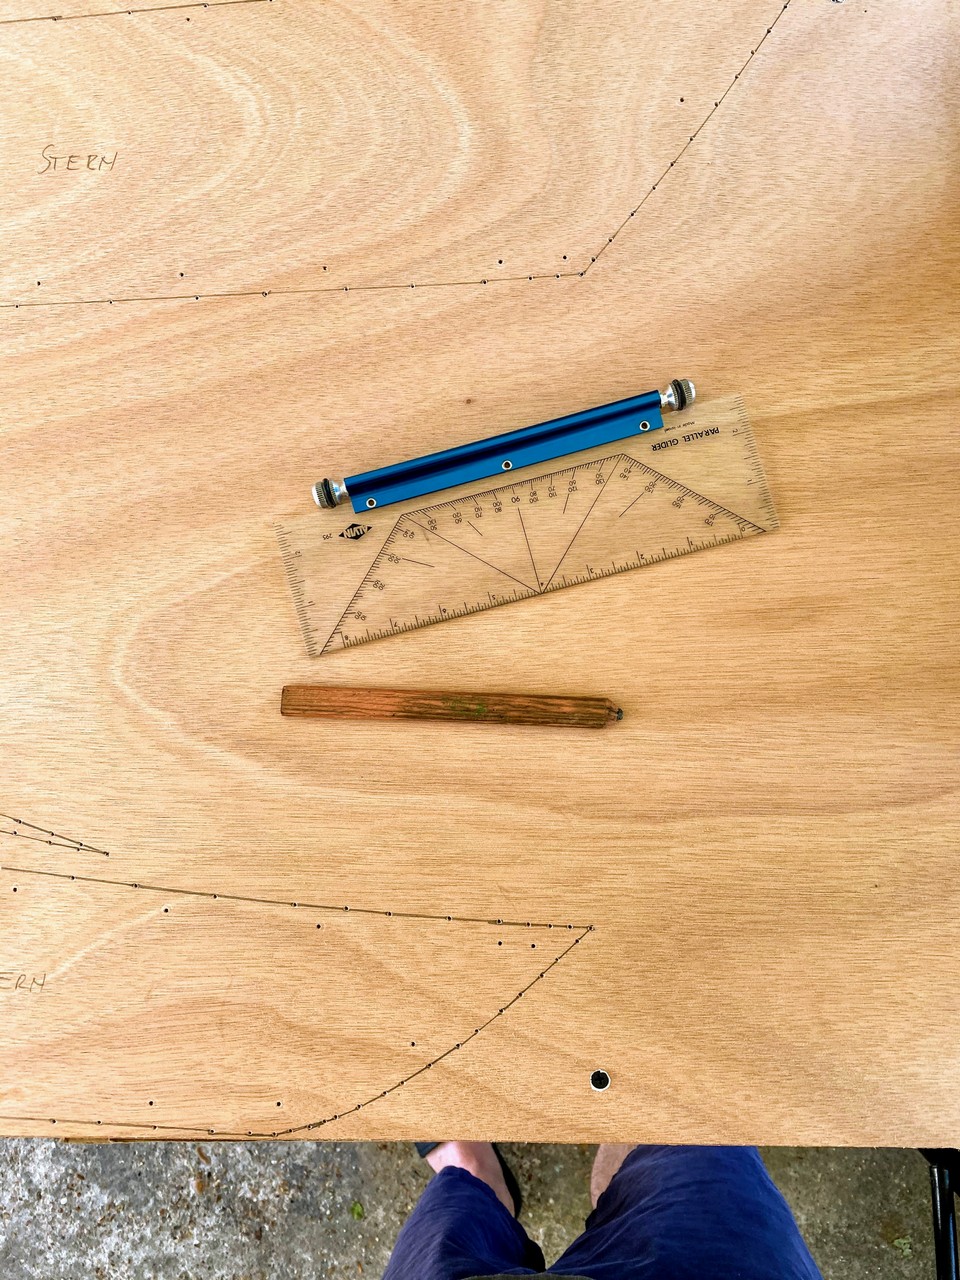
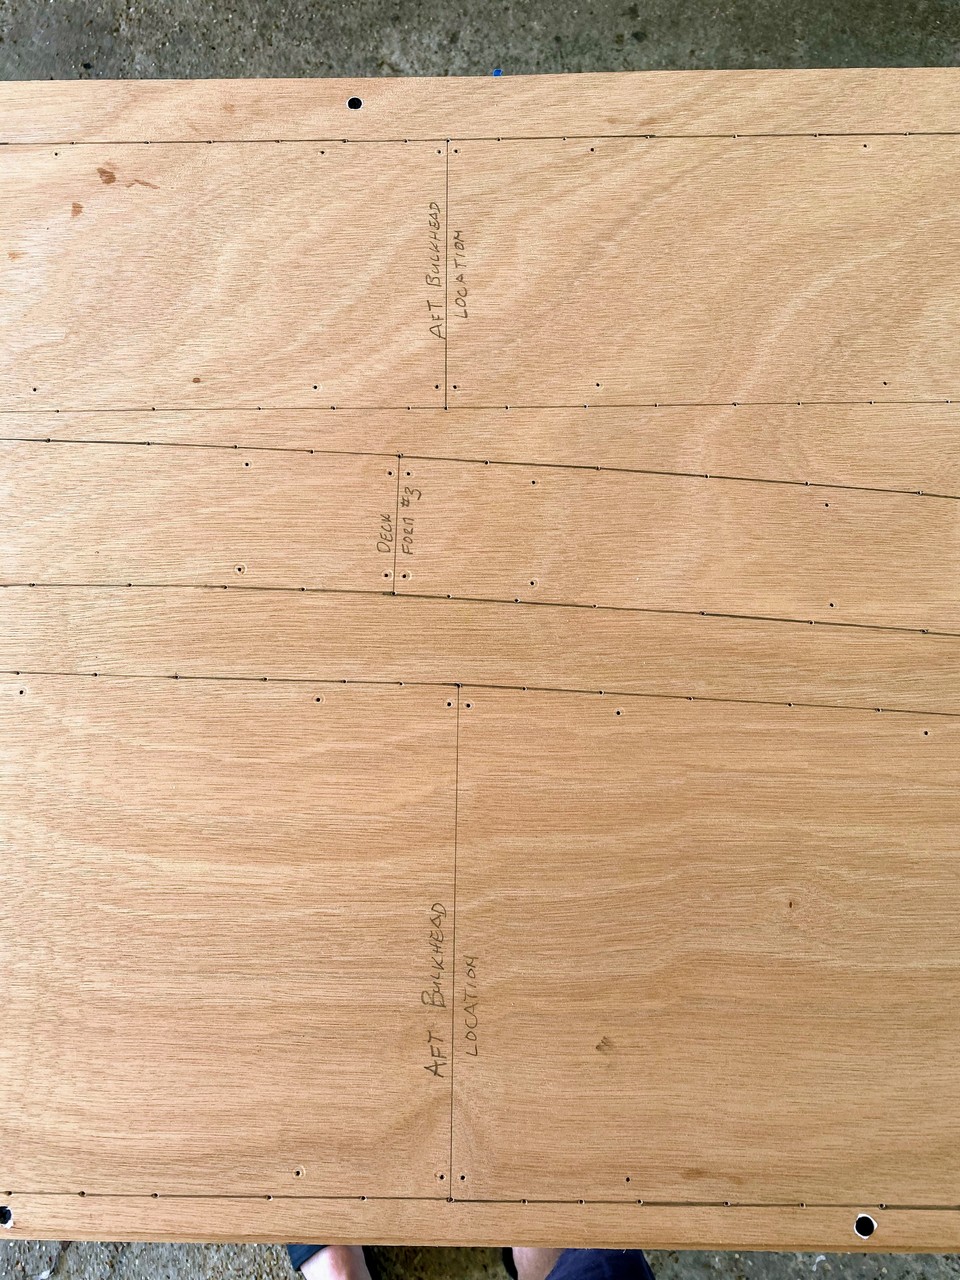
The hull patterns were essentially just rolled out onto the 2’ x 16’ sheets of 4 mm okoume. I used scissors to cut the bulkhead patterns away from the hull patterns and store them for later use. The hull panels are cut in matched pairs but bulkheads are singles, so you don’t want to waste wood cutting out extras. I taped the patterns down with blue painter’s tape and then used an awl / punch to trace around every cut line of every pattern, and also to punch the center points of each wire stitch hole. On curves and complex shapes, I punched marks close together, on the stratight-aways I could space them up to two inches apart. Before removing the paper patterns I drilled out the wire stitch holes.
Penciling onto the Wood
With the paper patterns removed (but nearby in case I needed to double check shapes) I used a carpenter’s pencil to draw visible lines along the punch marks. A straight edge was used for the straight cuts, but I just free sketched the curves. Before reaching for the saw, I wrote on each panel the name of the panel and the centerlines of bulkeads, etc. - any information on the plans that would be usefull to me when assembling panels was written in pencil. I could always sand it off later. Also, I used drywall screws to bind the multiple sheets of plywood together. This ensured I’d have perfectly matched pairs with no shifting.
Gallery of Pattern Transfer images

Cutting Panels
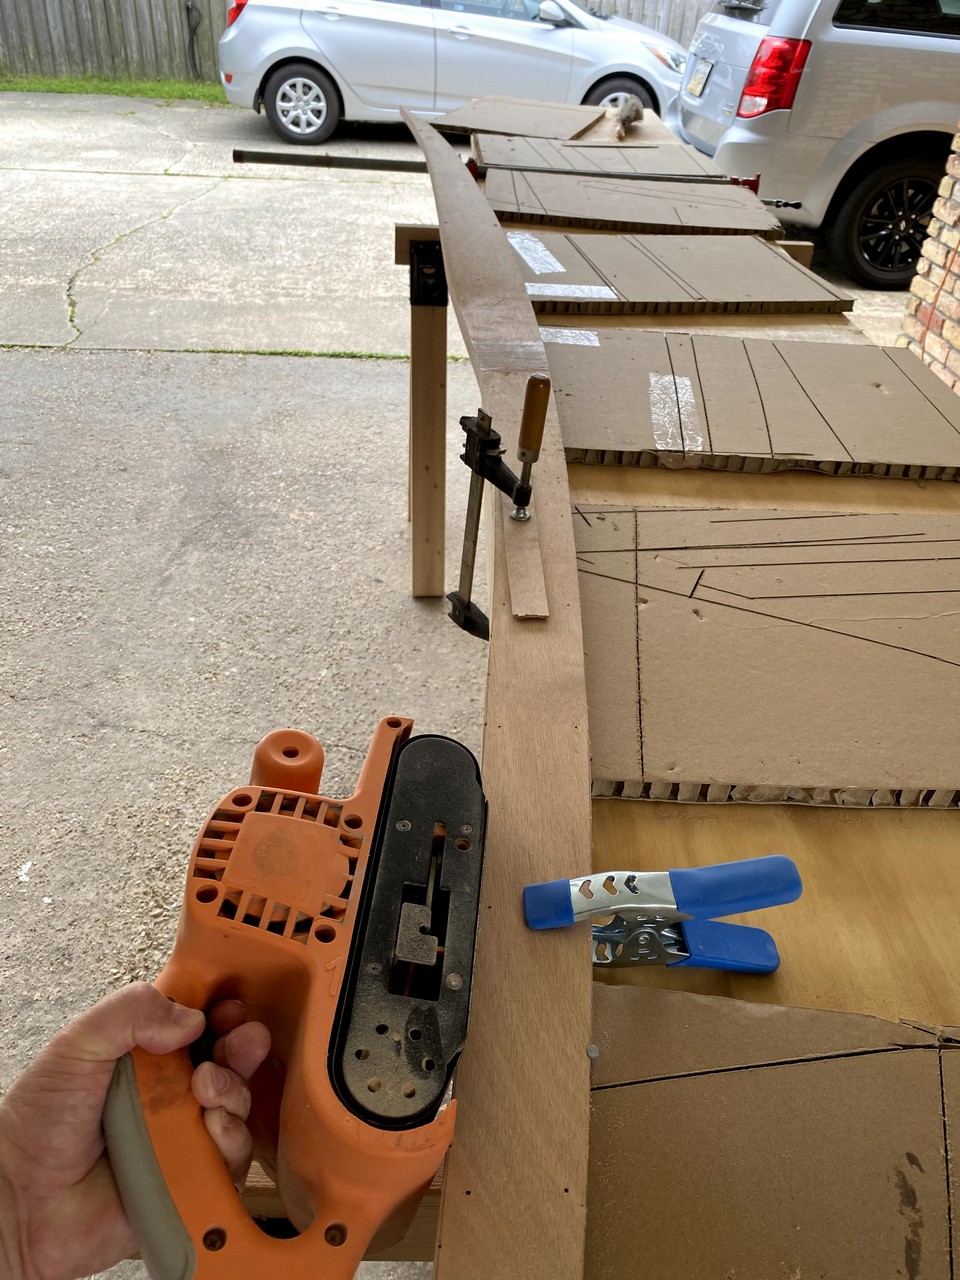
I’ve griped some in this blog about rainy weekends and other things delaying my progress, but if I’m honest it was this circular saw work that I found intimidating. A moment of lapsed concentration, or a sudden shift of the saw or sawhorses could cause serious damage to the valuable marine plywood. I did make a few mistakes: I cut on the wrong side of the line for a set of cockpit combing spacers, and the circular saw did bind once and kick back into a hull panel. I can make combing spacers out of other scrap material and I will patch the 1/2" goof in the hull panel with wood flour thickened epoxy.
Initially, I tried cutting with a cordless circular saw having a 5-1/2" 100T plywood blade. I found it simply wasn’t powerful enough and this was on the thinner 3 mm ply. I switch to my regular 7-1/4" carbide tipped 24T blade and found it worked better. So long as I didn’t push it too fast I had no problems with splintering.
I came to have several large sheets of really thick corrugated cardboard last year which I saved. It was more than 1/2" thick and both surfaces were very uniform, flat and smooth. I used this as sacrificial spacer material between my stack of okoume plywood and the work bench. This allowed me to set the circular saw blade depth well below the okoume and it cut into the cardboard without damaging my plywood workbench. The okoume stayed flat and level, and was up at waist level so I didn’t have to stoop down onto the floor to make the cuts.
So how close to the line? I’ve read several opinions with most builders suggesting to keep 1/8" or more outside the line. In the straight cuts I strove to get closer… more like 1/32" or even right up on the line. I used the graphite pencil lines as a guide, but the rather strong (big) punch holes were very valuable in keeping my eye on the line. As sawdust flowed off the saw blade, those punch marks remained visible while the pencil lines were obscured. In the curved areas I did leave a gap between the blade and the line, mostly out of necessity because the circular saw simply couldn’t get that close. I did pull out my Japanese handsaw a couple of times to finish a few cuts that I just couldn’t reach with my 7-1/4" circular saw.
One last technique - sheetrock screws - were used to bind the pairs of plywood panels together. I just put a few screws right through a few of the pre-drilled wire stitch holes to hold the panel pairs motionless. This prevented one panel from shifting in relation to its mate and ensured both would eventually have identical shapes.
Sanding to Shape
Some folks use a block plane or surform tool. I just used my belt sander with 60 grit paper. I used clamps and occasionally a driven 6# nail to hold the panels in place along the edge of my workbench with the edge to be sanded protruding. Following the pencil lines and the punch marks, I sanded all edges of the hull panels right down to the finished pattern lines. The 1/2" thick corrugated cardboard sheets were still beneath the okoume, allowing the points of the sheetrock screws to punch into the cardboard. This further held the panels in place while sanding, and prevented the screw points from digging into the workbench.
I finished the day covered with sawdust, with irritated and itchy eyes, and really just sore from bending over and concentrating on cutting and sanding to - and not into - the lines. I’m looking forward to the next steps.
Gallery of Carpentry images