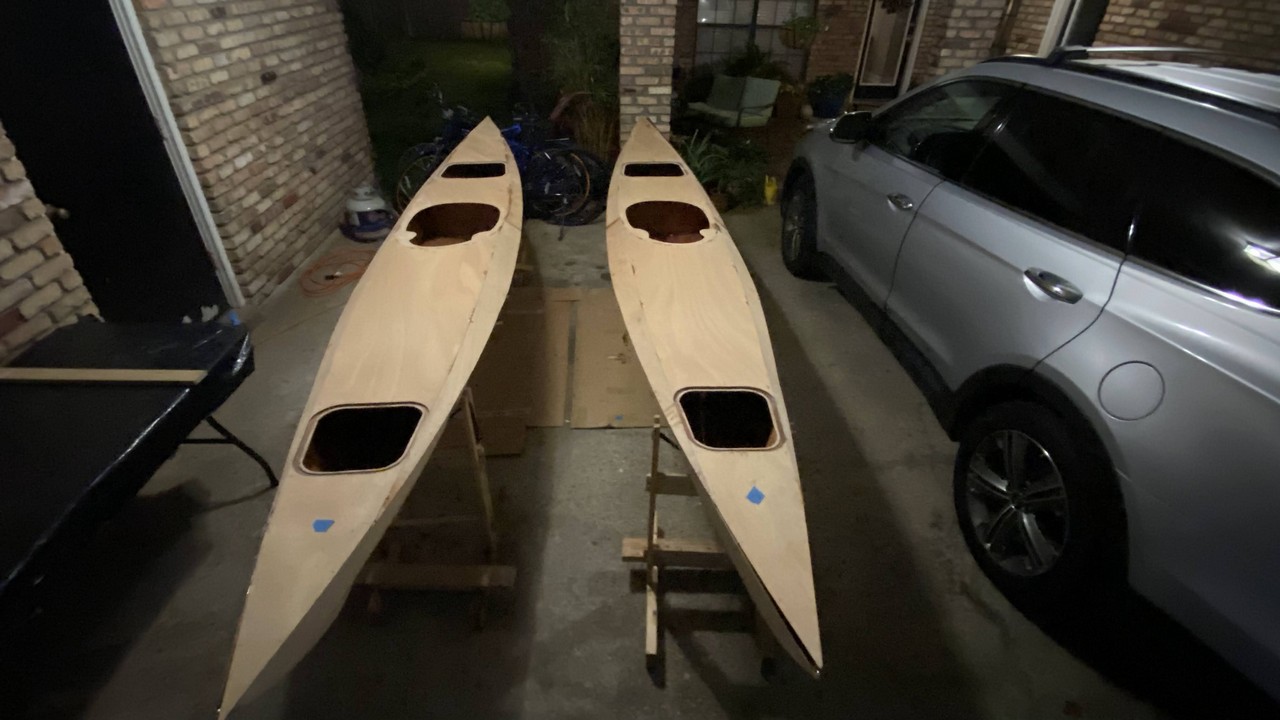
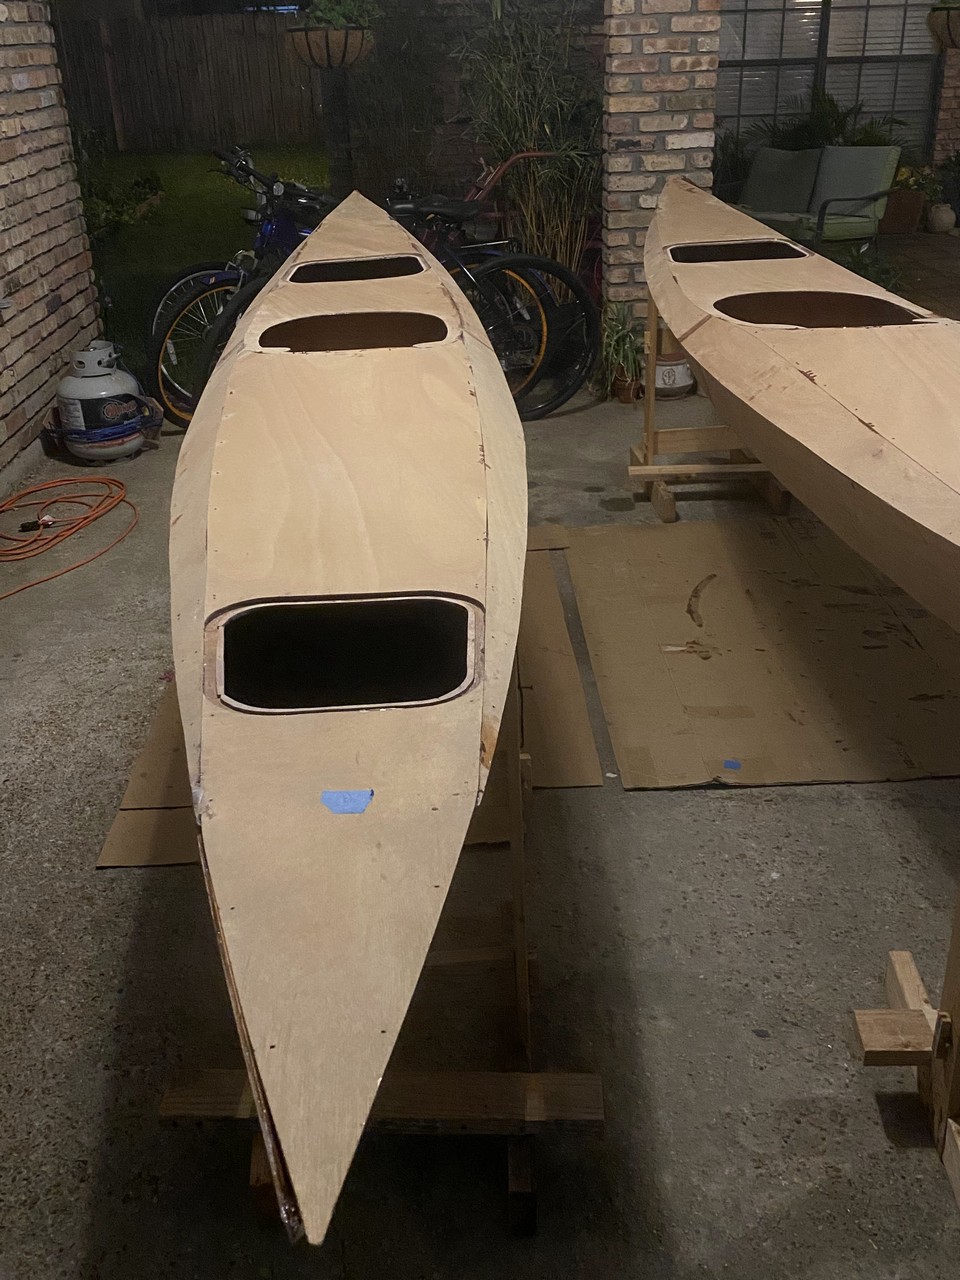
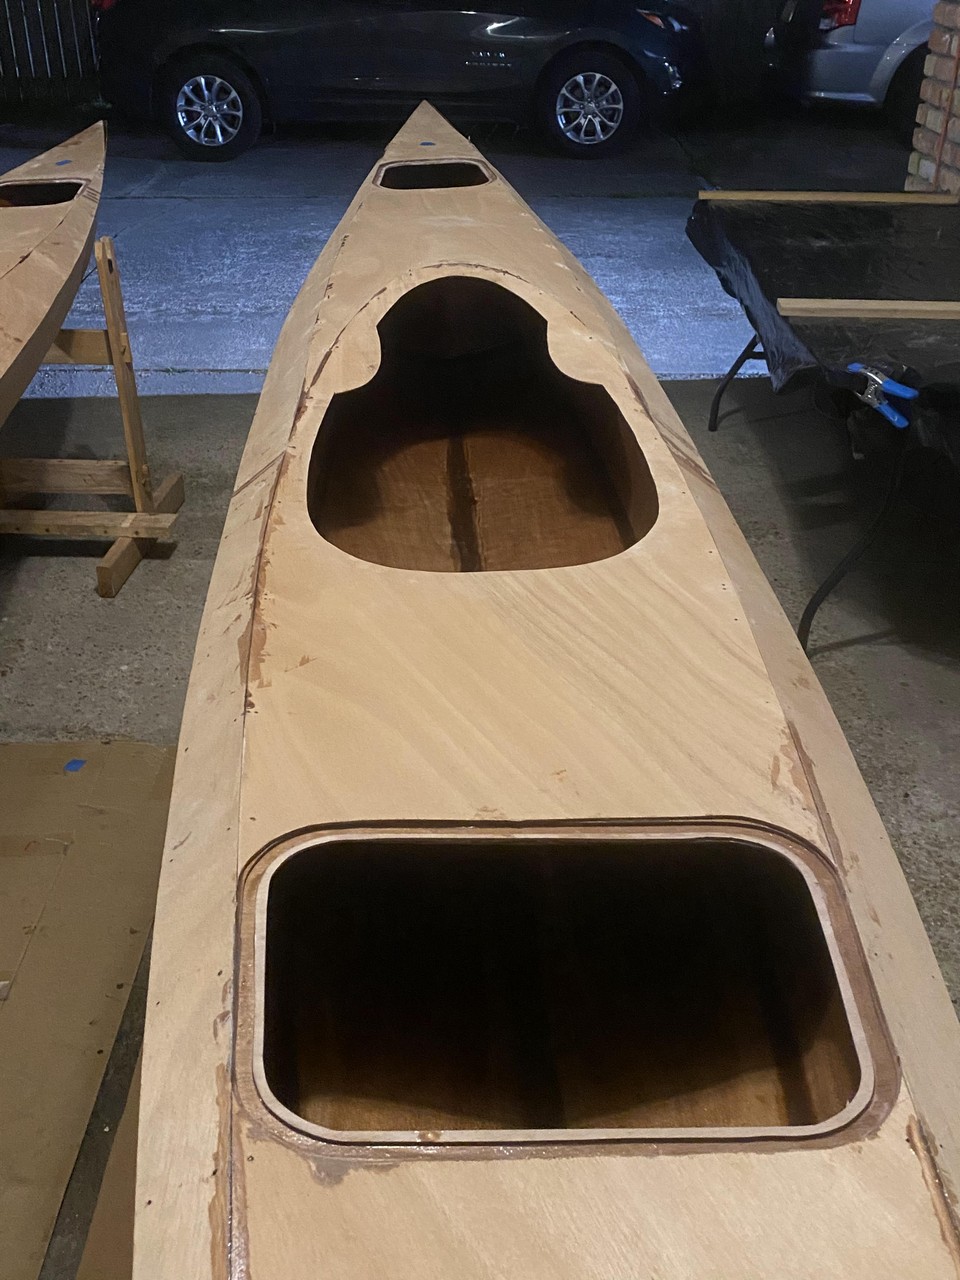
12. Joining Deck to Hull
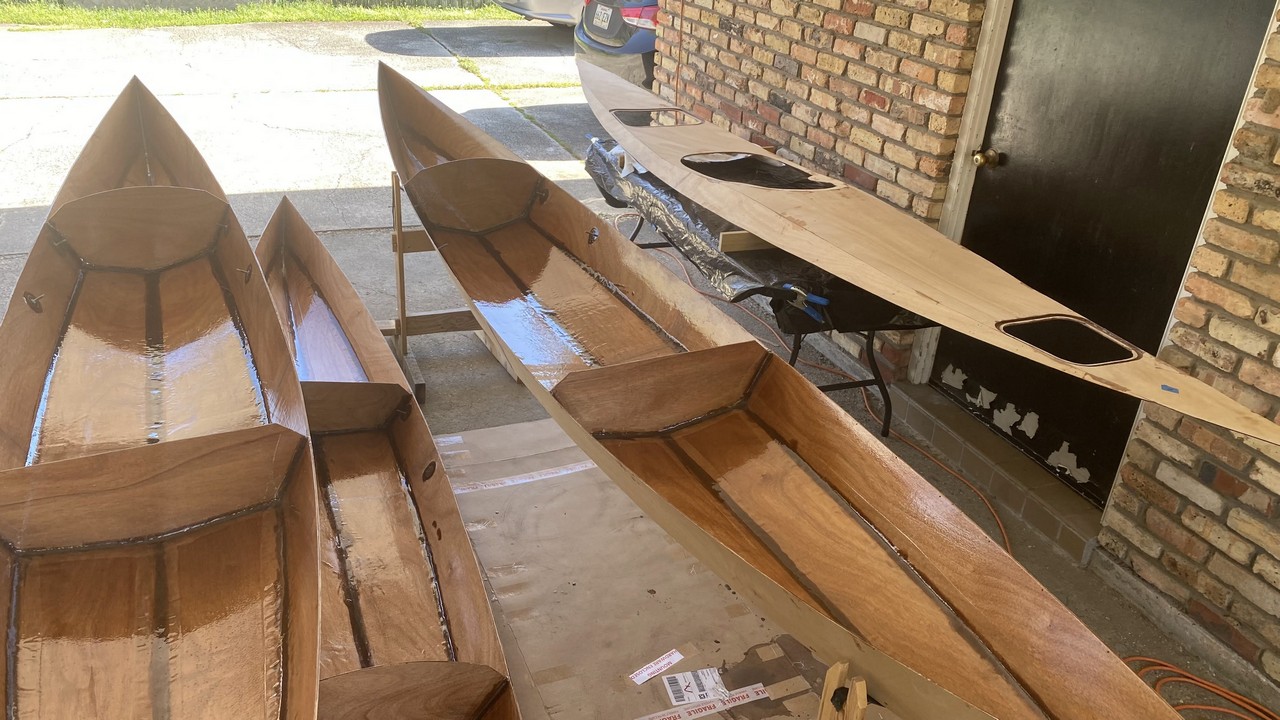
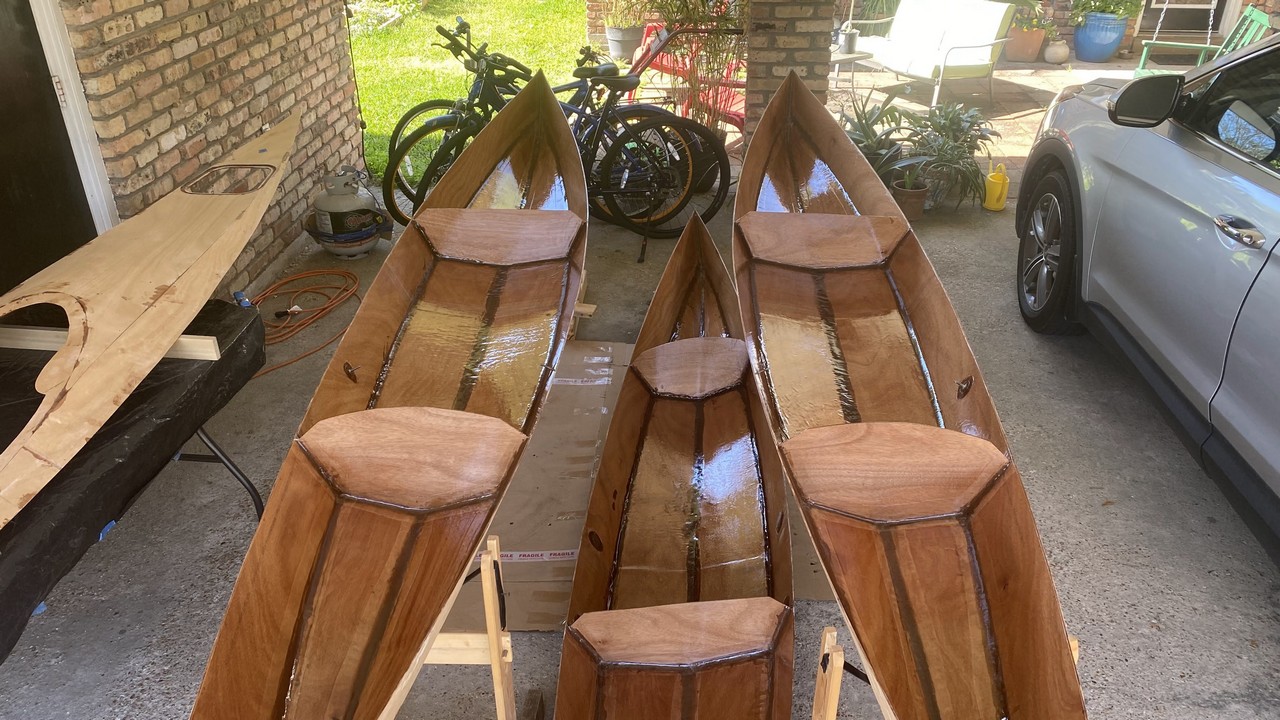
We’re really building boats! Work was completed on the interior of decks and hulls, allowing the pairs to be bonded together - forever taking the shape of kayaks.
Fortunately I enjoyed fine weather most March weekends which allowed much progress in my carport and driveway. I found completing the kayak interiors labor intensive as there was an extraordinary amount of sanding. Partly this was due to my errors in technique applying sloppy filets or other issues I had to correct.


My Mistakes
The assembly line technique of building three kayaks at once does enjoy some efficiencies, but there is no way around some of the labor (sanding) and this just takes time. I strive to be efficient on the weekends and holidays when the weather is nice but I’ve made some mistakes. Perhaps you can avoid them.
1. Poor filet technique or epoxy mix
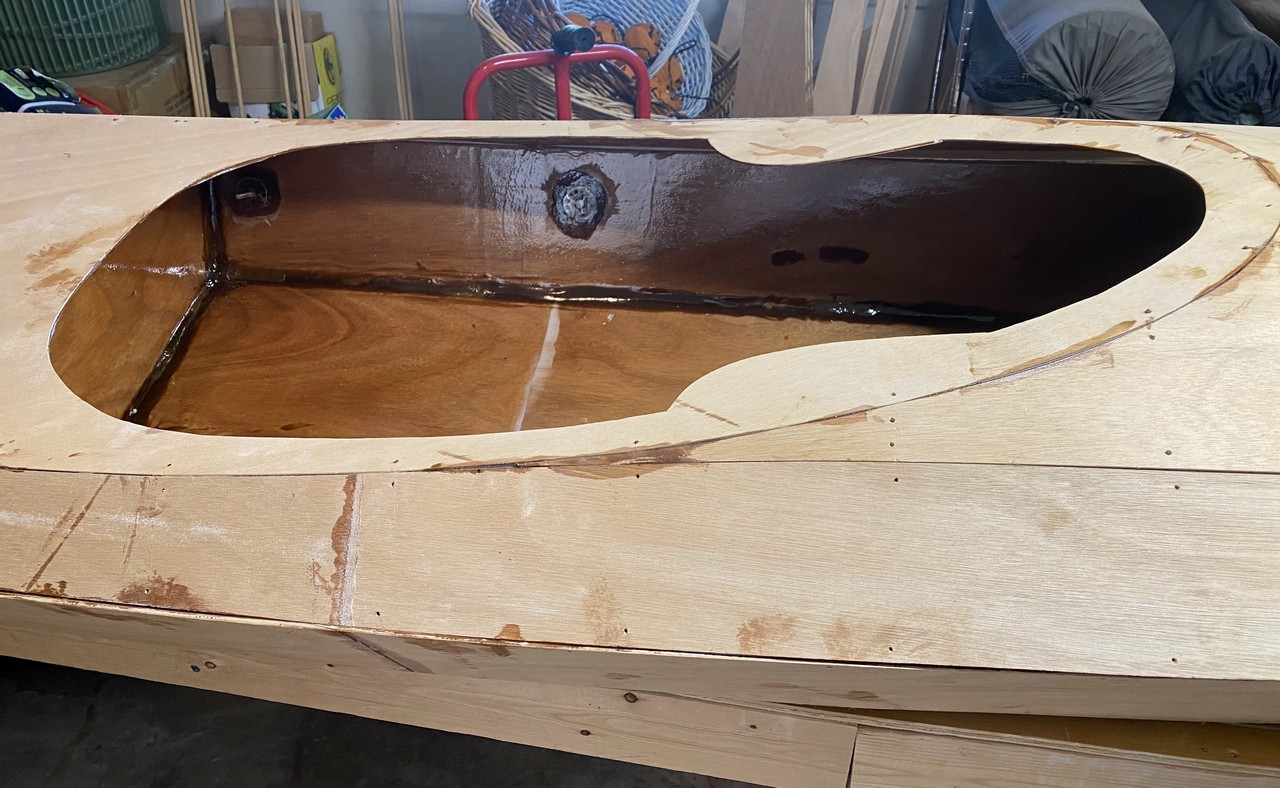
These are perhaps the most readily avoidable errors and are compounded for me trying to build three at once. Ideally, I’d use painter’s tape to mask the filet areas before applying them. Striving to make progress, I couldn’t be bothered with this step and will tolerate some dark stains inside the boat from the wood flour thickened epoxy. Some but not all were sanded out before applying the fiberglass and clear epoxy coat.
I did use “cake frosting” bags to apply a clean bead of the epoxy along the panel joints, and then knocked down the bead with a curved-end plastic spatula to form the convex shape of the filet. Generally, this worked well, but there were a few drips, sags, etc. Occasionally I didn’t get the mix of wood flour in epoxy quite right, resulting in too thin filet material that slumped or ran down.
With my assembly line process going on in the driveway I also got slow in using up a batch or two of epoxy, resulting in attempting to apply too-thick epoxy that was already beginning to cure. I should have just discarded it. The result was some lumpy filets in some areas - particularly corners. I erroneously assumed I’d be able to sand them down. Worse, I discovered that in some areas I didn’t knock down the bead soon enough with the spatula, resulting in bubbles forming within the filet.
2. Sanding challenges (inside corners)
Due to the above, I created extra work for myself in the sanding stage. I tried to sand down bumps and to uncover bubbles so that additional epoxy could fill these voids in certain portions of filets. Having only a belt sander and random orbital disk sander, I was left to using my fingers to grip sand paper and attack inside corners of the hull.
3. Fiberglass tape issues
My wife assisted with applying the fiberglass tape to the fore and aft hull compartments after I’d applied the filets. Timing of the application of the fiberglass is (I subsequently learned) critical. Do it too soon when the epoxy is still wet and the tape will stick - sometimes in the wrong place - and you’ll have to pull it up and lay it back down again. This results in a brown stain in the tape from the wood flour. In other areas I waited too long and we couldn’t get the fiberglass cloth to completely lay down in the joint. This resulted in bubbles forming which later had to be cut and sanded out to allow future epoxy layers to penetrate the voids. Some builders seeking pristine filets allow their perfectly formed filets to fully cure. Then, they sand to roughen the surface and apply the fiberglass tape with clear epoxy resulting in a more attractive look. I could justify this time requirement for the cockpit interior, but not for other areas.
4. Foot brace studs error
I chalk up this error to exhaustion at the end of a day of work… On boat #3 I bonded the set of four bolt studs to the hull facing the wrong direction. Duh. I ended up cutting off two of them with a hack saw, leaving alone the other two in the corner near the rear bulkhead as they would end up behind the seat back. I had to order another set and bond it in the correct location facing the fore bulkhead. I just added useless weight to this particular boat.
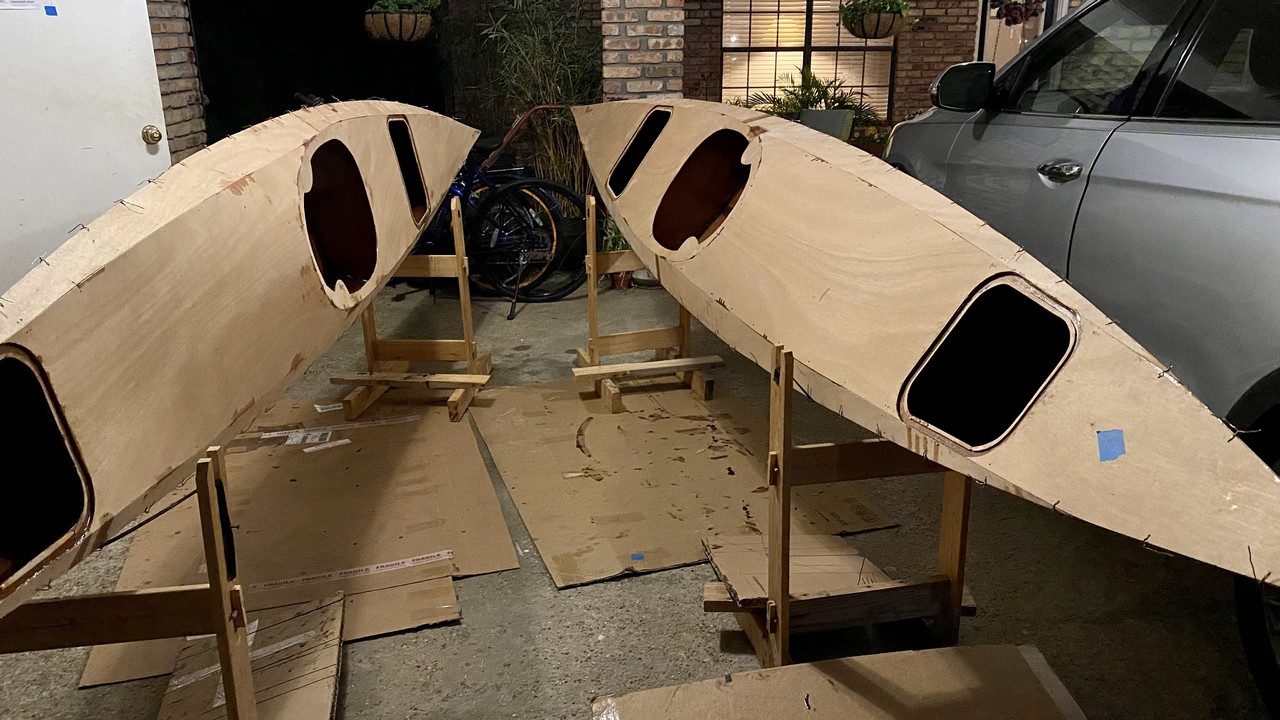
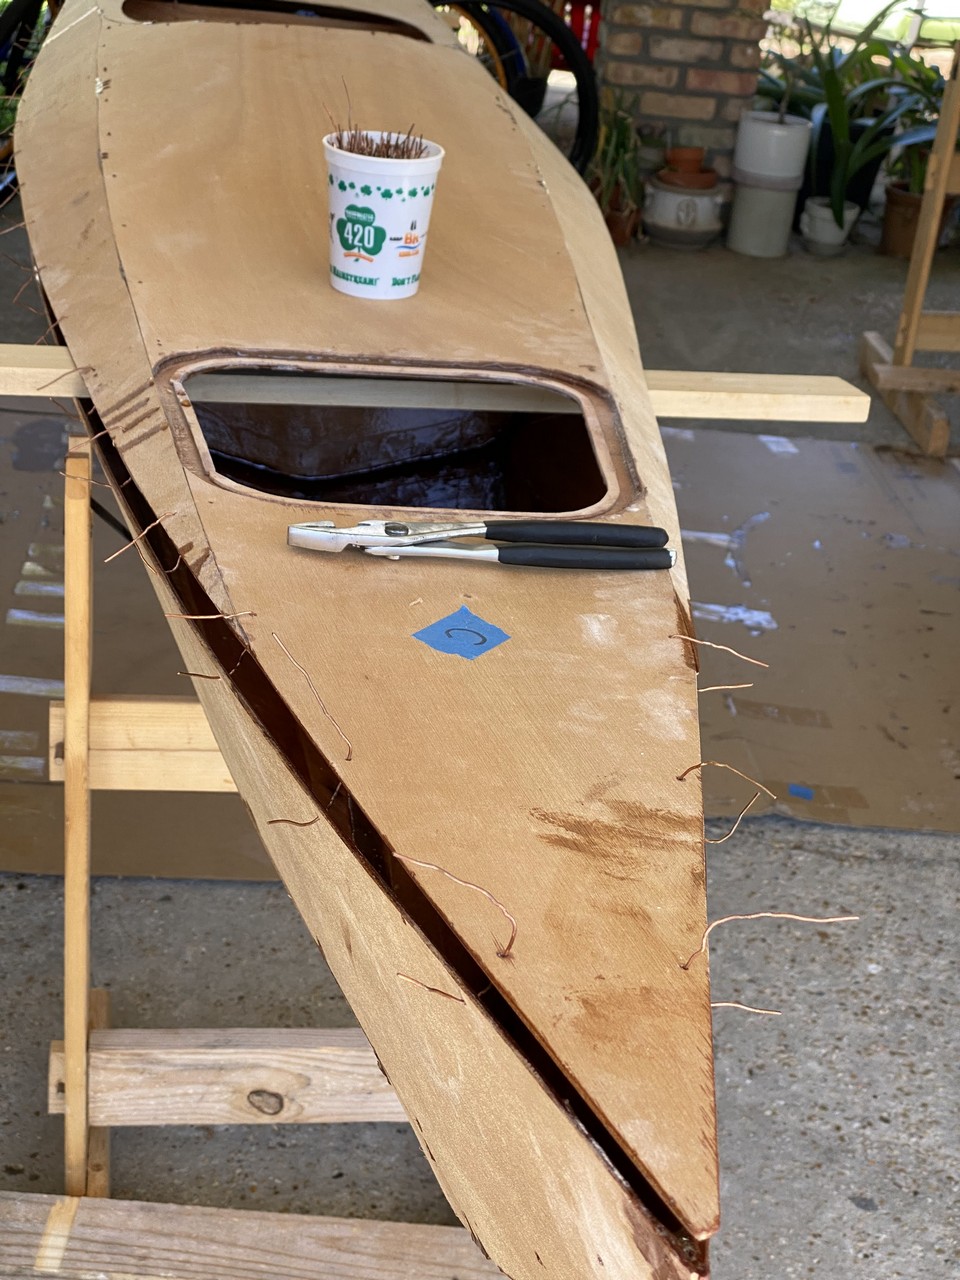
Stitch it Together
I strayed from the instruction manual in joining the decks to the hulls. The CLC manual calls for placing a bead of silica-thickened epoxy along the thin edge of the hull panel with a syringe and then wiring the deck down to meet it. I agonized over this a bit before “kayak workday Saturday.” I feared I would have great difficulty cleanly wiring the decks to hulls without the epoxy getting all over the place. I also knew the silica-thickened epoxy dries white, and I didn’t want a “there you see it, there you don’t” white line along the sheer of each boat. Tack welding from the inside worked for the hull panels - why not continue it for the deck-to-hull joint?
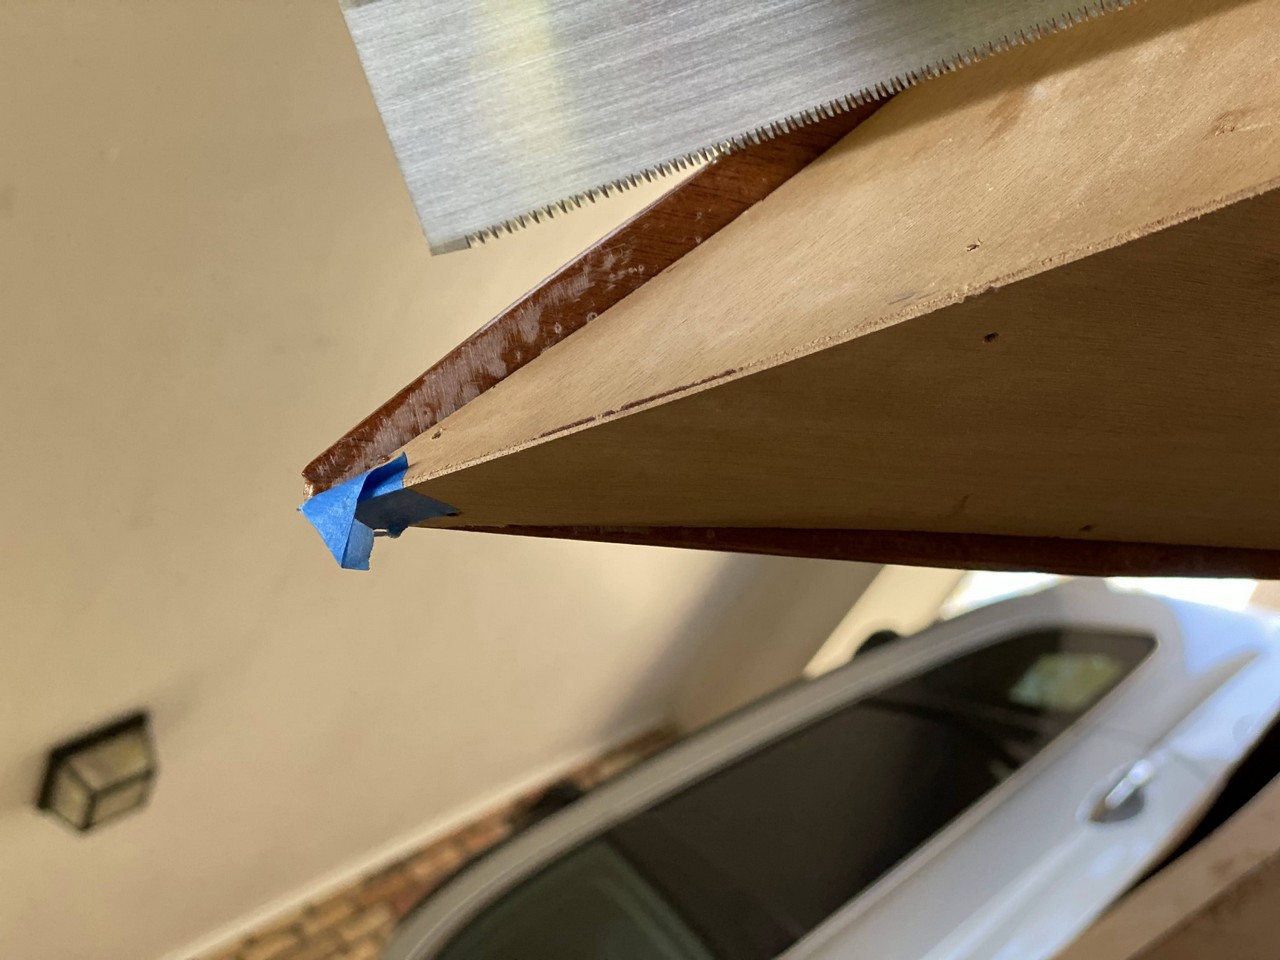
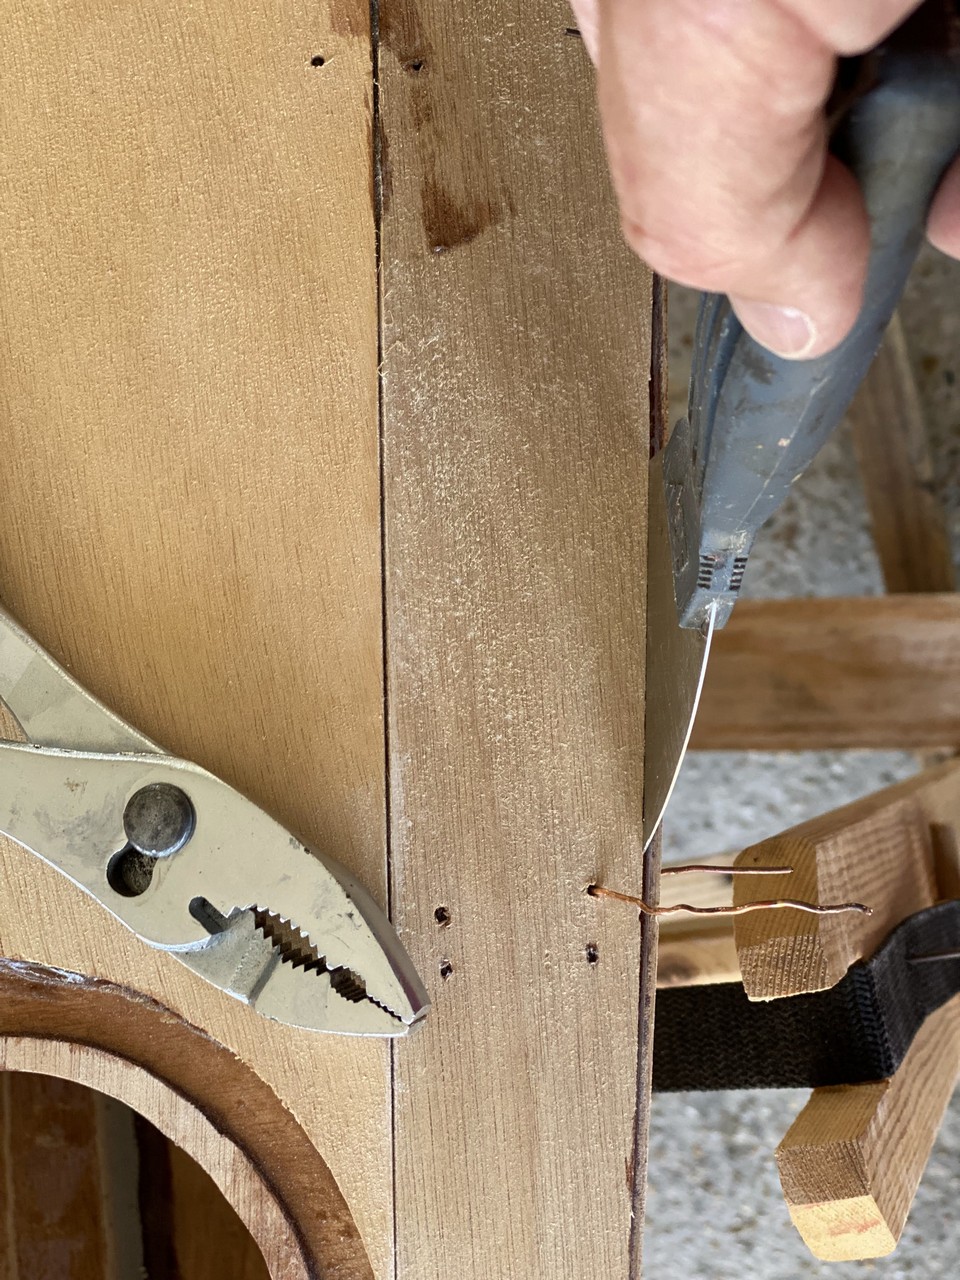
First I wired hulls to decks, sanding and filing the joint occasionally to improve the fit along the sheer line. The manual suggests a flat screwdriver, but I prefer a wider putty knife and/or drywall mud spreader to pry and align the deck to hull as I tighten the wire stitches. It spreads the force along a greater area and so doesn’t mar the wood.
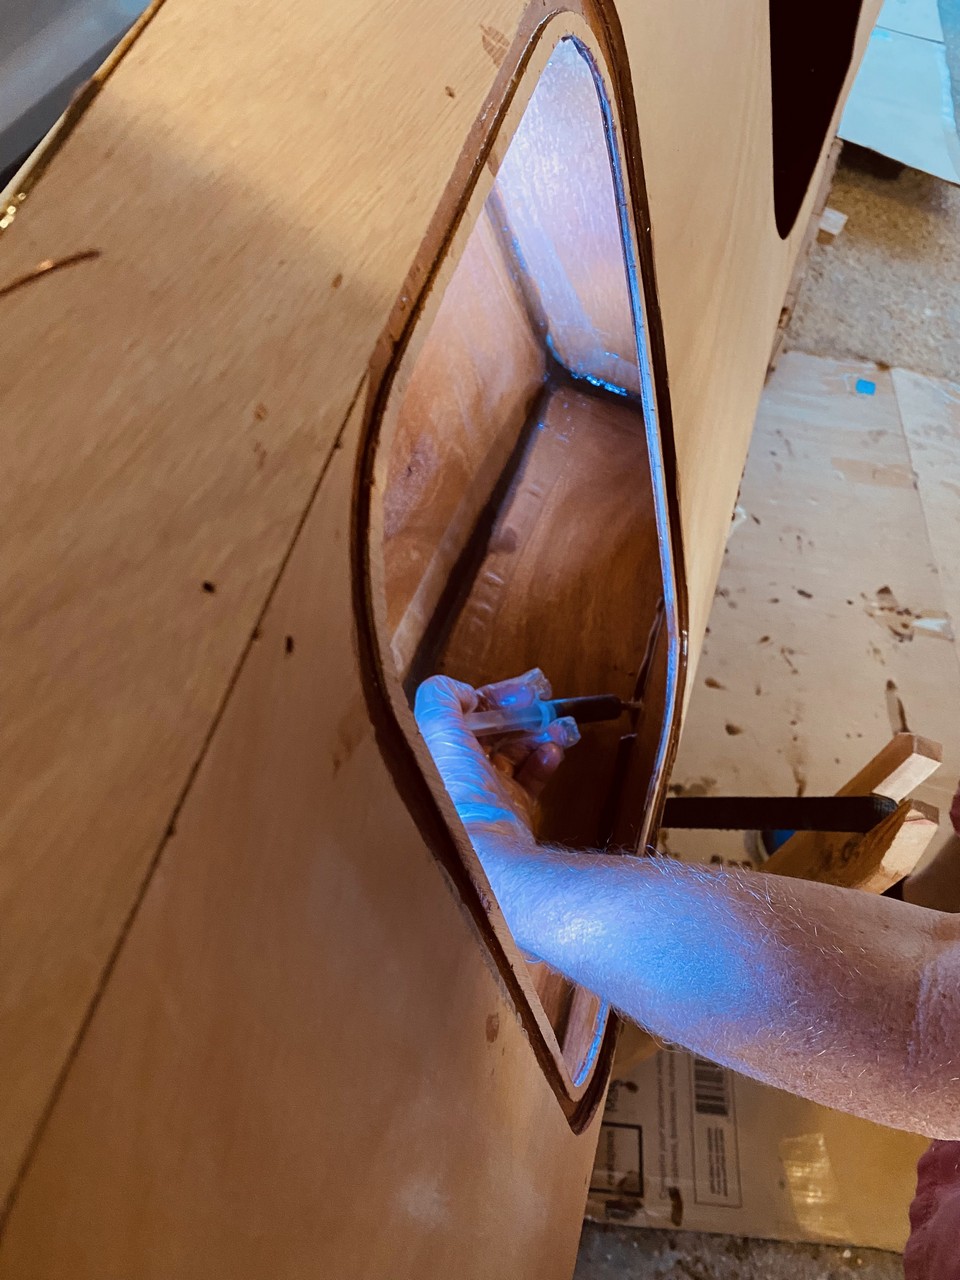
Epoxy Tack Welds
I thickened the epoxy with wood flour instead of silica so that the color visible through any gaps along the sheerline would be brown instead of milky white. I laid the kayaks on their edges in the cradles and used a syringe to lay a bead of runny thickened epoxy along the lower deck-to-hull joint. I did this one side at a time, allowing the epoxy tack weld to partially cure so it wouldn’t run before flipping the boat over to do the other side. I did not apply a bead with the syringe along the exterior because I knew it would leak into the interior, running down inside walls and generally making a mess. I can easily sand off runs on the exterior, but not so on the now enclosed interior.
Flip and Repeat
Towards the end of the day one side had cured enough to no longer run so I flipped the boats and applied epoxy tack-weld beads along the opposite interior hull-to-deck joint. The boats were then left overnight to fully cure, and the next evening I removed the copper stitching wires. I was able to reach all by hand through the hatch holes with my wire snips except those stitches at the very front tip.