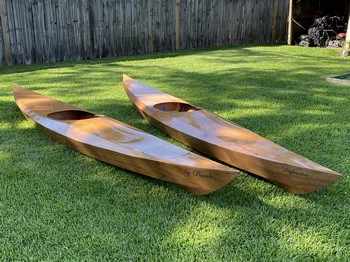
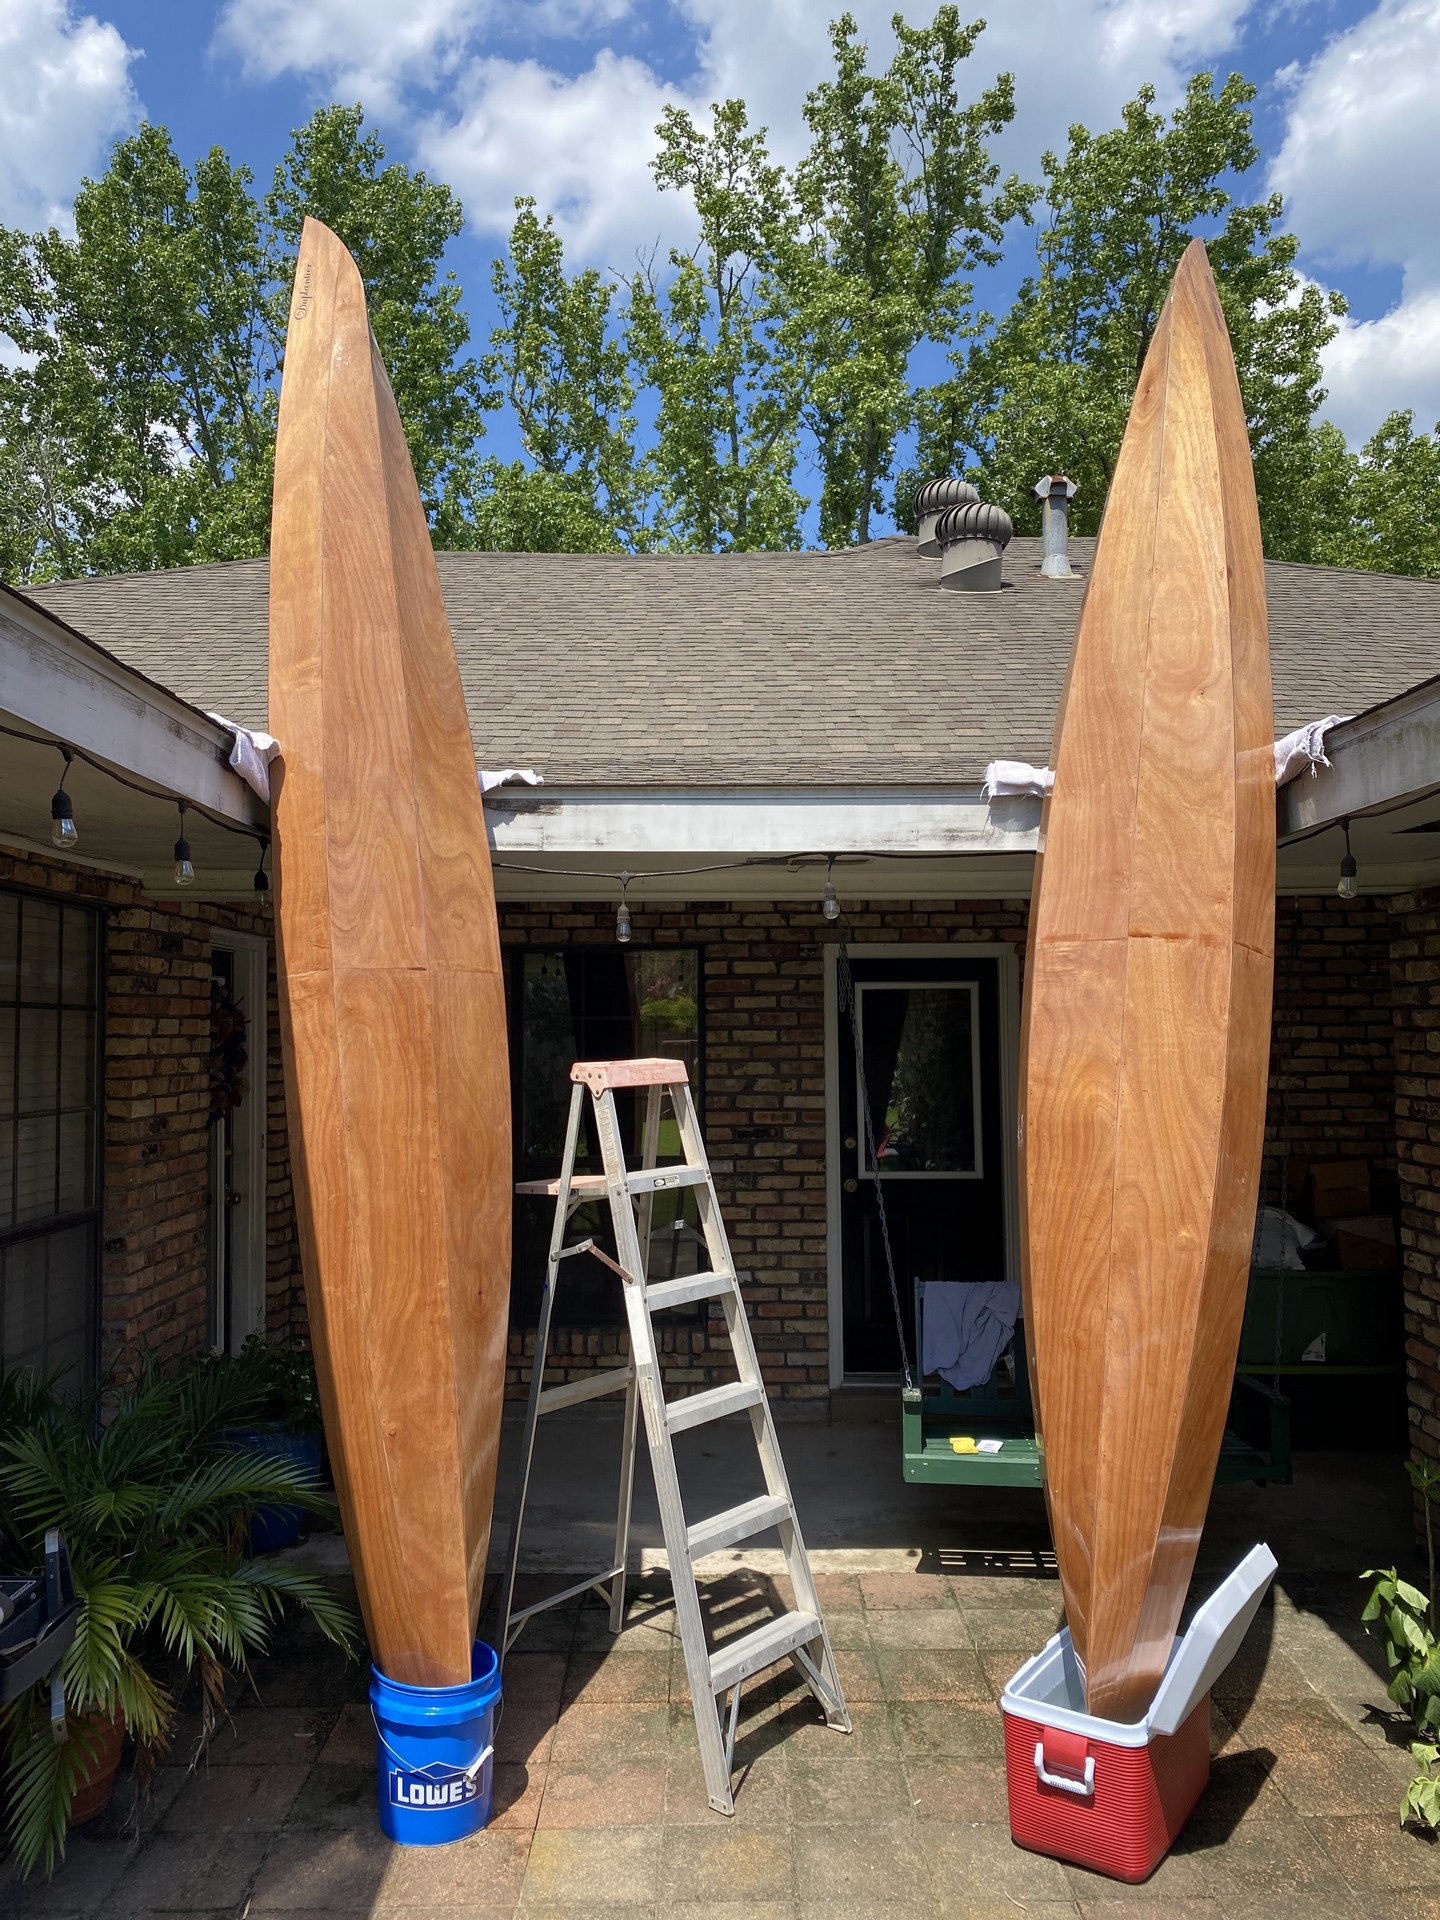
14. Cockpit Time!
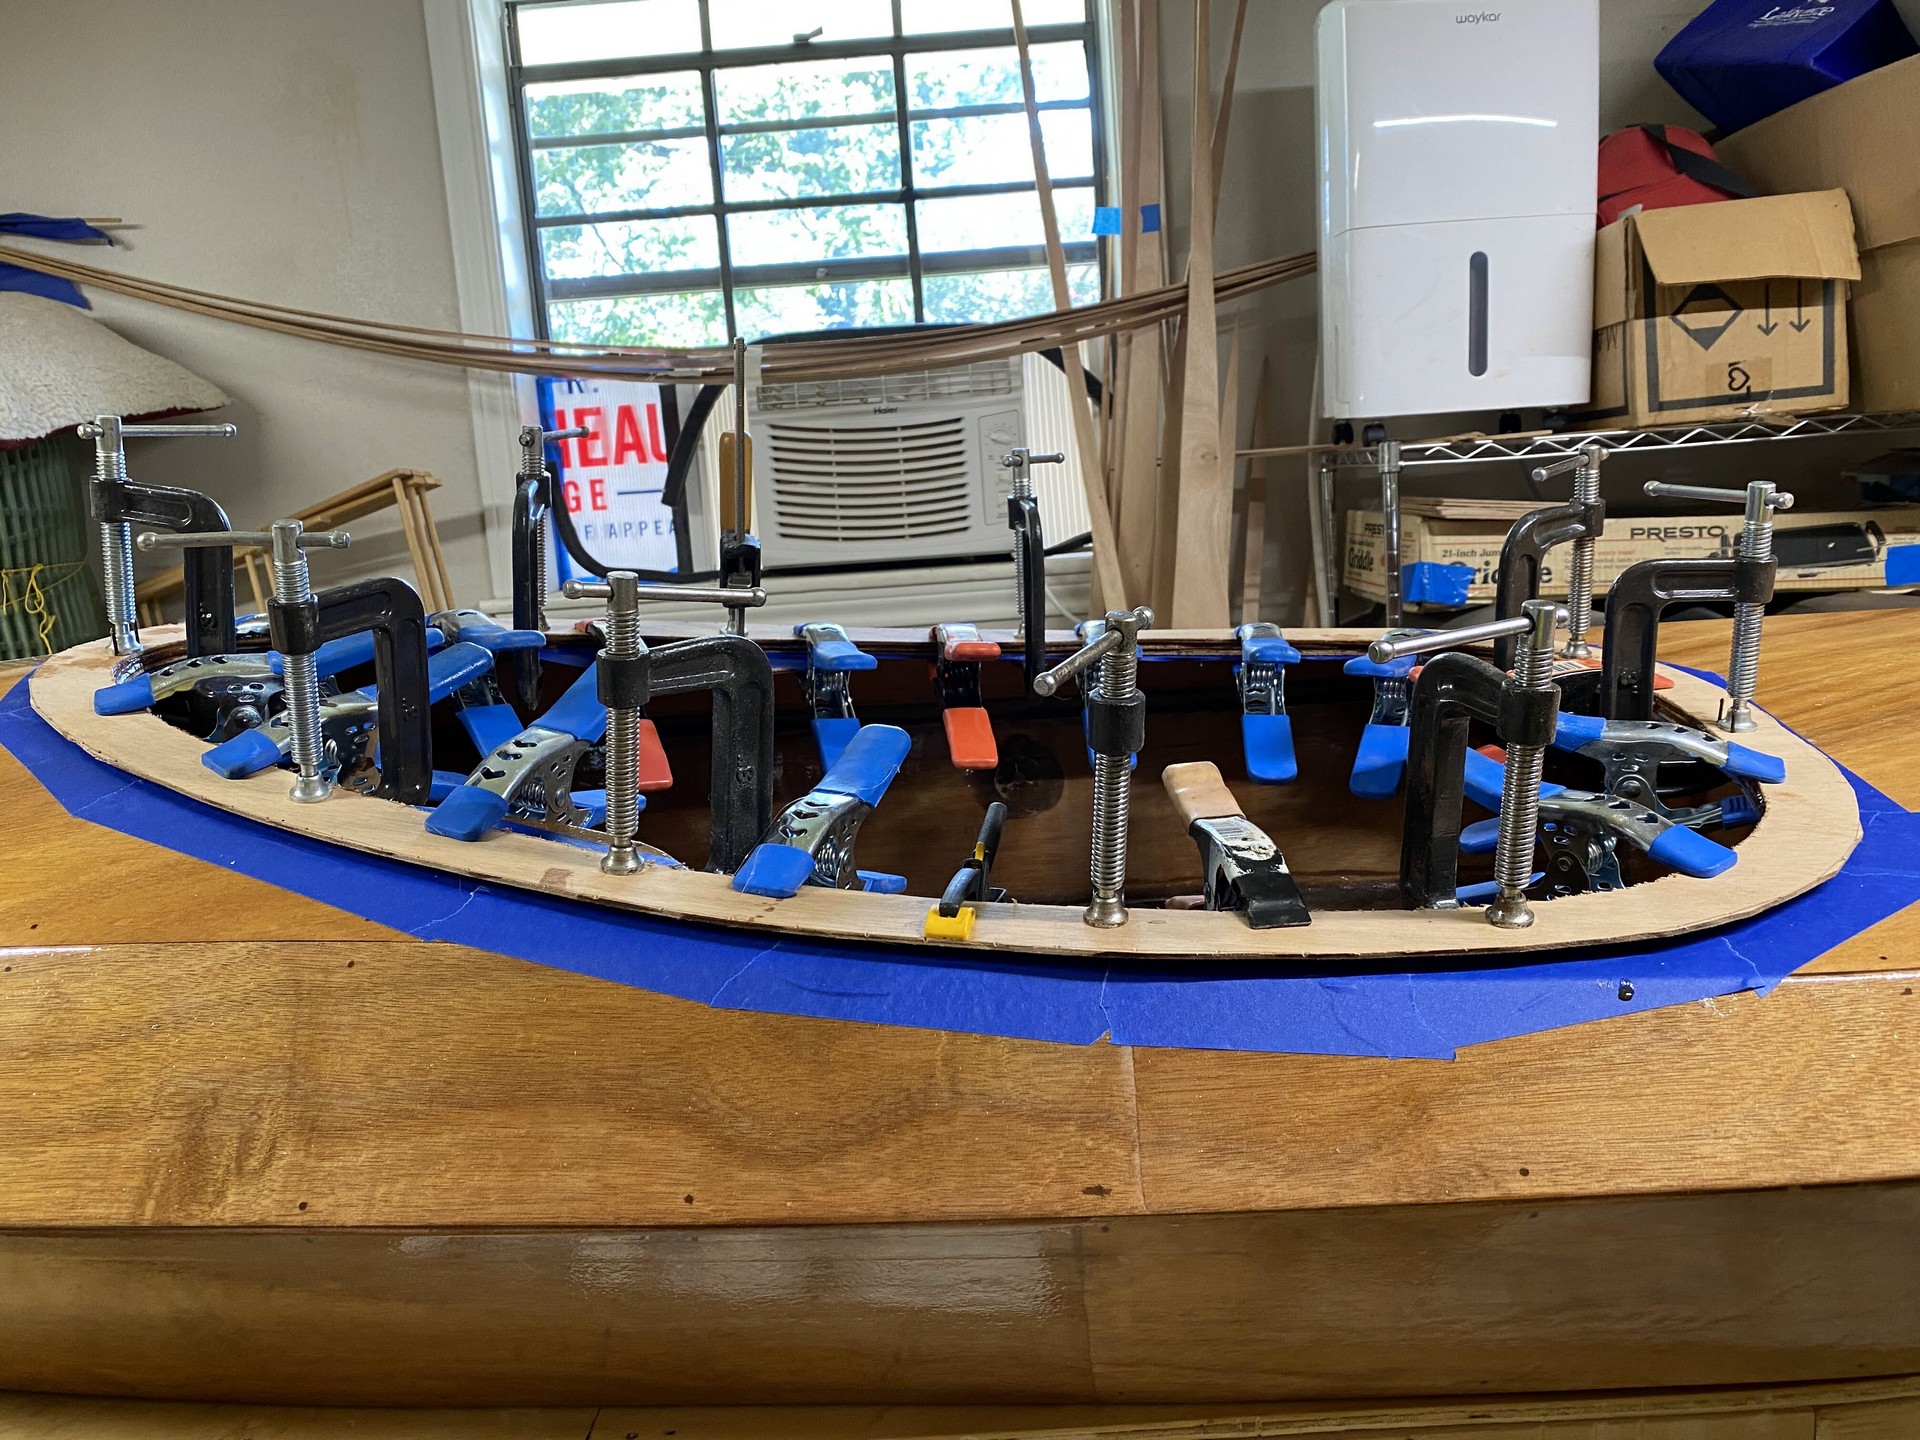
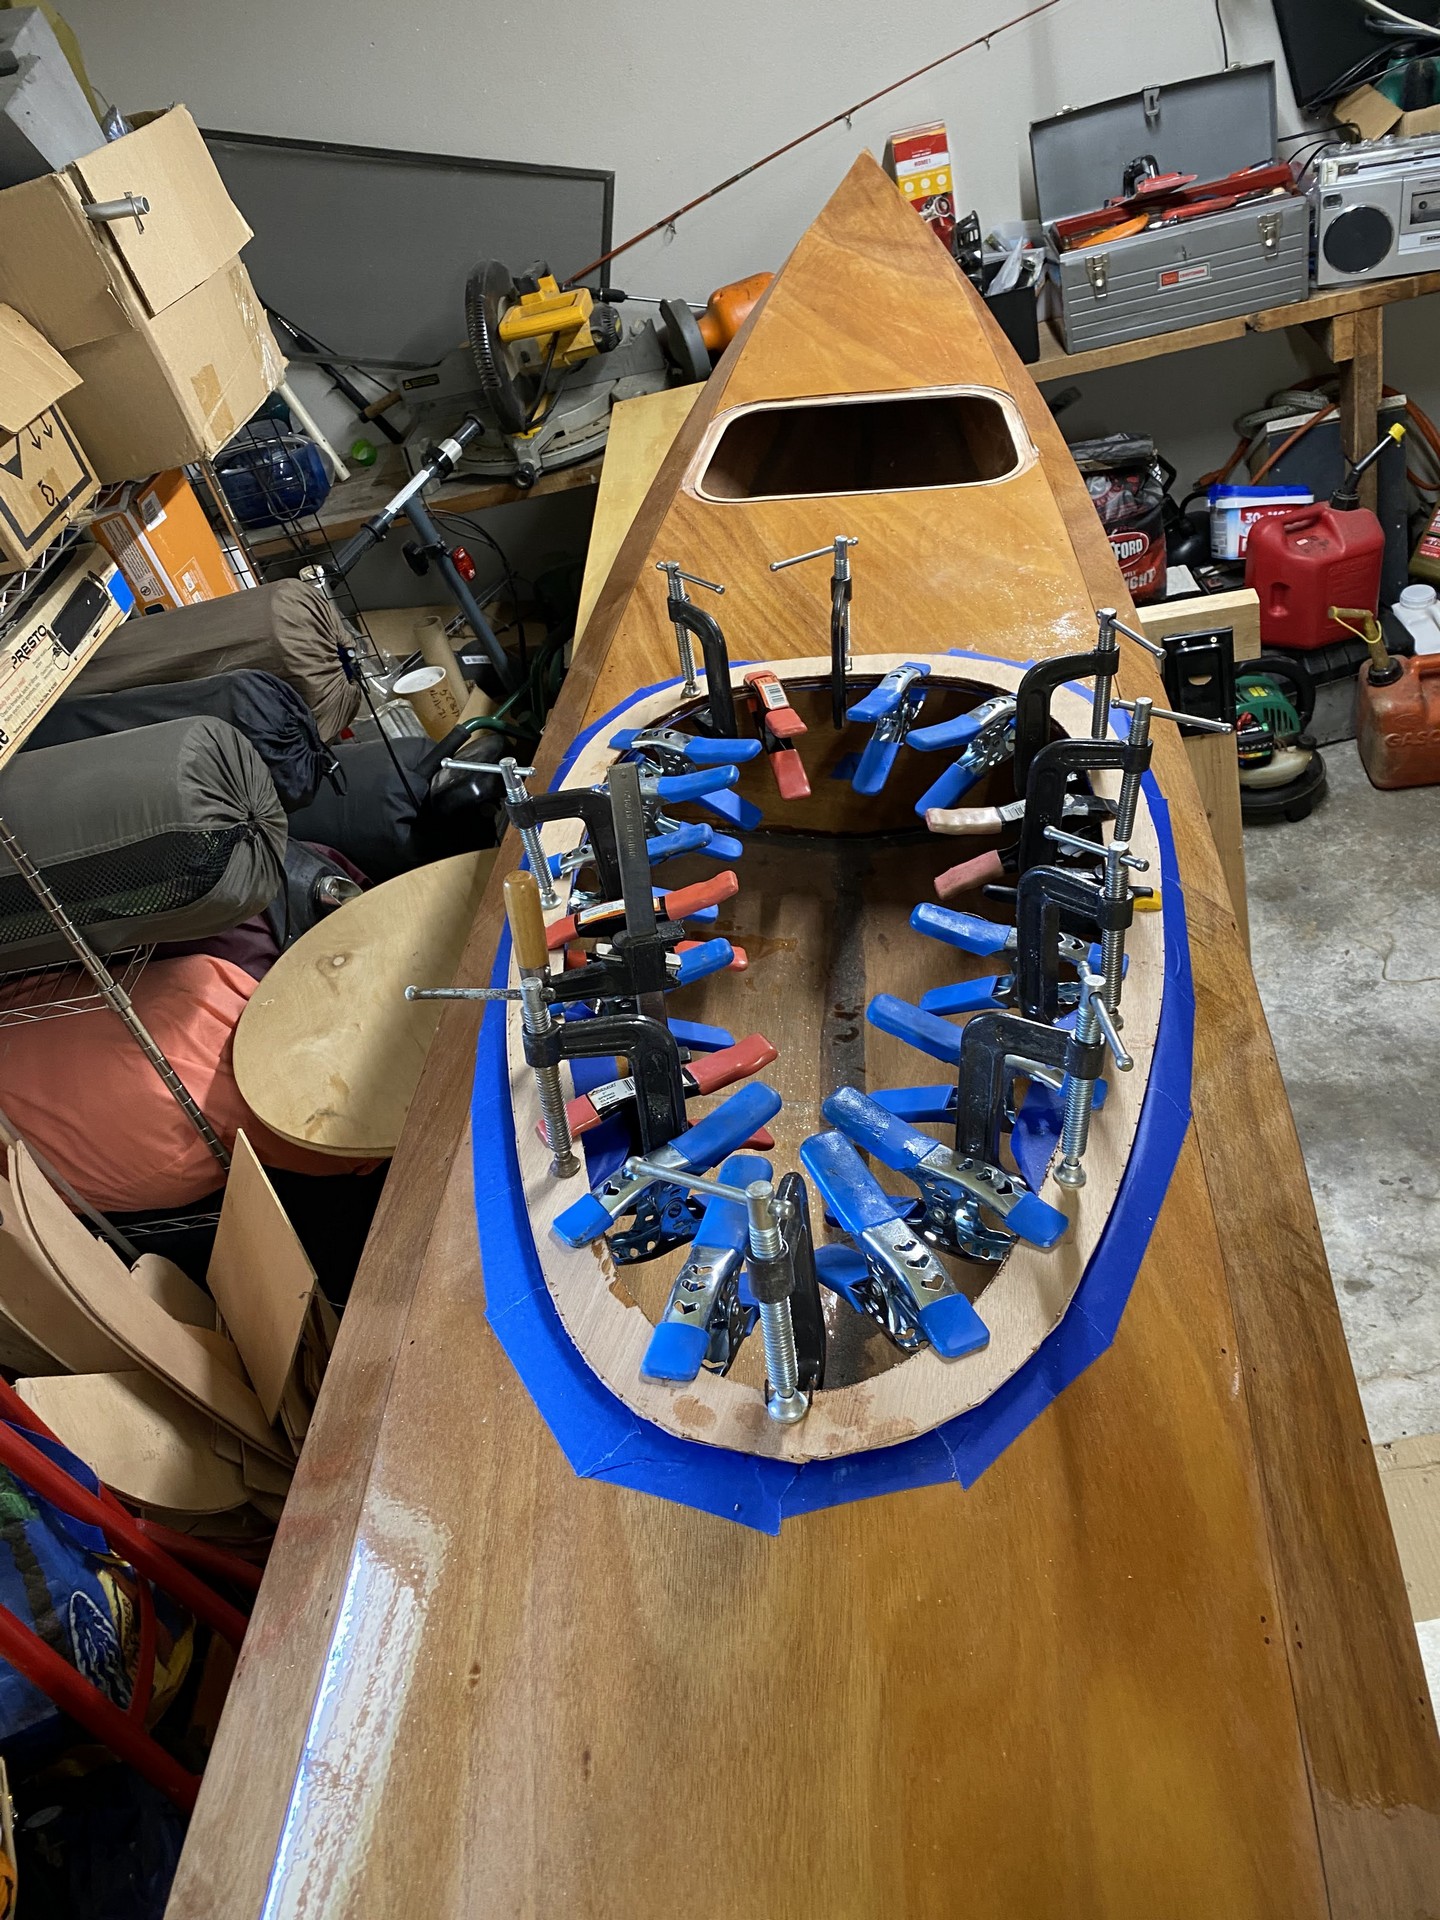
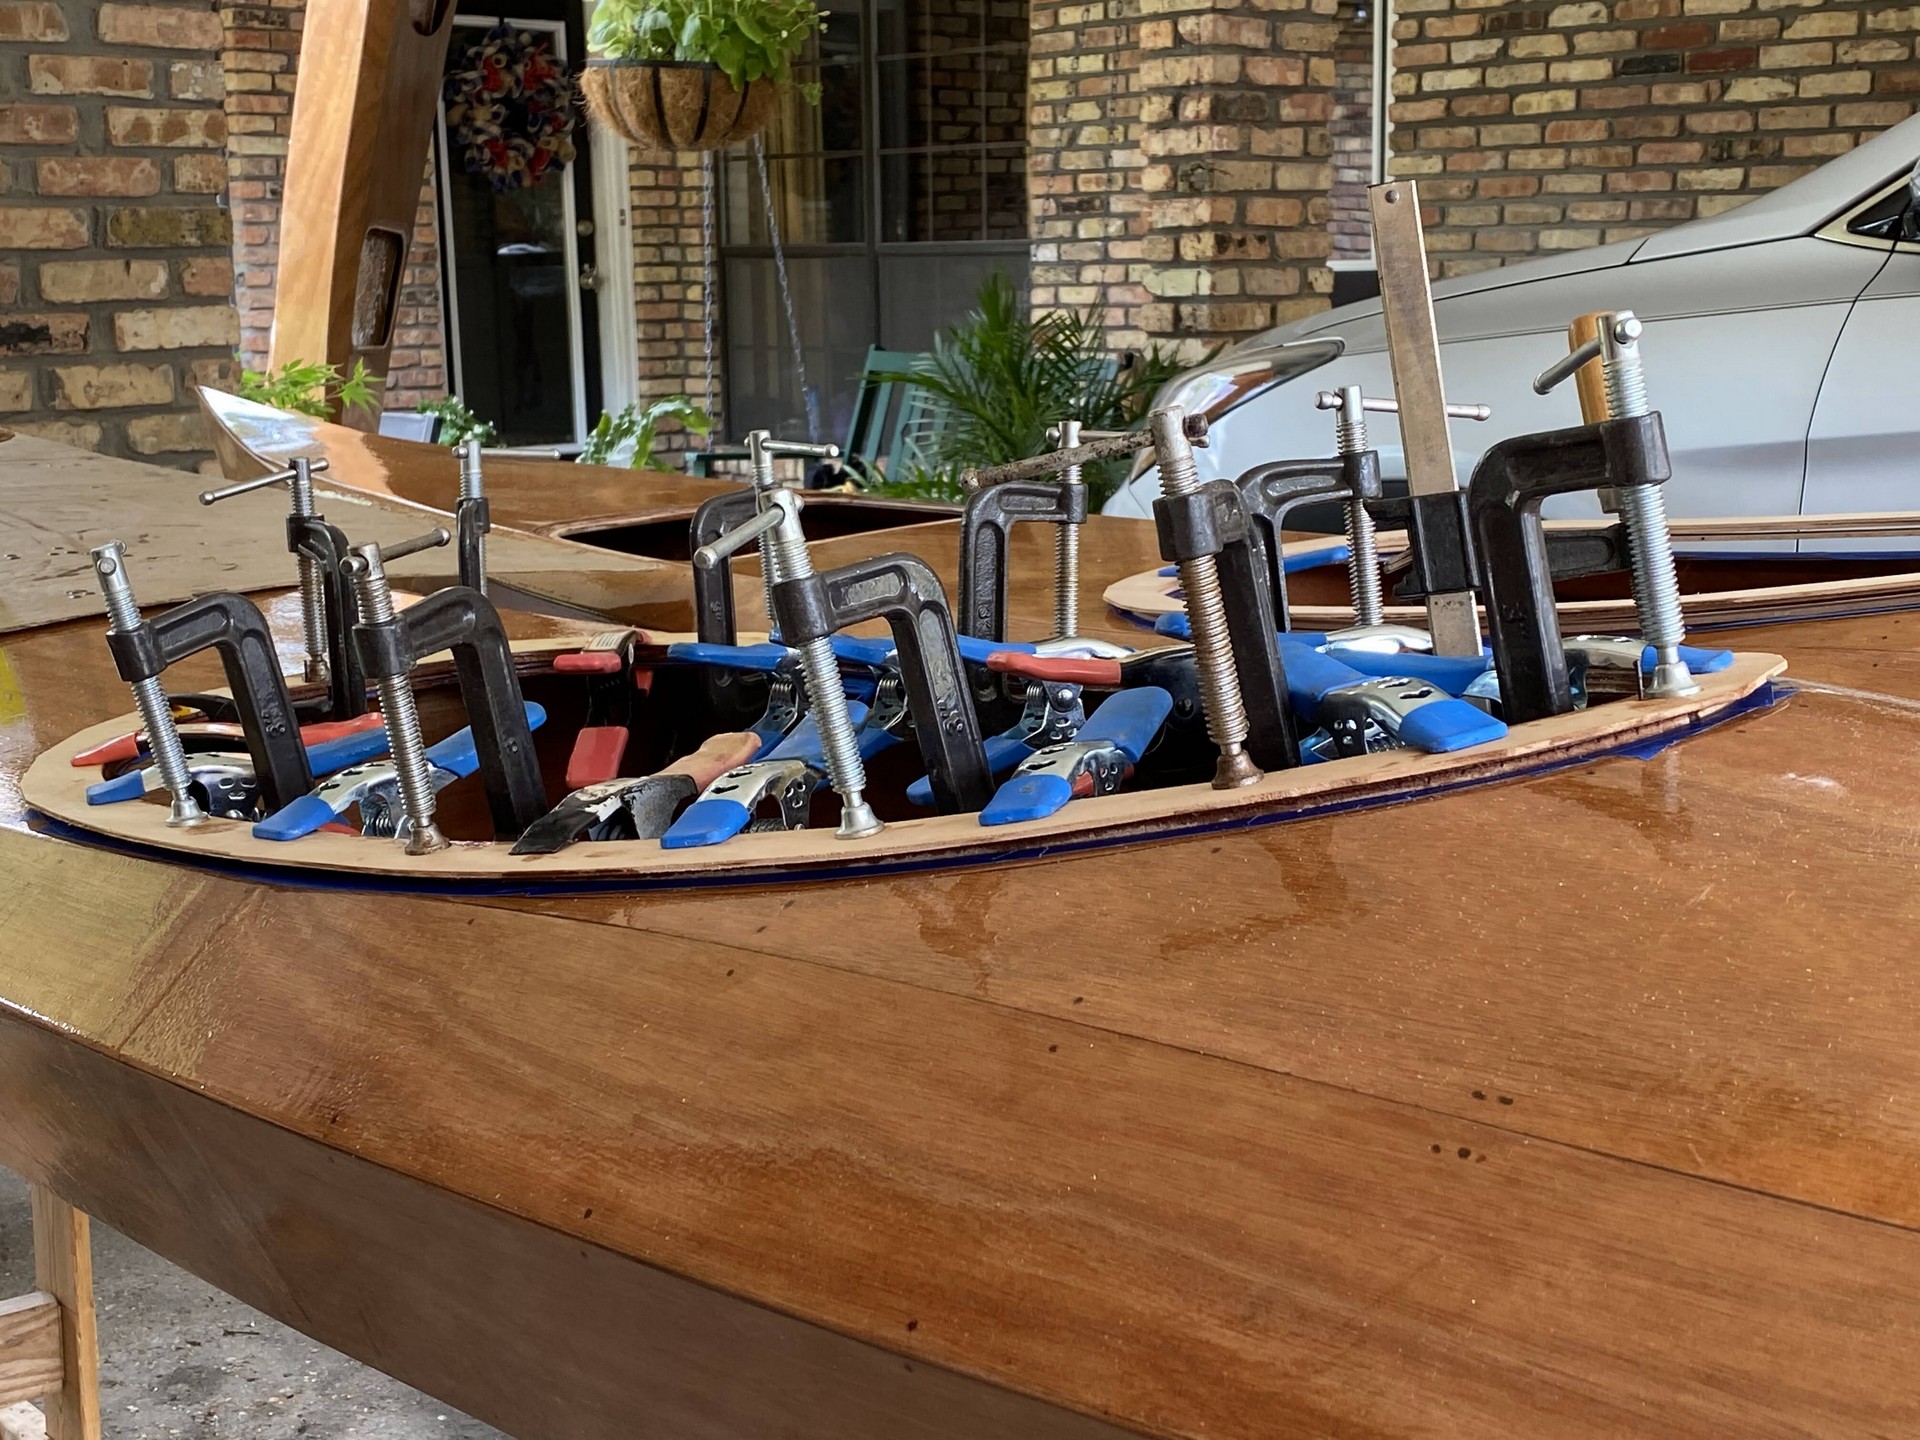
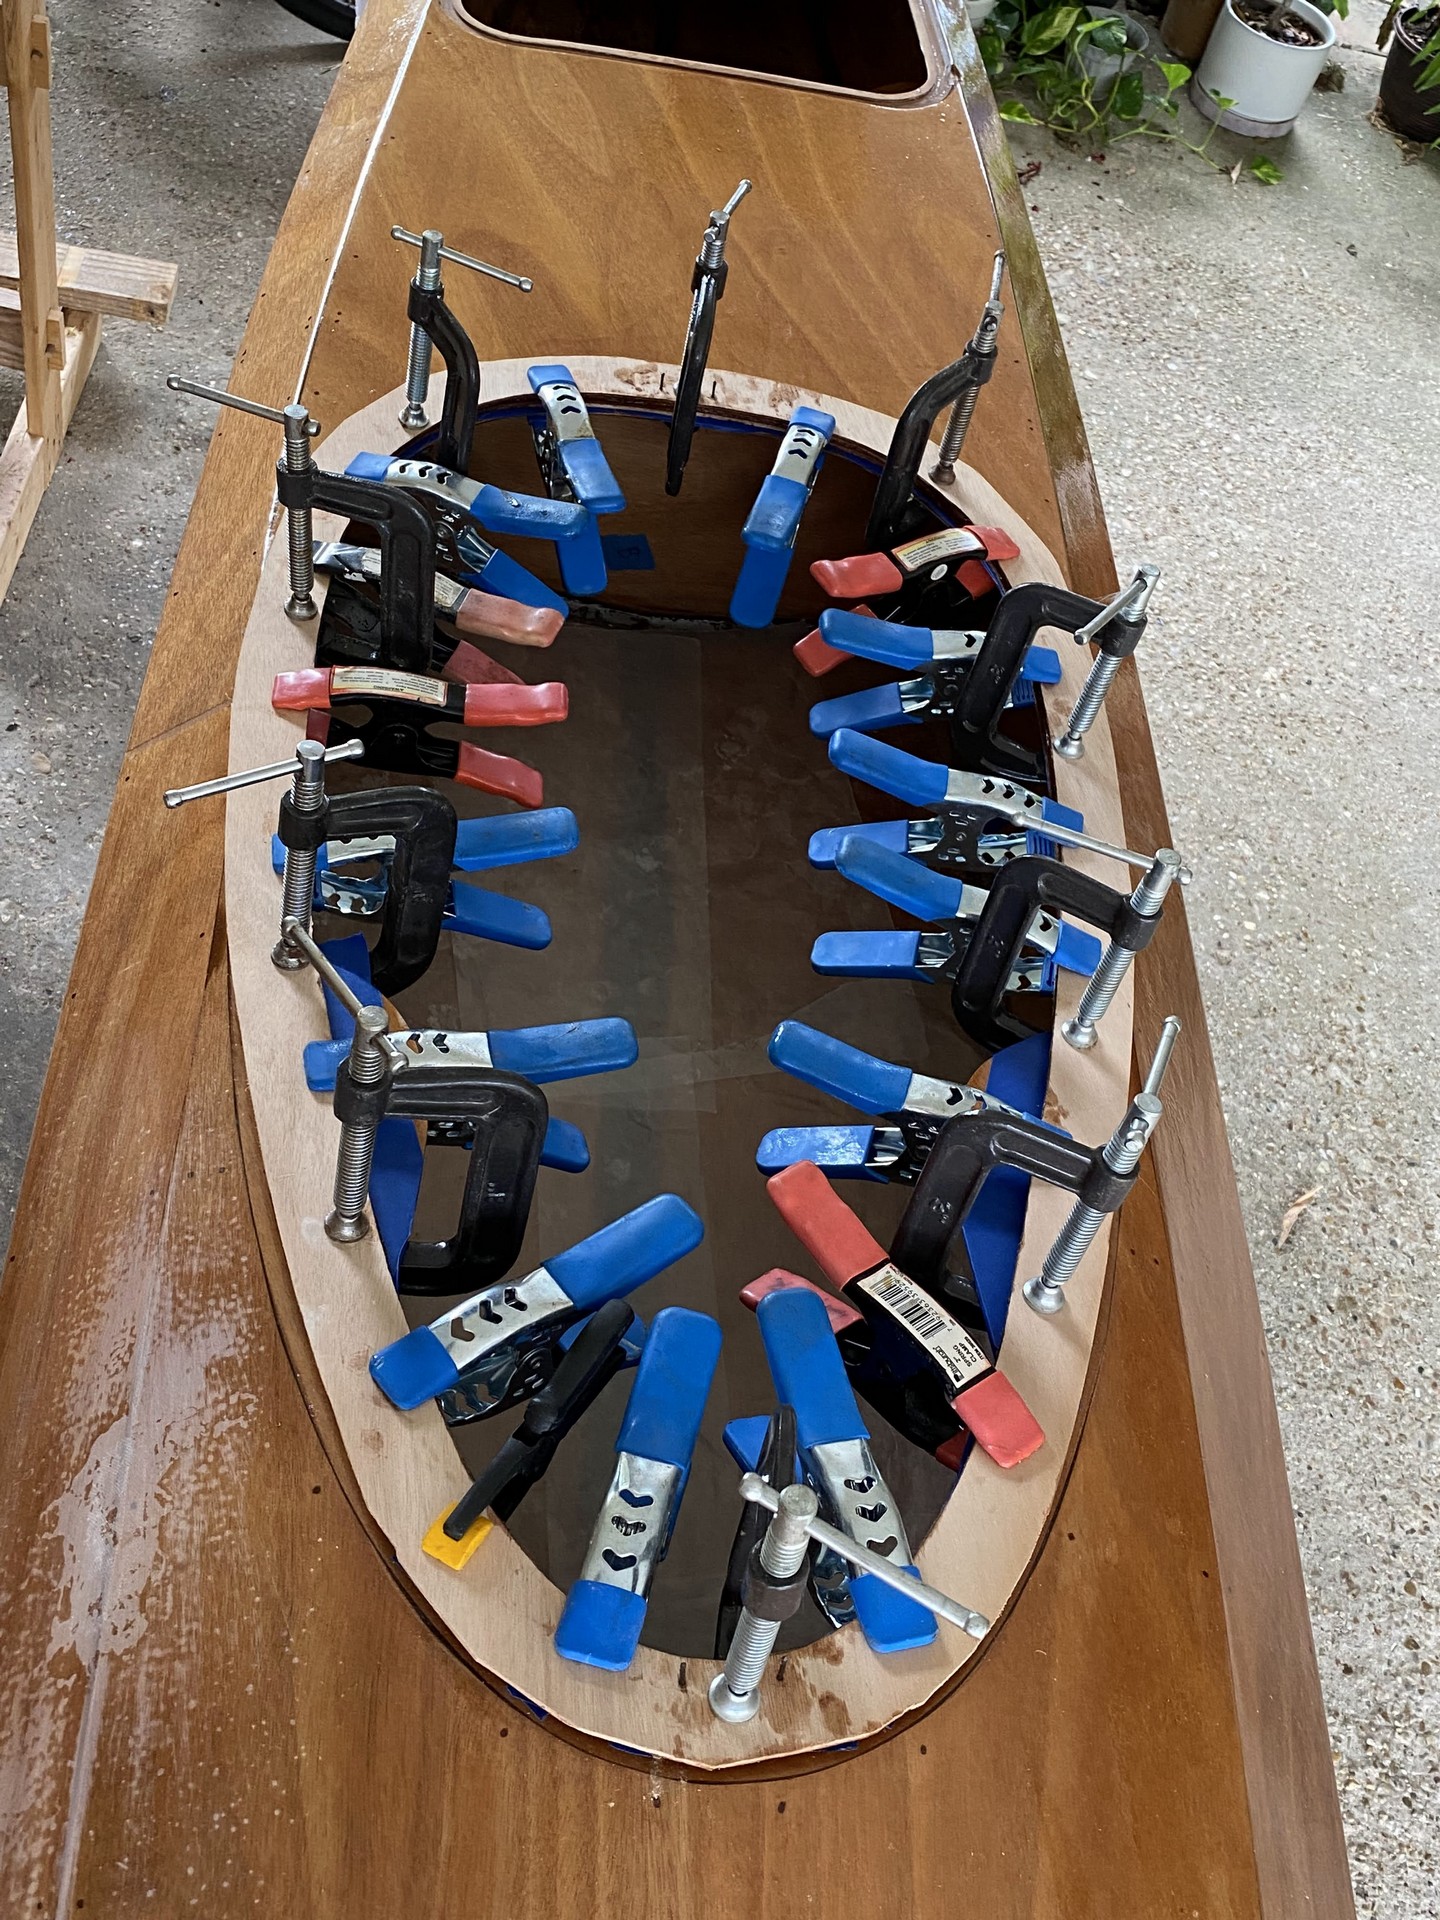
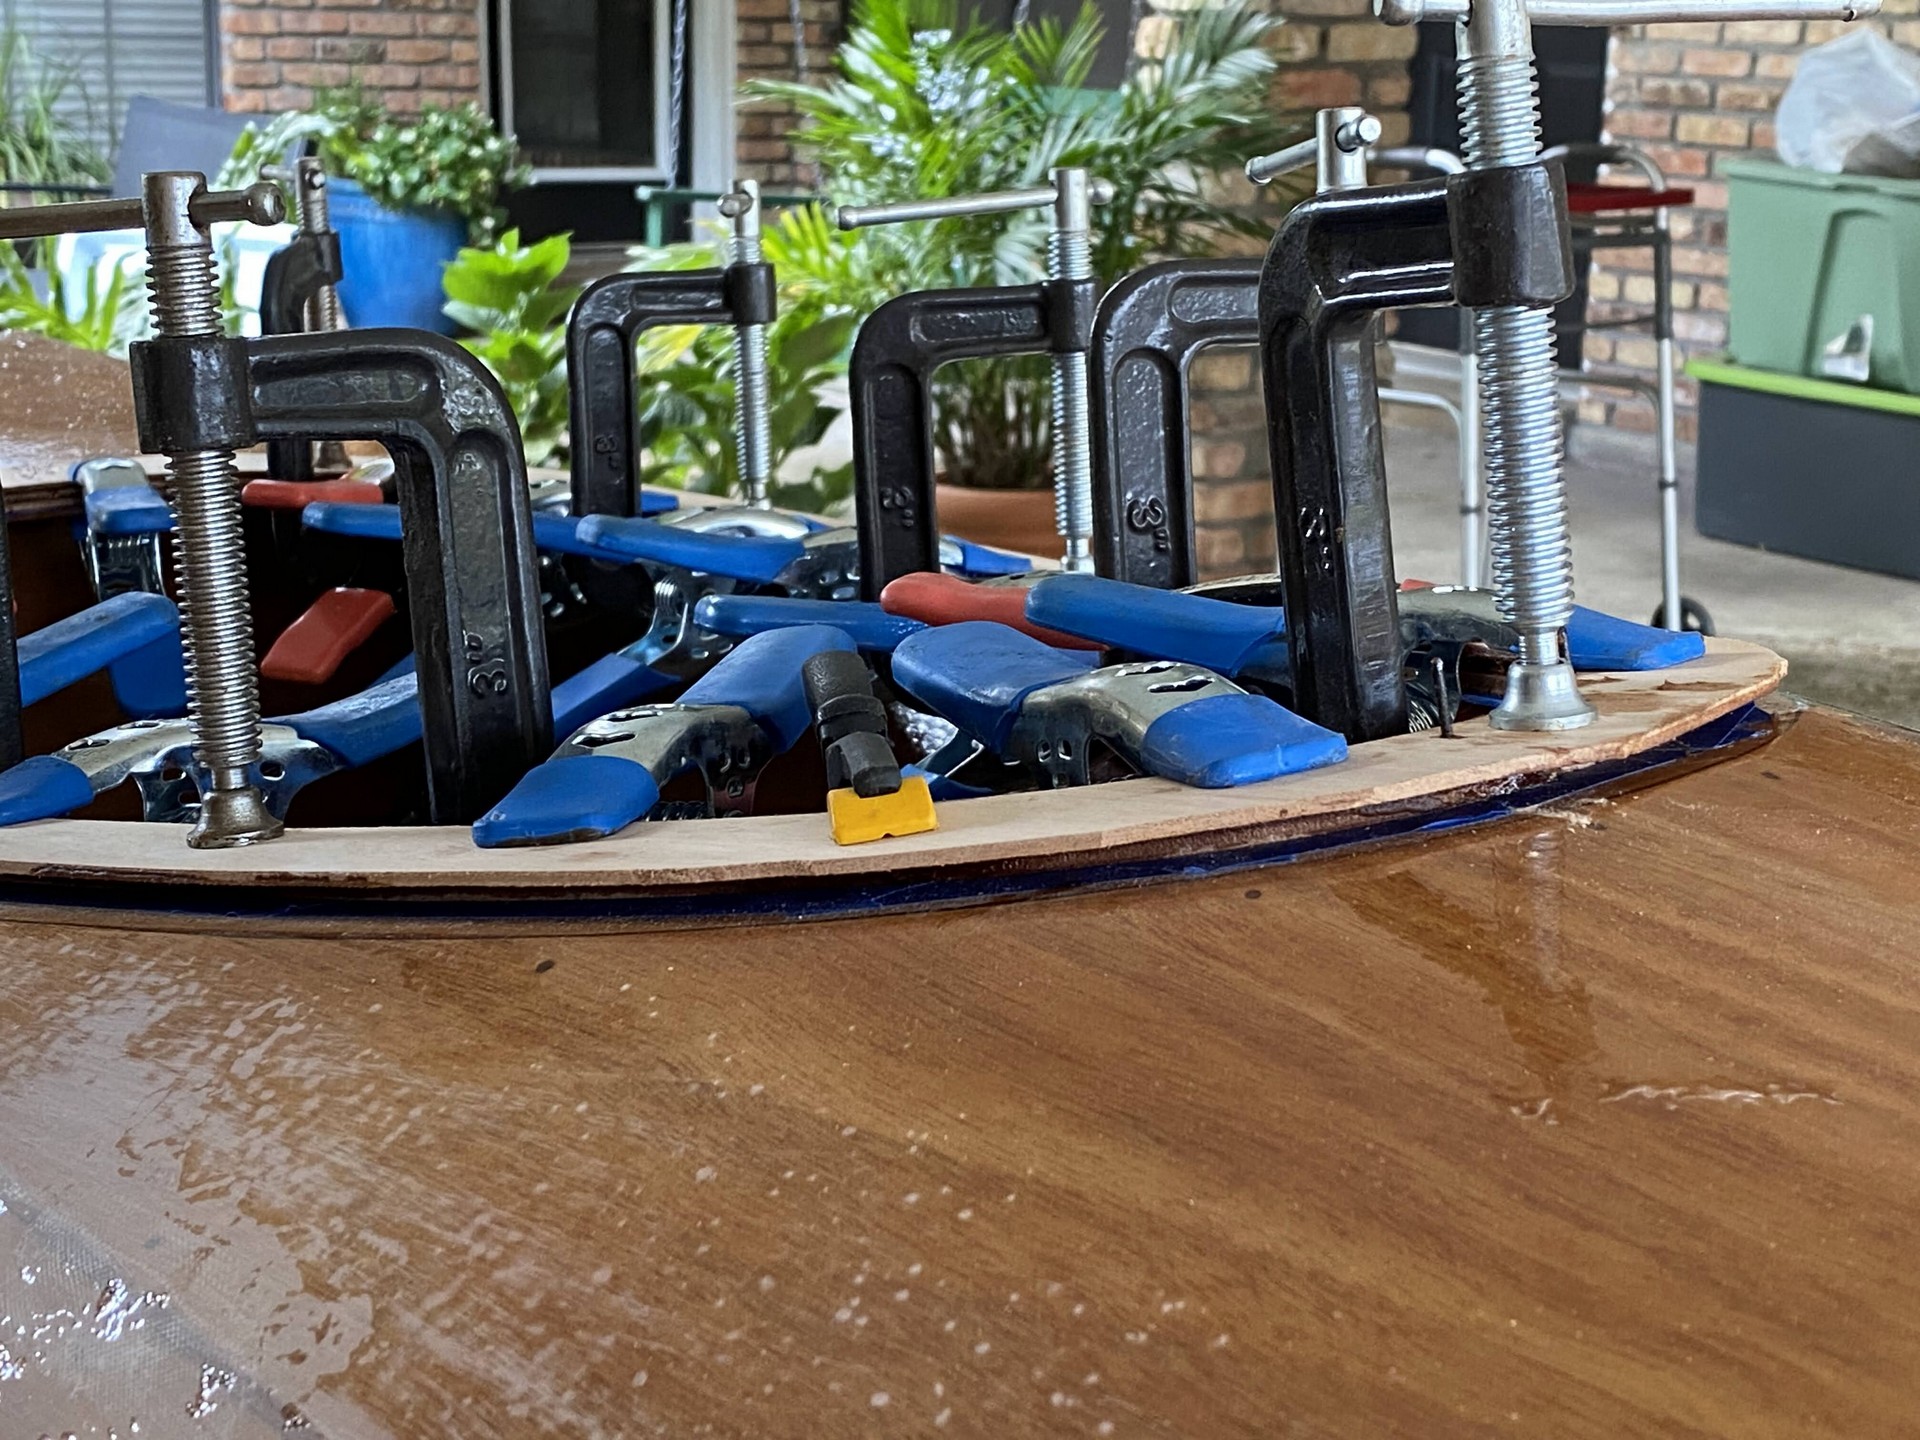
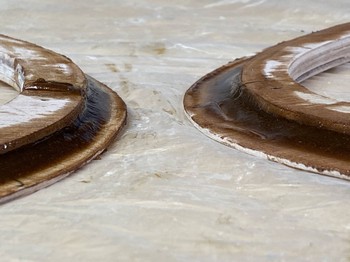
There it is… This “oval of clamps” photo is proof I’m on the back end of the curve. The kayaks really look like kayaks now.
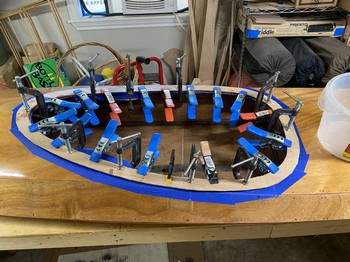
They’re nearly waterproof since most of the plywood is encased in epoxy, so in theory I could put one in the water and test it out.
Na! That’s crazy talk. What if I got bare plywood edges wet? What about the strong summer sun on that unprotected epoxy? What if it flew off the roof rack on the way to the pond?
Ok. Now that last one is just irrational. It must be the heat getting to me. As I write this today is the summer solstice and lately - in June - we’re “enjoying” 94+ F temperatures each day unless cooled by a thunderstorm. The midday heat is brutal even under the shade of my carport. The epoxy has a short pot-life, and I literally rain sweat all over my workspace. The thought of putting this project on pause again did cross my mind, but I’m going to tough it out and finish these kayaks! Let’s take note of recent accomplishments…
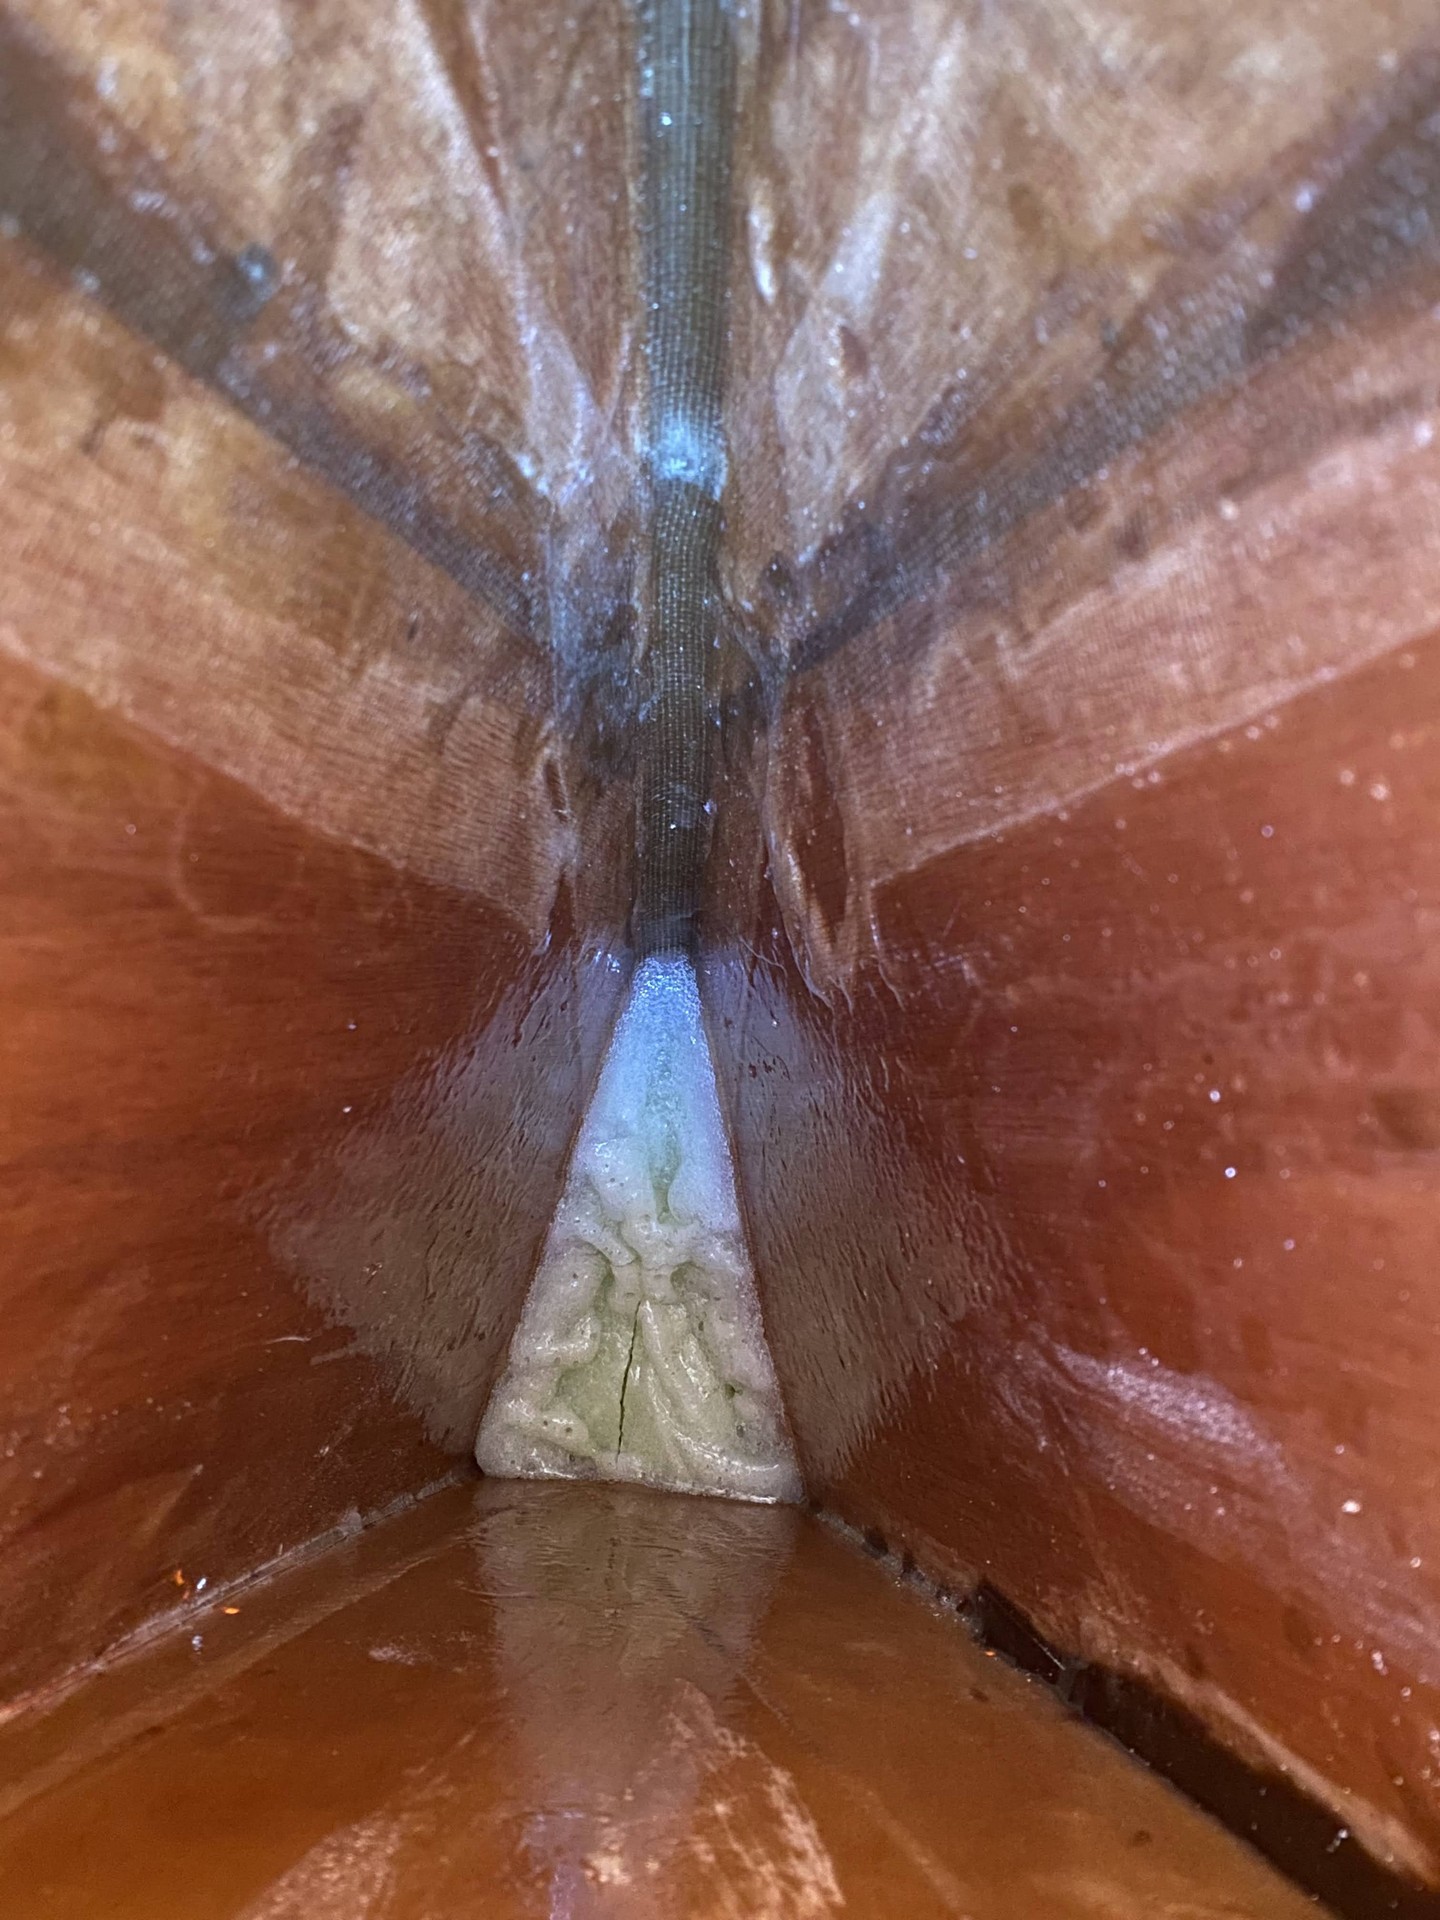
End Pours
We’ve begun the process of end pours to fill fore and aft tips of the kayaks with a chunk of epoxy. The twofold purpose is to both securely bond together the plywood panels from the inside (I was unable to reach the tips with wetted-out strips of fiberglass cloth.) And secondly to provide a solid waterproof mass through which to bore holes for rope hand-holds. About 9 oz of epoxy is thickened with microballoons in an effort to increase volume without excess weight. My first attempt was to simply pour from the mixing cup, but this didn’t work well as the batch was too thick. The microbaloons perform differently than wood flour in the mixing cup. On subsequent end pours I used the pastry bag technique - loading a plastic bag with thickened epoxy, cutting off a corner and pinching it closed, then lowering it into position inside the upright kayak, and squeezing the epoxy into the crevice. The pastry bags resulted in better placement and much less mess inside the boats.
During end pours that mass of curing epoxy gets hot. I prevent heat damage to the exterior finish by first immersing the kayak into a bucket of cool water to dissipate the heat of reaction. I placed a thick foam block in the bottom of the bucket or cooler to absorb the weight of the kayak all focused on it’s tip.
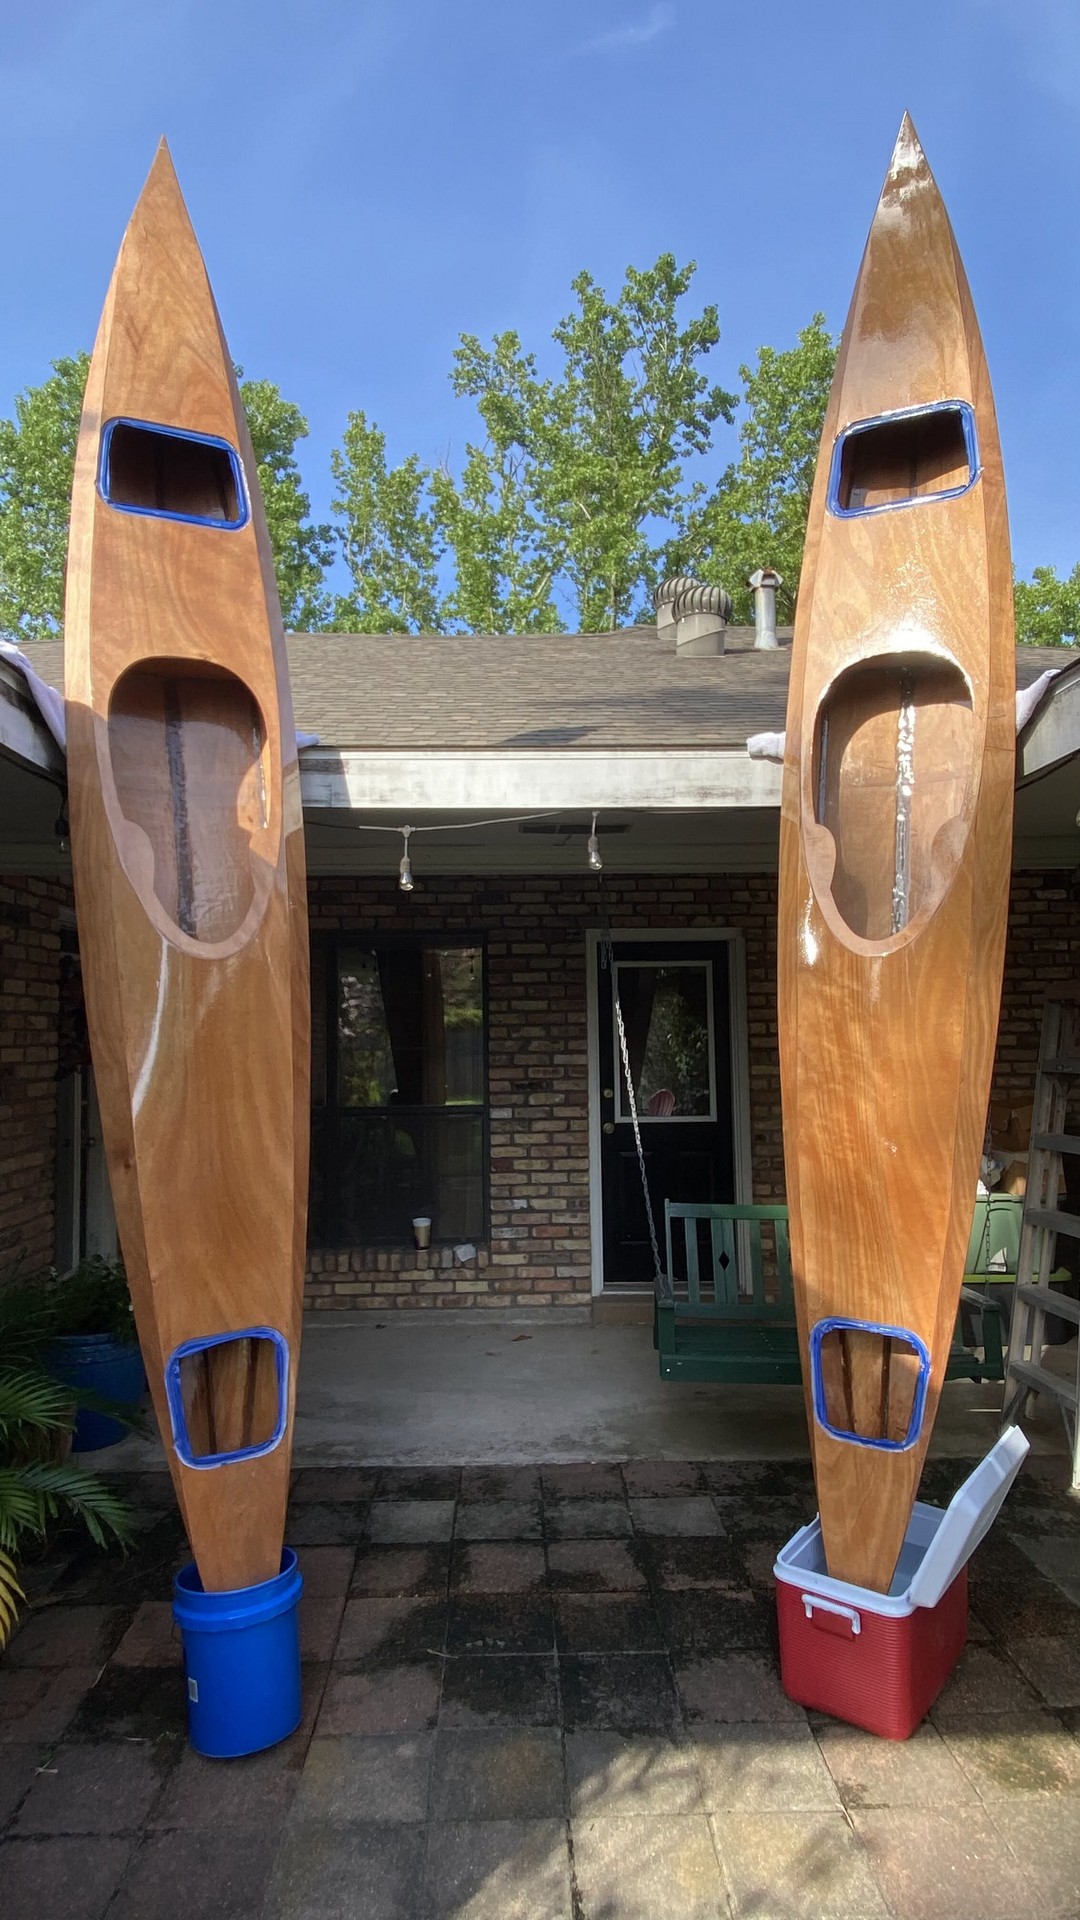

Cockpit Combing
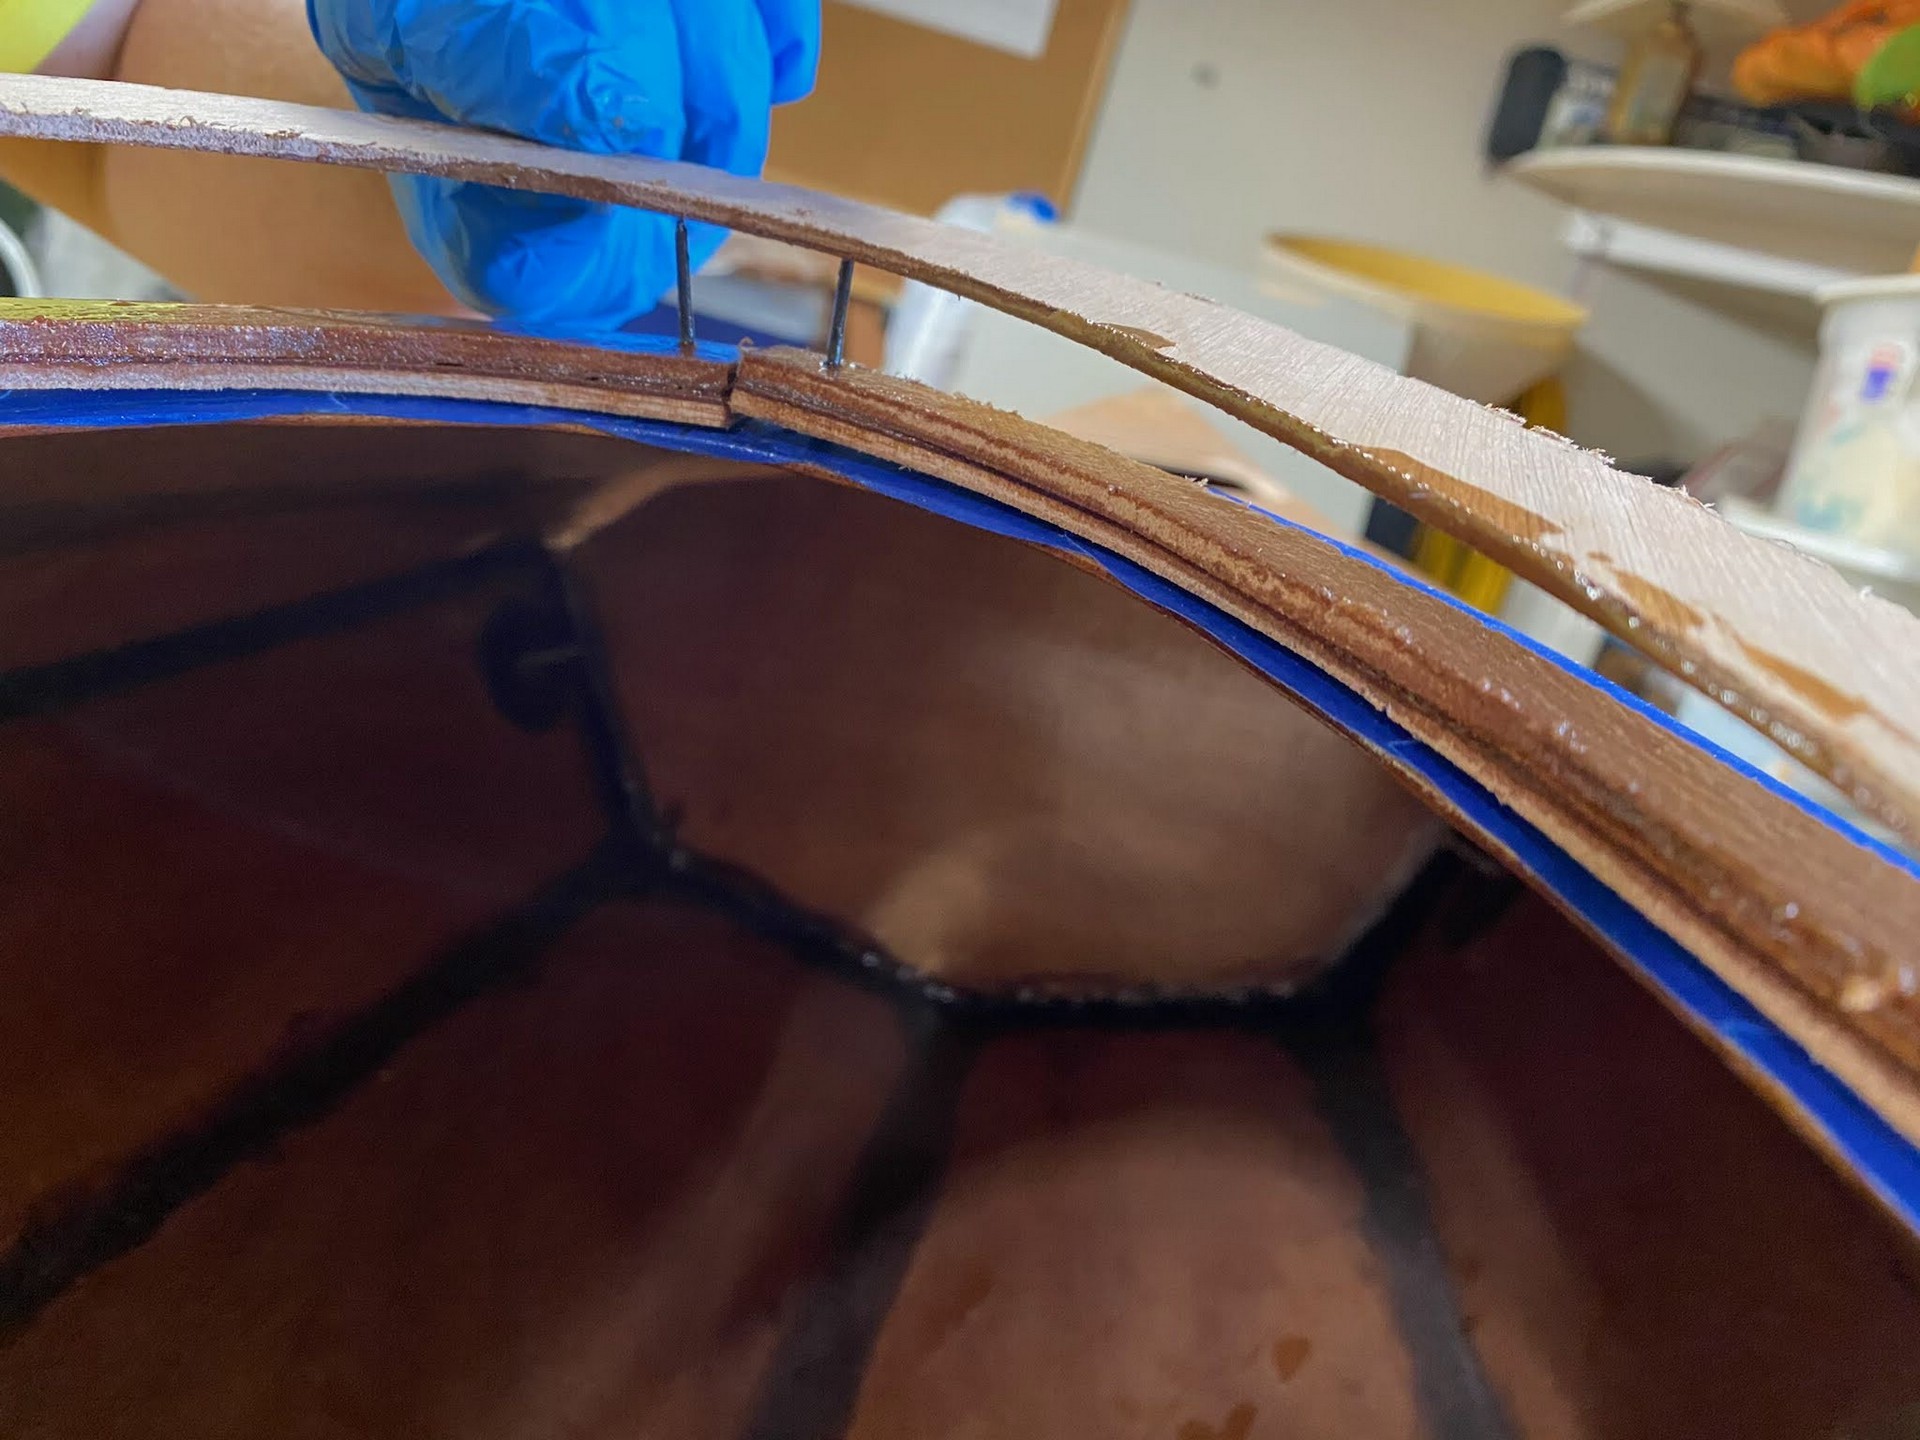
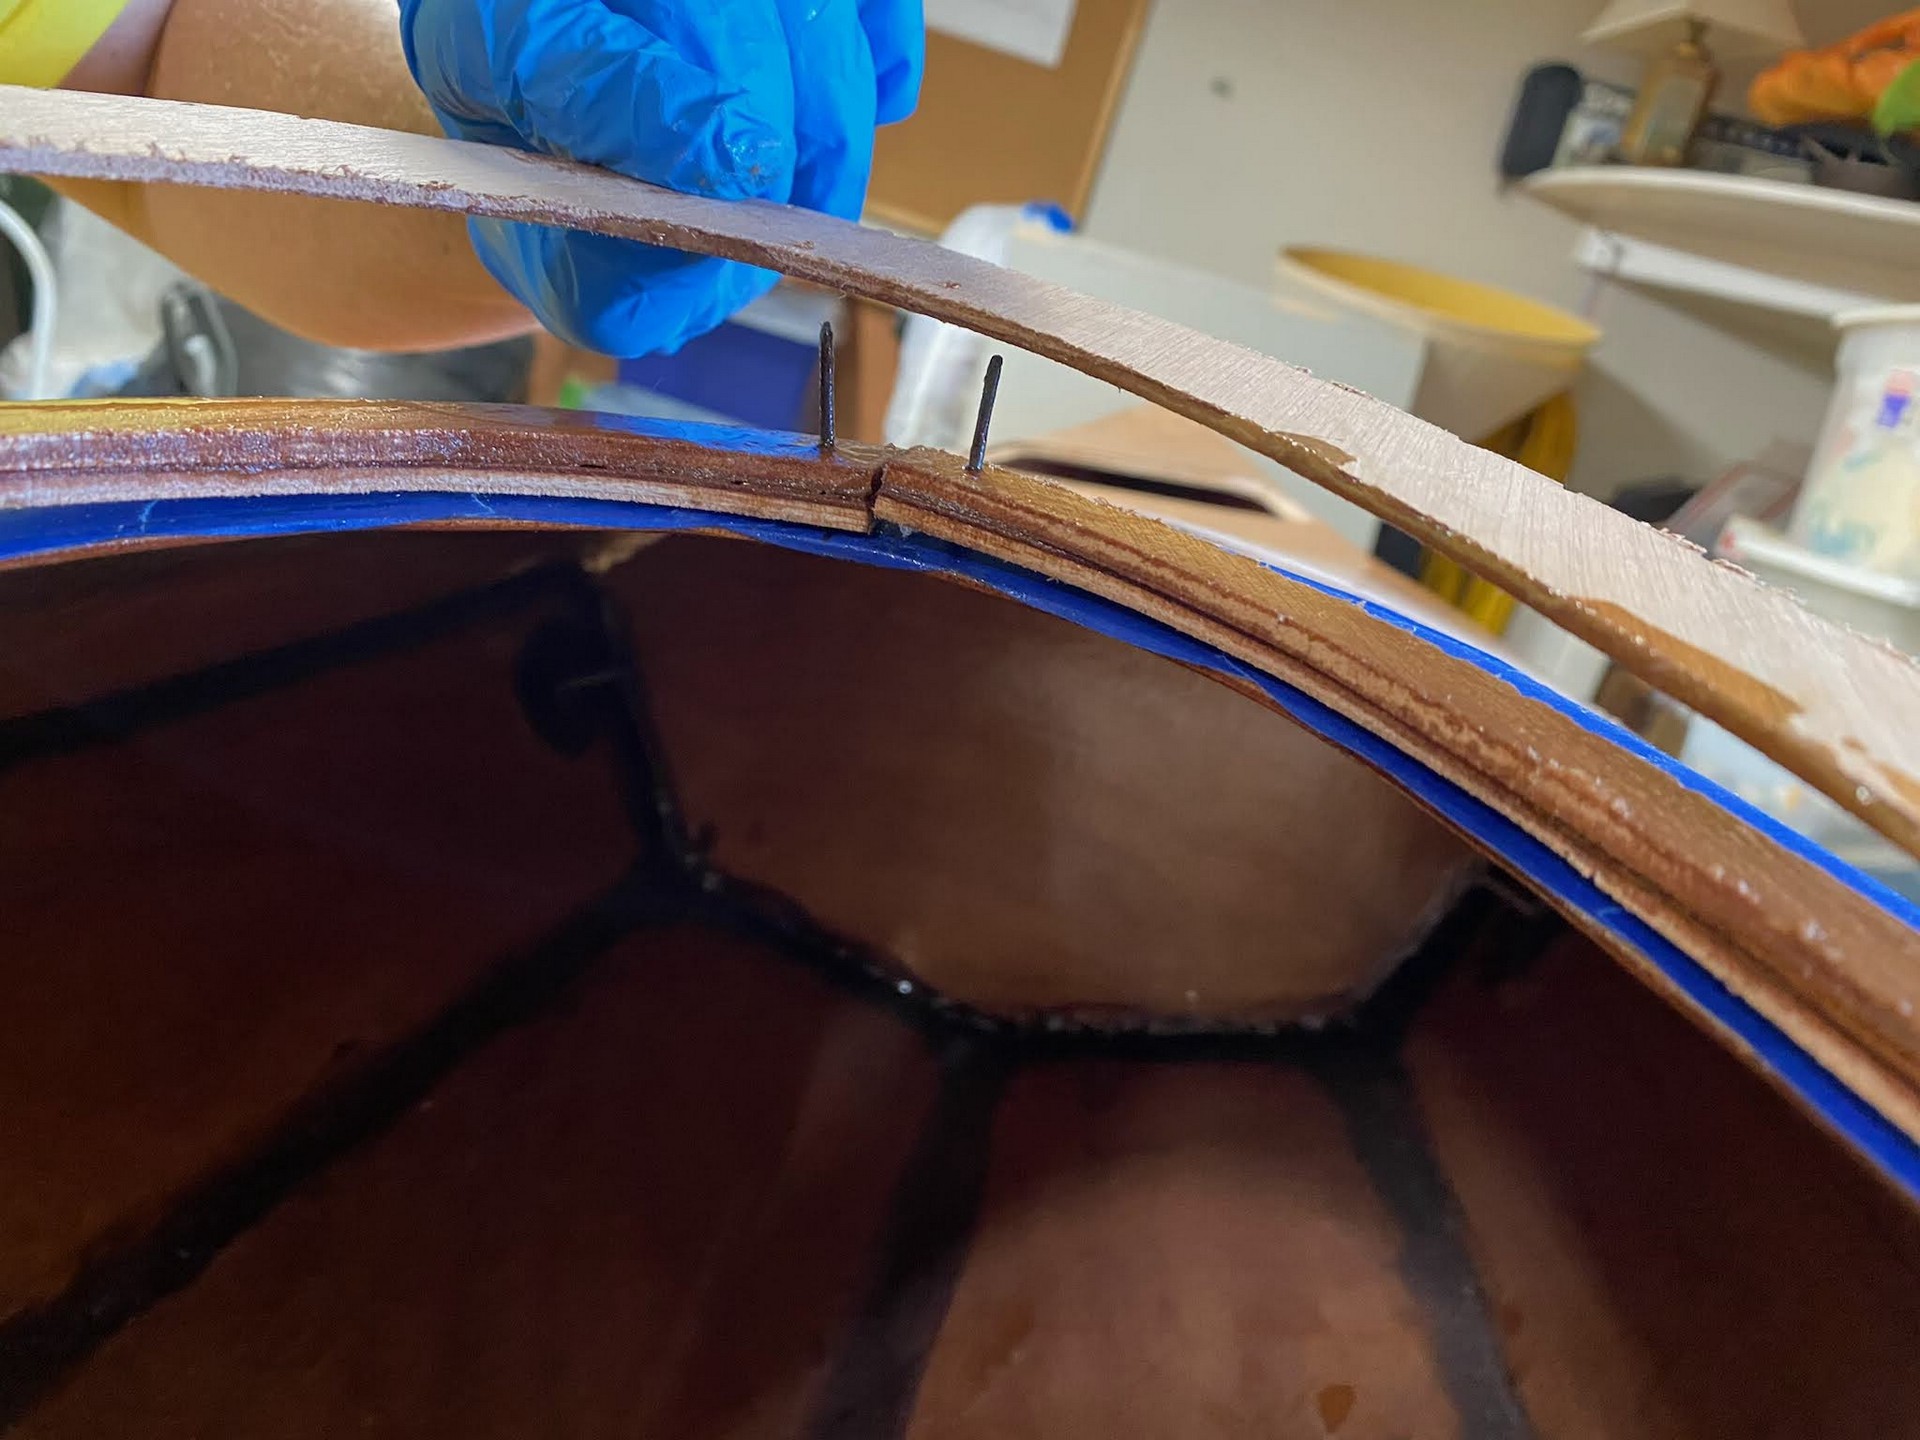
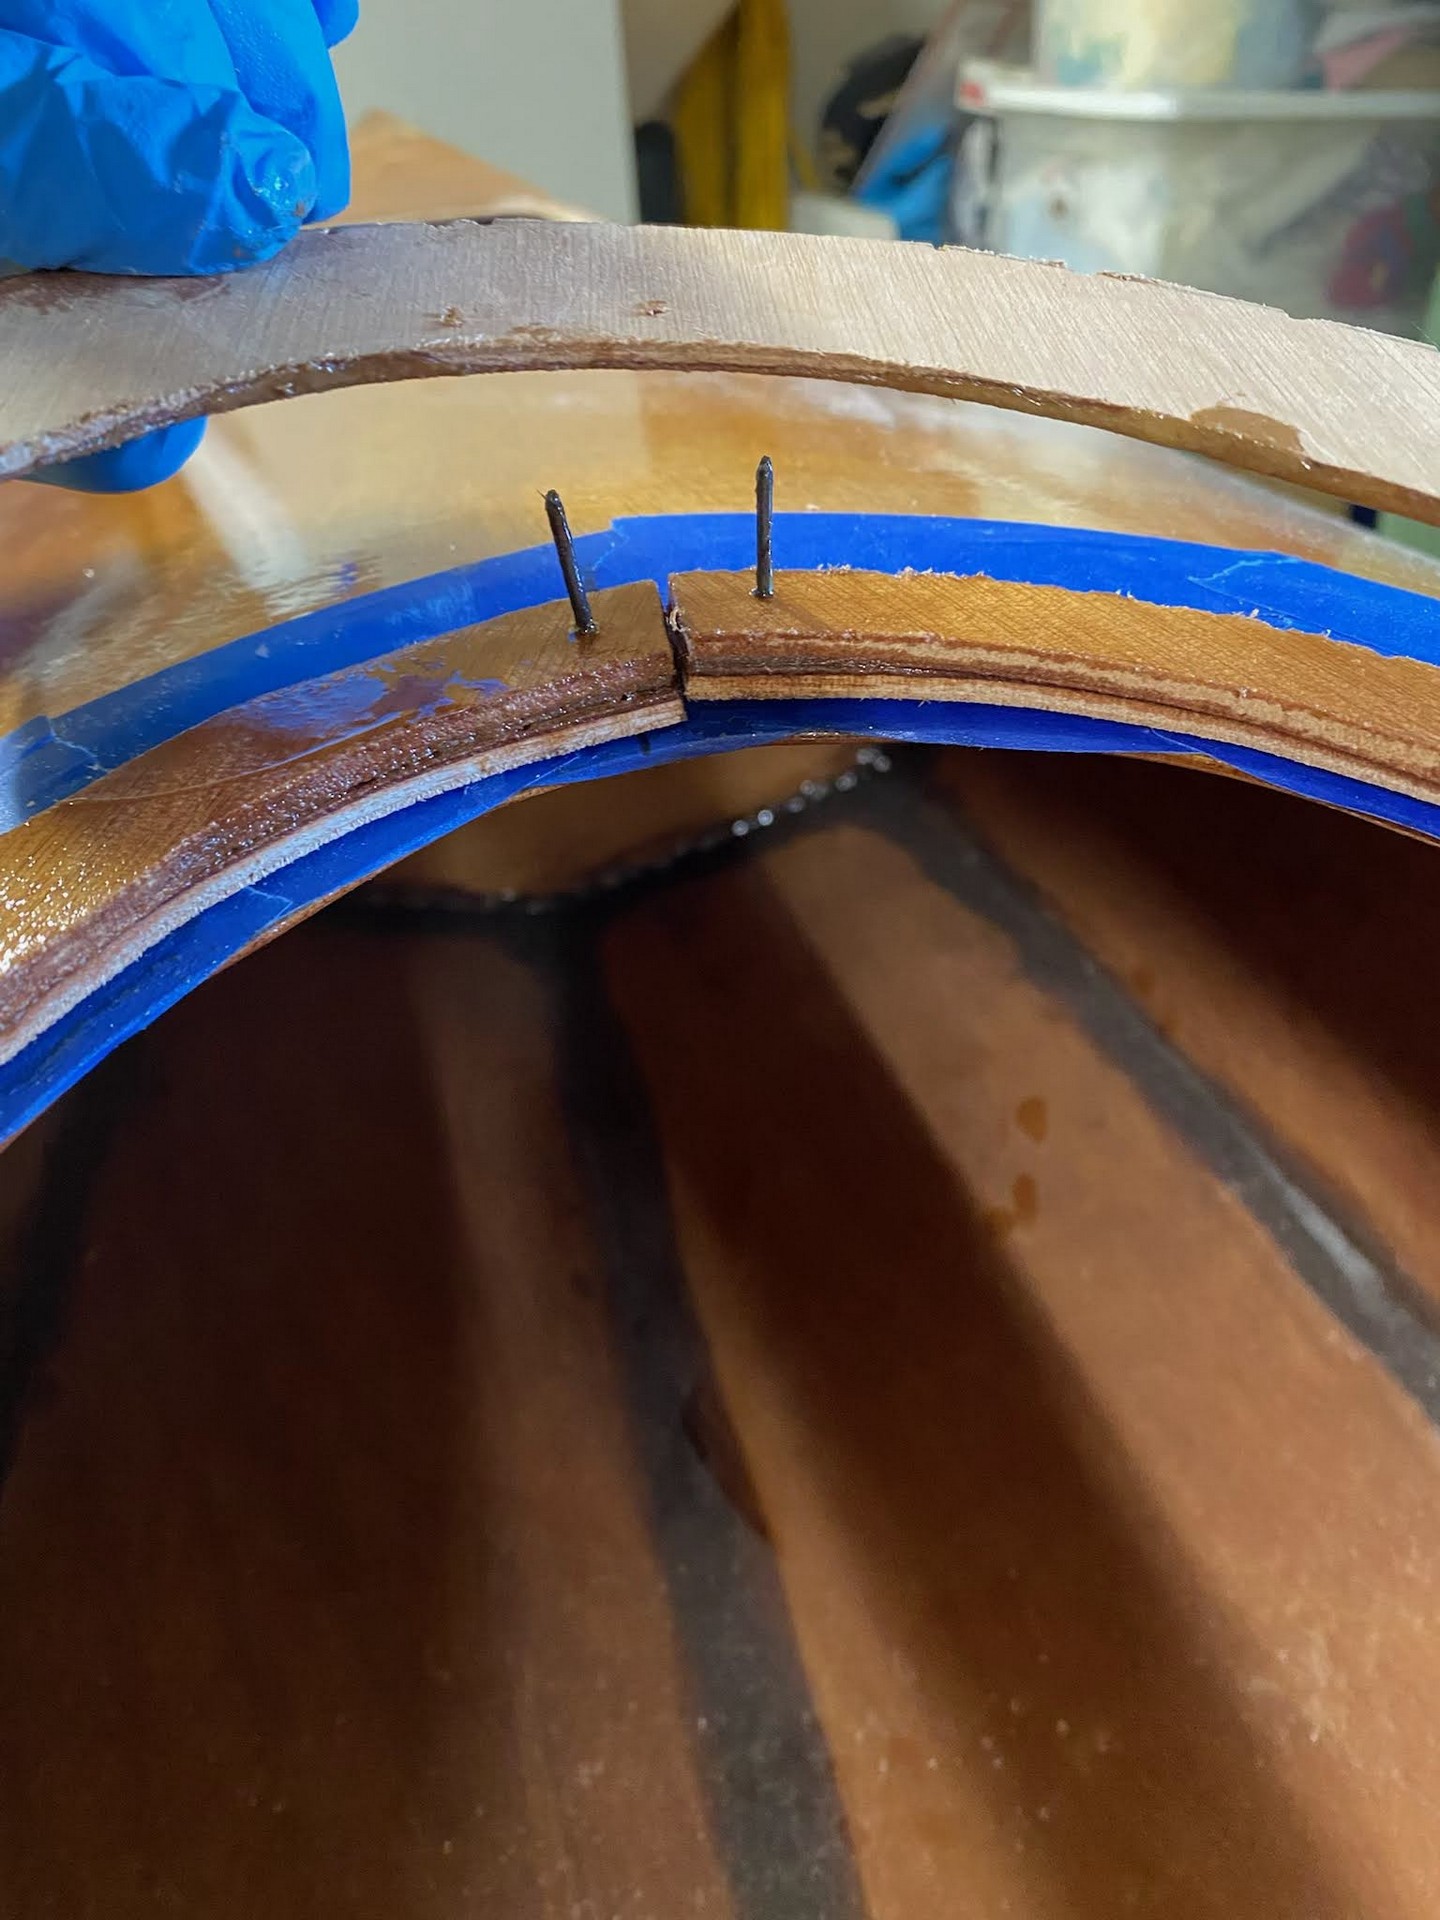
Combing is the rim or lip around the kayak cockpit providing reinforcement and strength to the opening but also the lip allows attachment of a spray skirt to keep water out when paddling in rough water conditions. This step represented a return to carpentry tasks as I had to cut out the oval combing rim and spacers with my jigsaw. These form the 3-layer sandwich. I again deviated from the assembly manual in that I followed the “Laszlo technique” of gluing up the combing pieces in two stages. (I believe I read that Mr. Laszlo is on staff at Chesapeake Light Craft.)
- First, you epoxy together all of the components while clamped to the boat with a non-stick barrier.
- After removing and sanding the combing to shape, the non-stick barrier is removed, surfaces sanded, and bond the combing permanently to the deck with epoxy.
You see in the photos below I pre-drilled holes and inserted 2 brads at front and rear to hold the pieces in place as I spread thickened epoxy and clamped them together. The manual suggests thickening with silica but I used wood flour because I prefer the dark brown color over milky white. After curing, I’ll heat the nails to soften epoxy and lift the combing off the boat. Then, the painter’s tape will be removed, the kayak deck surface sanded and prepped to permanently attach the sanded and shaped combing to it.


Why?
- Yes, with two stages of gluing and clamping it takes longer. But does it?
- The Laszlo technique gives you unfettered access to the underside of the combing lip, allowing it to be sanded and then a clean fillet of thickened epoxy applied.
- Sanding both inside and outside edges of the combing is easier if it’s not attached to the boat. You can bring it over to your workbench.
- Once the combing is sanded to perfection I’ll glue and clamp it to the kayak permanently, using a pastry bag to disperse and then spread a fillet where combing meets the deck.
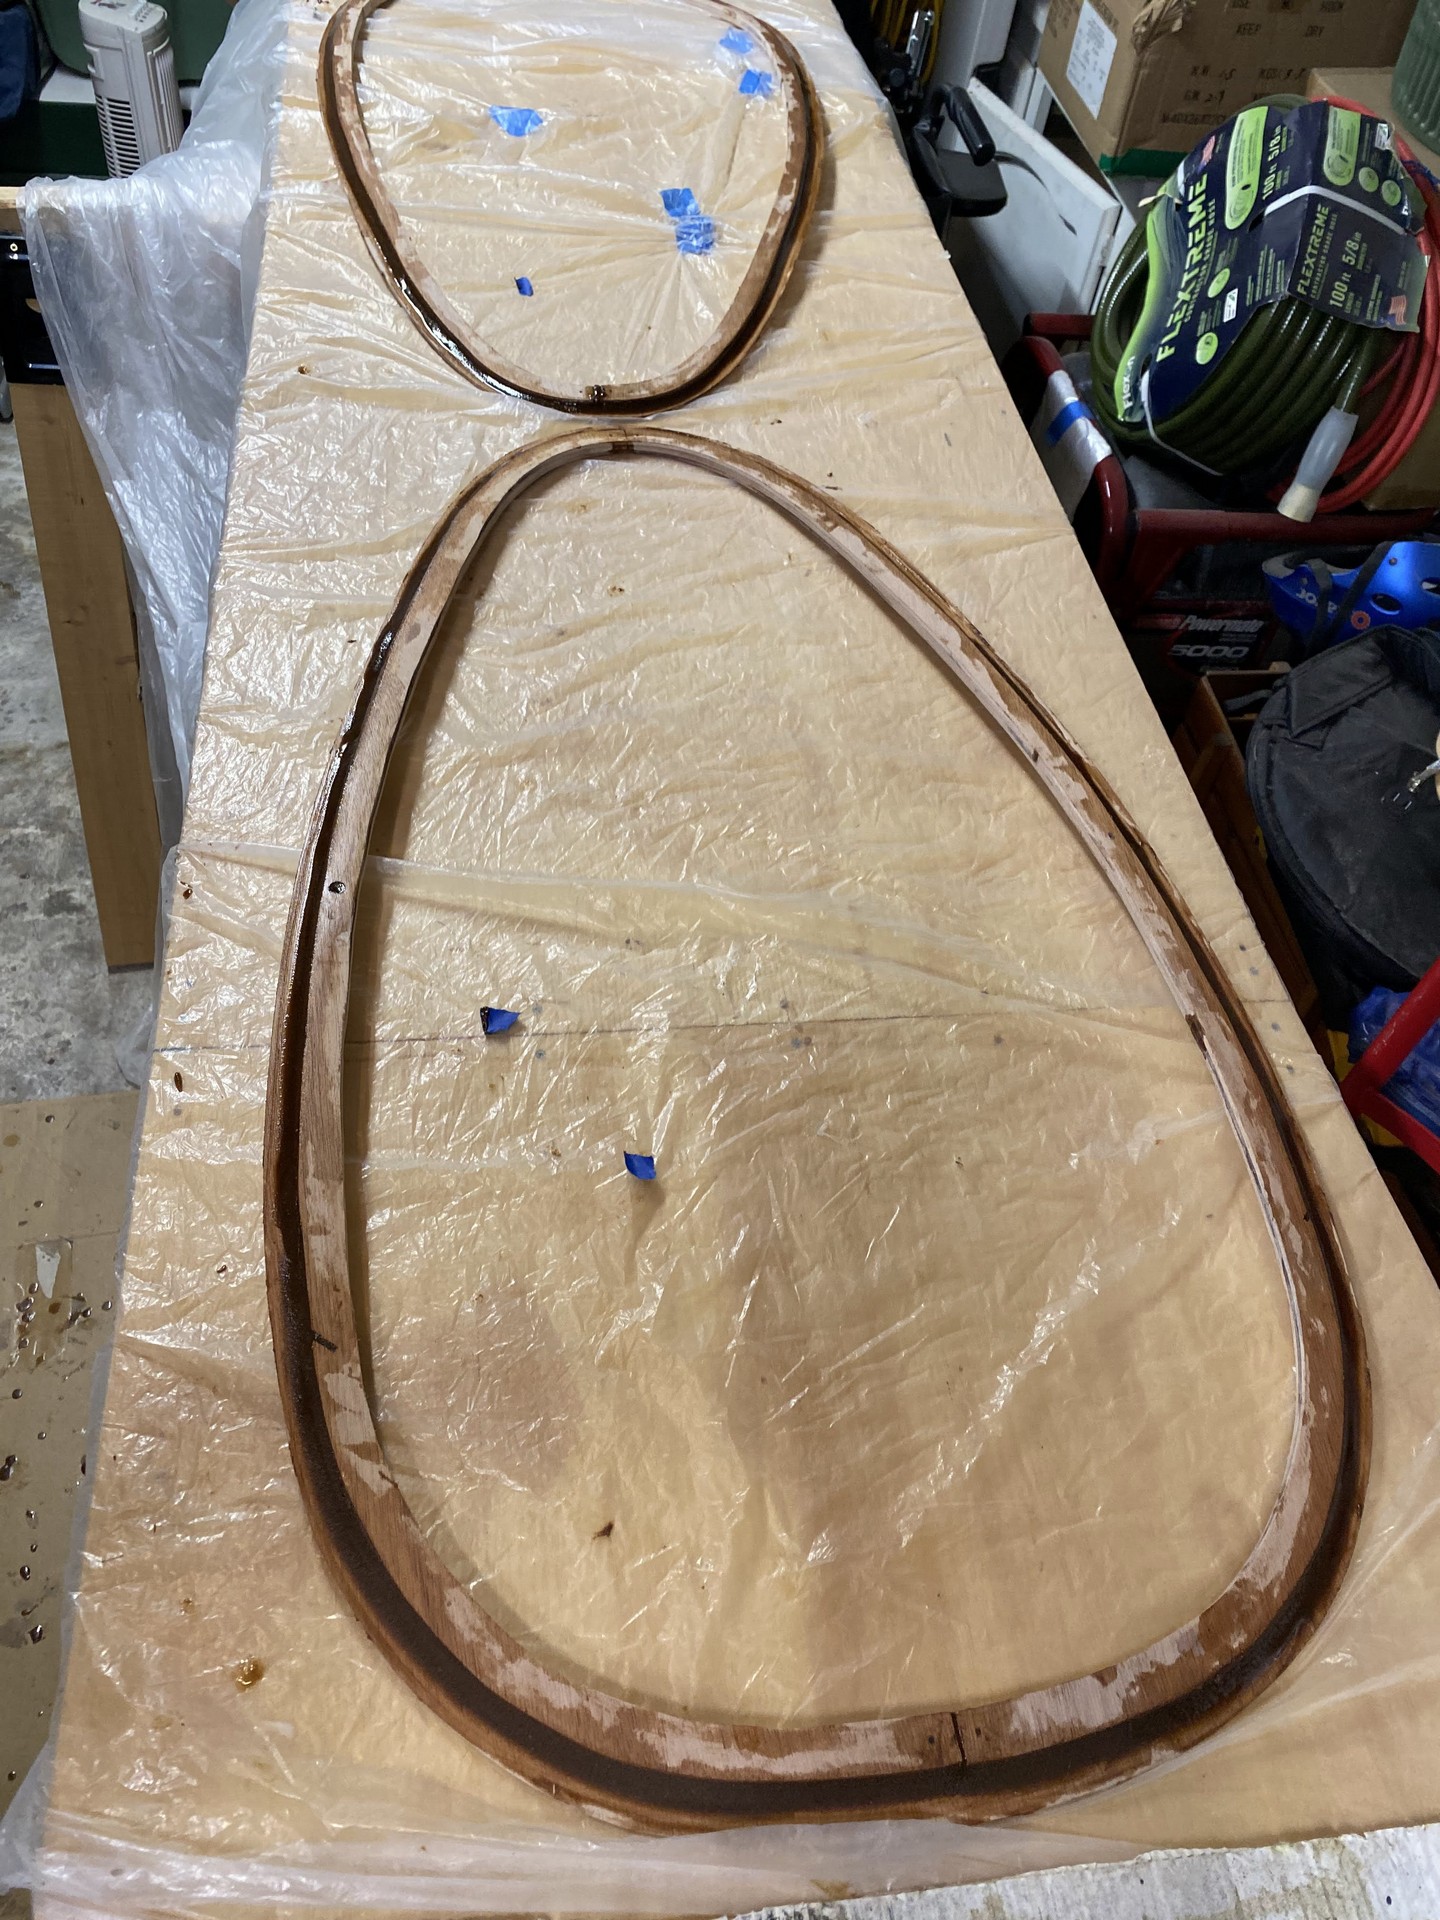
Shaping the Combing
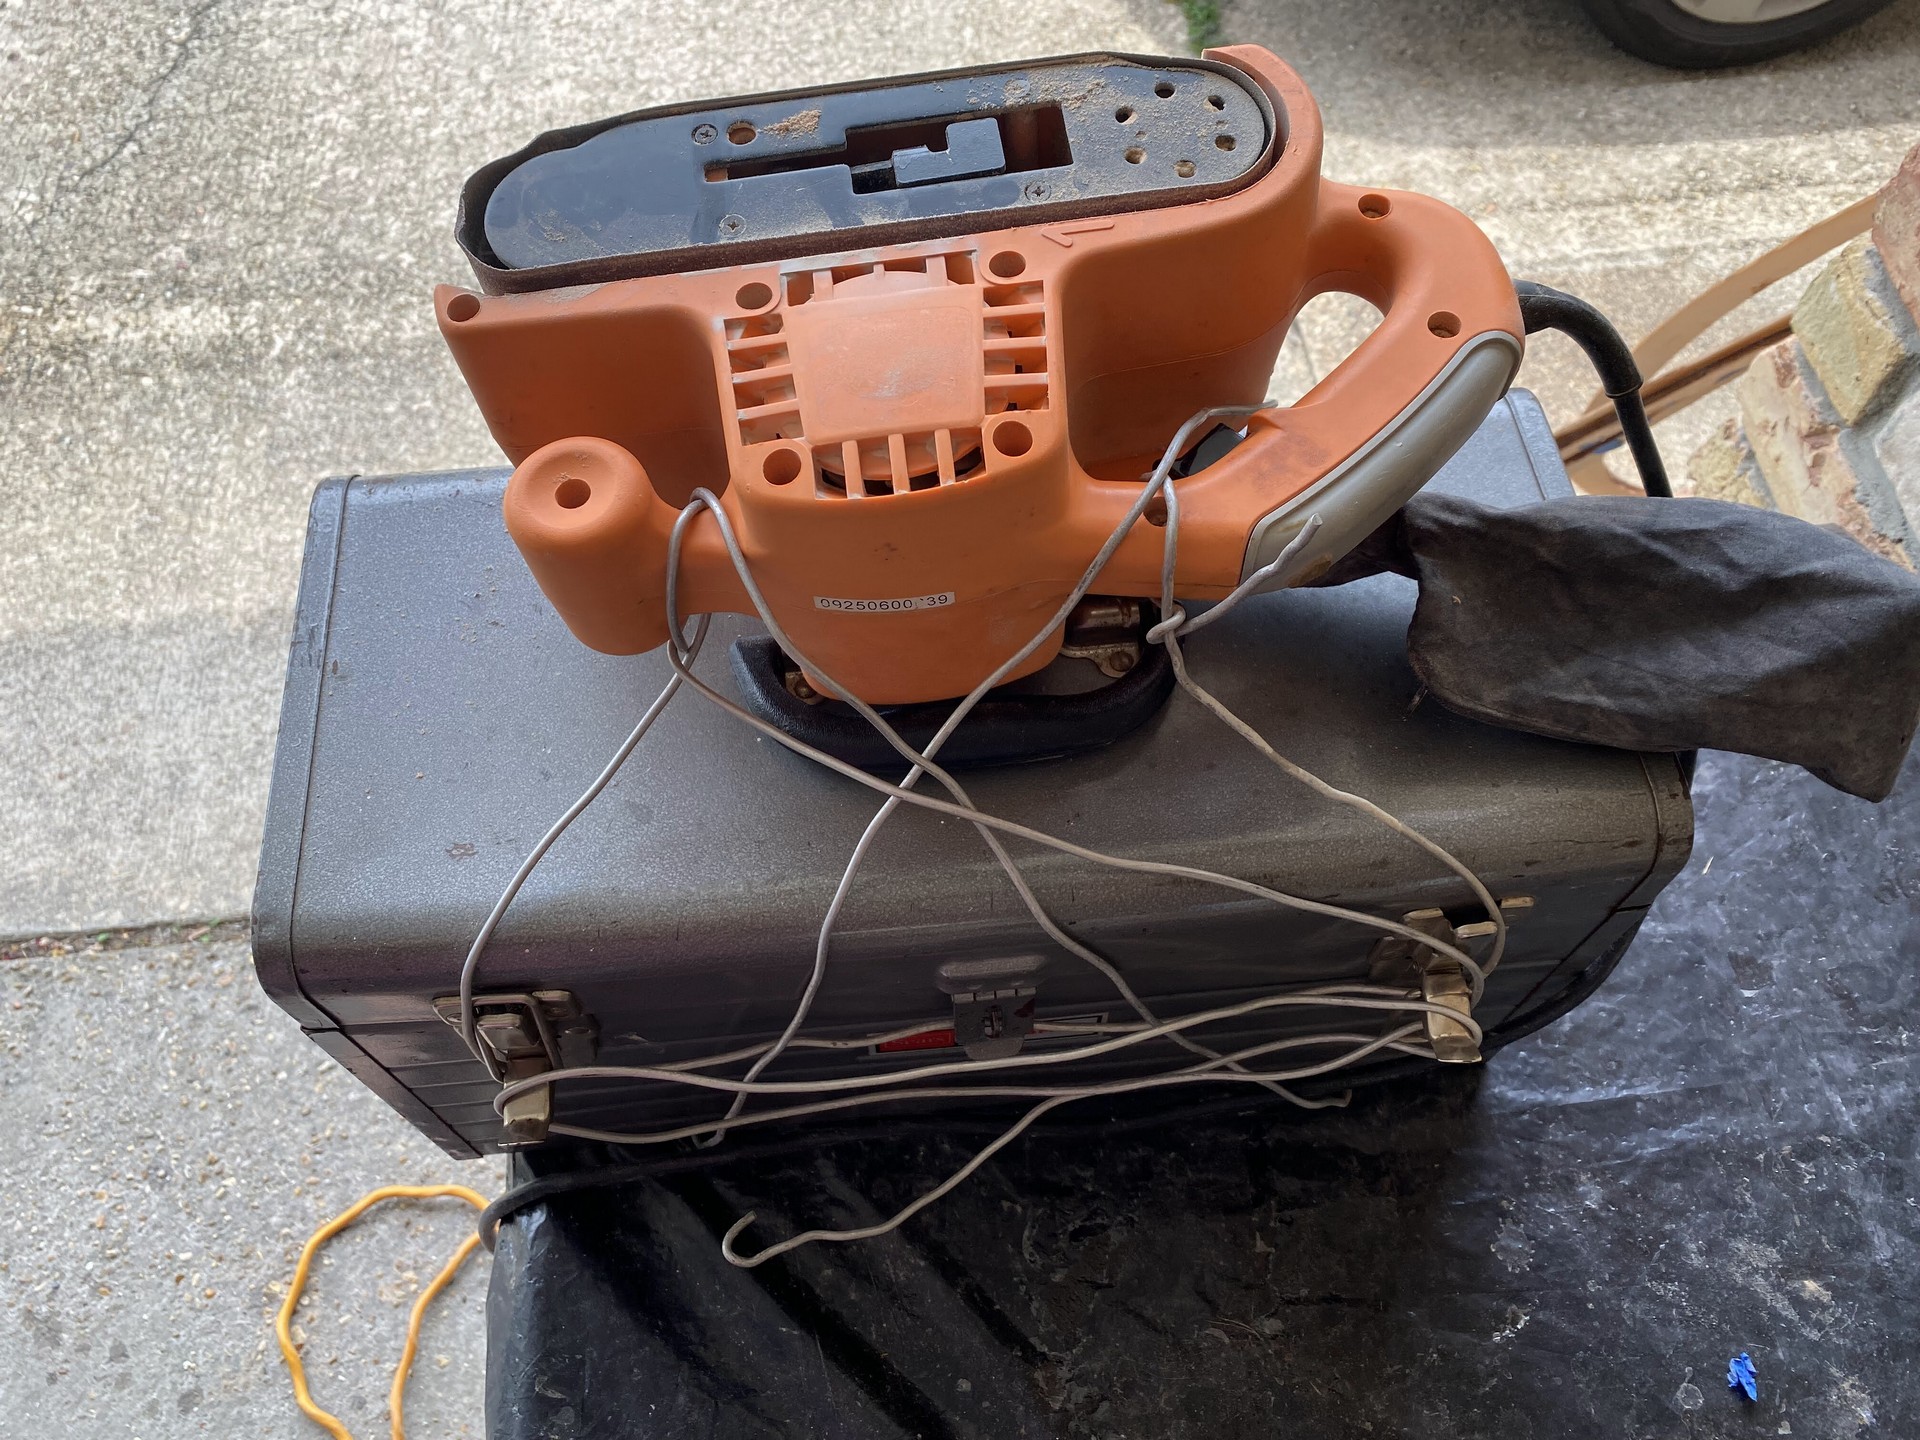
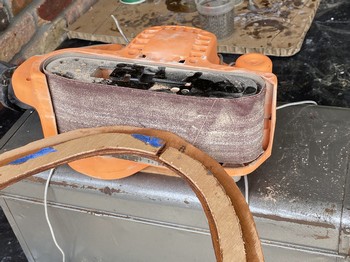
After the epoxy cured during initial layup the clamps were removed, combing rim removed and blue painter’s tape removed. Following a tip gleaned from another builder on social media, I wired my belt sander to my toolbox on a table outside and used this to sand each of the combing rims to shape. This was an effective way to round the edges, inside and out. Also, some builders use strips of poly plastic instead of painters’ tape and in hindsight I believe this would be better because I found epoxy did saturate and stick to the tape in places. It took some effort to scrape and sand it off the combing.
Considerable hand sanding was still necessary to ready the pieces for the next step.
Fillets Beneath Combing Lip
One advantage of this Laszlo technique was the ability to apply a controlled fillet of thickened epoxy to the underside of the combing lip. This of course waterproofs and also strengthens the lip. I first mixed epoxy with wood flour to a relatively thin mustard consistency. I used a syringe to apply a bead of this thin mixture around each combing rim. I wanted to ensure the liquid epoxy truly saturated the wood. While this was still wet, I applied a second layer of much thicker epoxy - peanut butter consistency - all around the underside of the lip and made a smooth, rounded fillet with a jumbo popsicle stick. On one of the rims I also used the gloved finger dipped in isopropyl alcohol technique to smooth out one batch of epoxy that was mixed too thick with the wood flour. It worked well, leaving a smooth finish.
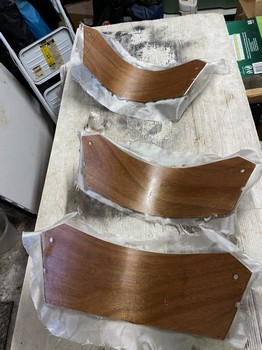
Seat Backs
Previously I applied a layer of fiberglass to the back of the curved seat backs. Now, I’ve applied a layer of fiberglass to the fronts. Next, I’ll cut the presently oversized seatbacks down to shape, create slots for nylon straps, brush on a fill coat of epoxy (mainly to waterproof exposed edges of the plywood) and glue a layer of foam to the front of the seat back to make them more comfortable. There were no instructions for seat backs in the CLC build manual. I’m basing my work on a seatback design by Vaclav Stejskal of One Ocean Kayaks, by looking at pictures of others’ builds, and at commercial products. Years ago I purchased but build manual for the One Ocean Cirrus.
Independence Day Weekend Approaches
Cockpit combing is a time consuming step and I plan to complete all three by July 4th. After bonding to the deck I’ll use the jigsaw to trim the deck to match the combing, as there will be overlap initially. There is lots of sanding to smooth the surfaces, using the router bit to round the inside edge of the combing, apply epoxy fillets where combing meets the deck, and wrapping the combing with wetted-out fiberglass cloth cut on the bias to add strength and durability.
End pours are now complete and holes will be bored through the kayaks’ fore and aft ends for rope holds, then sanded and coated inside with unthickened epoxy for waterproofing.
What’s next?
- Fabricate and install hip braces.
- Sanding to prepare the boats for varnish. Order Varnish.
- Order stainless hardware for hatch toggles and seatback holds.
- Order foam material for seats.
- Decision: buy or build my own paddles?
- Roof racks or trailer & hitch?