15. A Timelapse and Cockpit Combing
I can build three kayaks in 2-1/2 minutes! Well, maybe if you watch my 2 minute and 20 second timelapse video.
Timelapse Video
Approximately 1,500 still images captured by my Raspberry Pi cam from February of 2021 through July 2022 were used to build the short video below. After several failed attempts to produce this with various Windows applications, I turned to open source software on my LINUX box, running a command to process the folder full of jpegs to mp4 video using ffmpg.
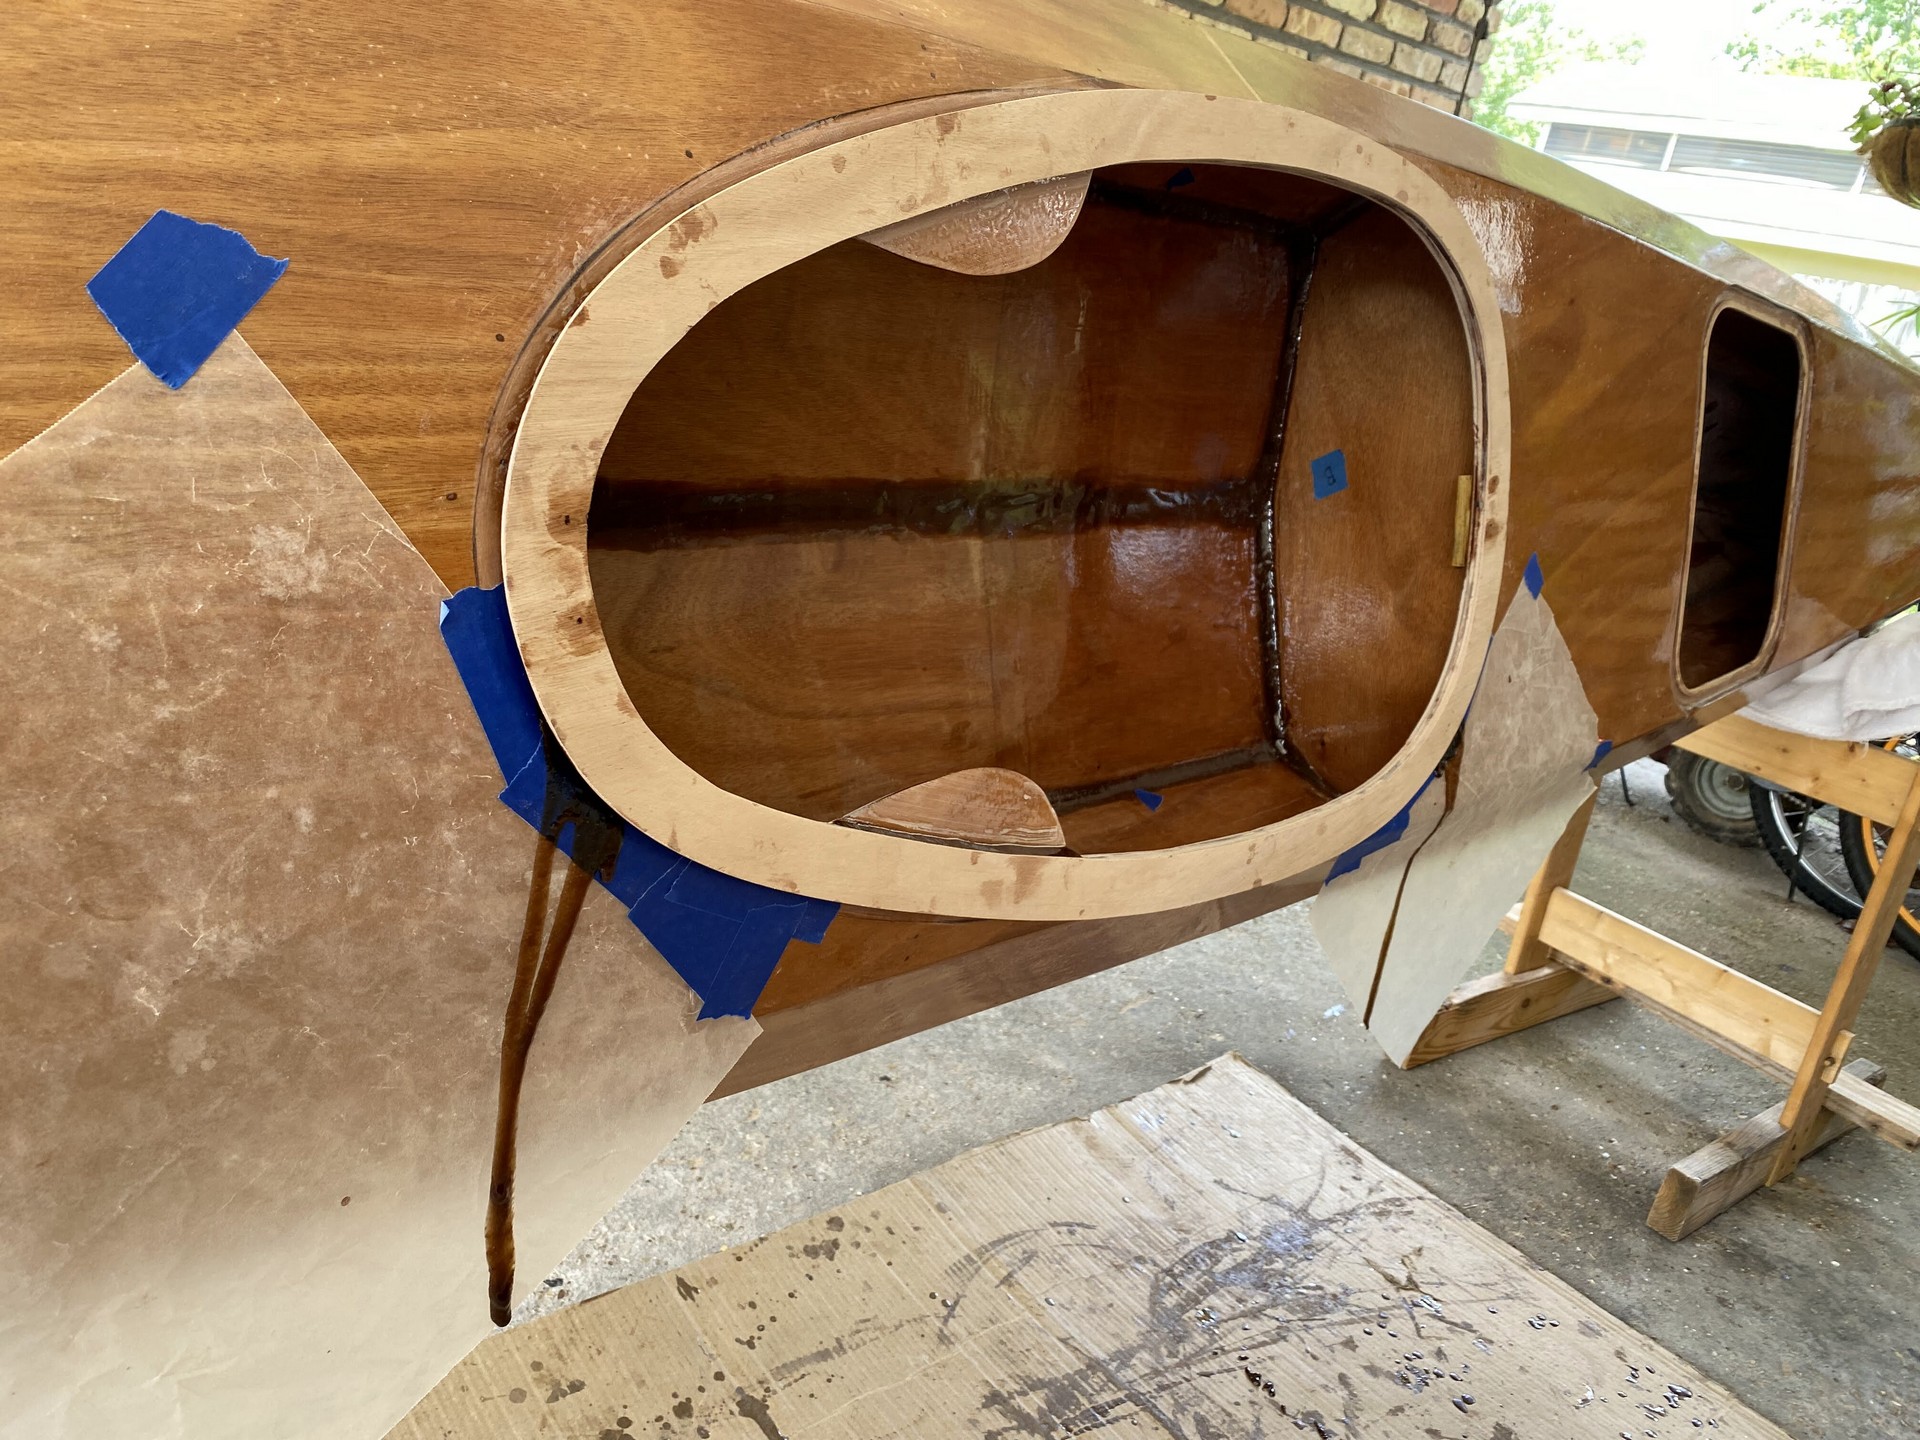
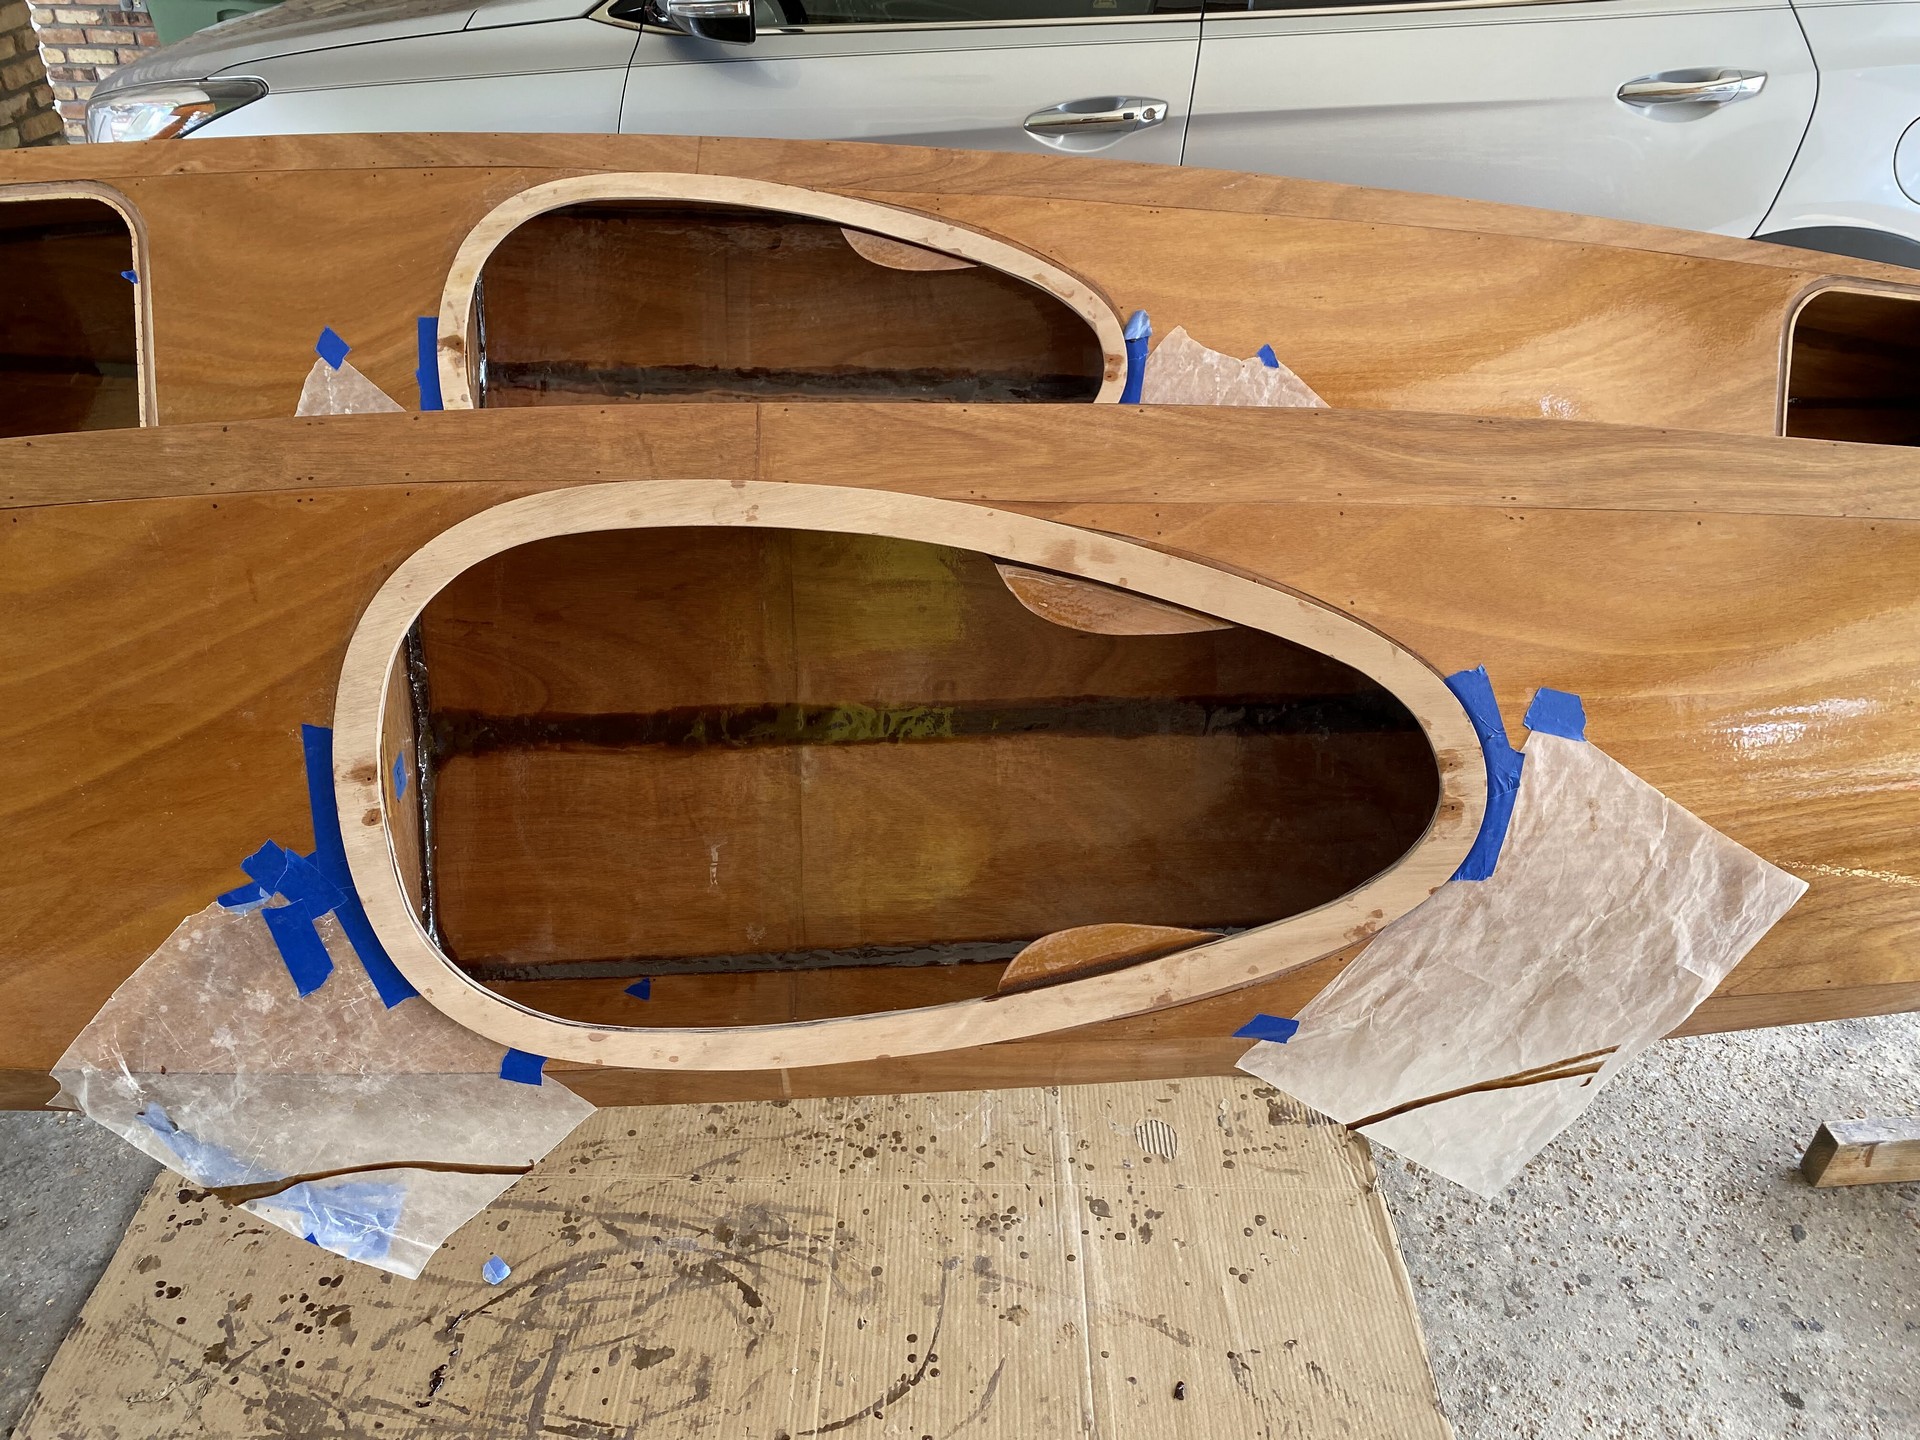
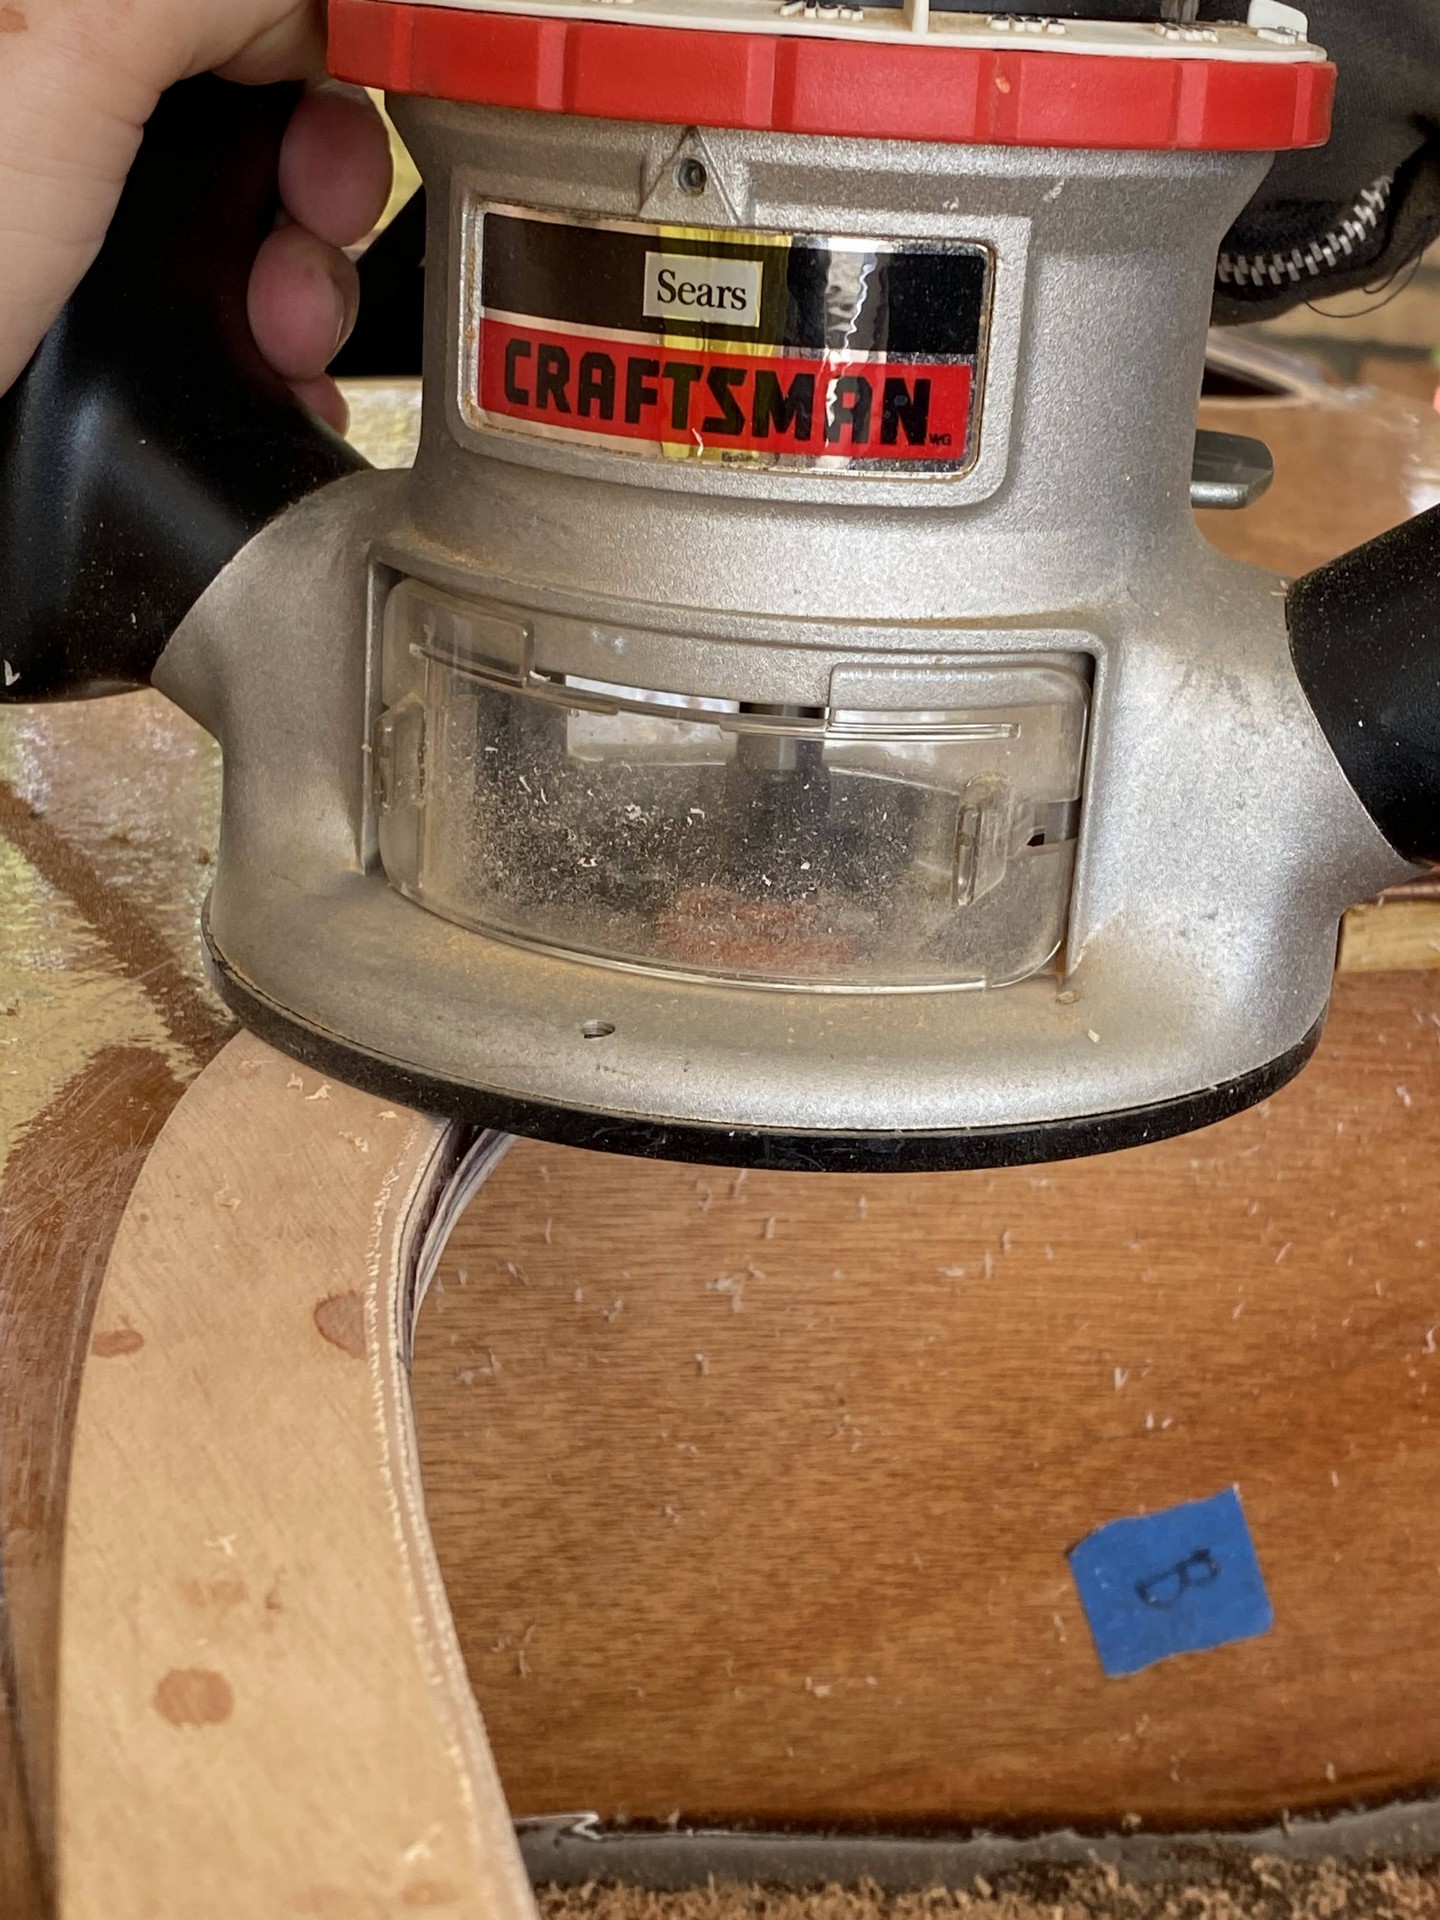
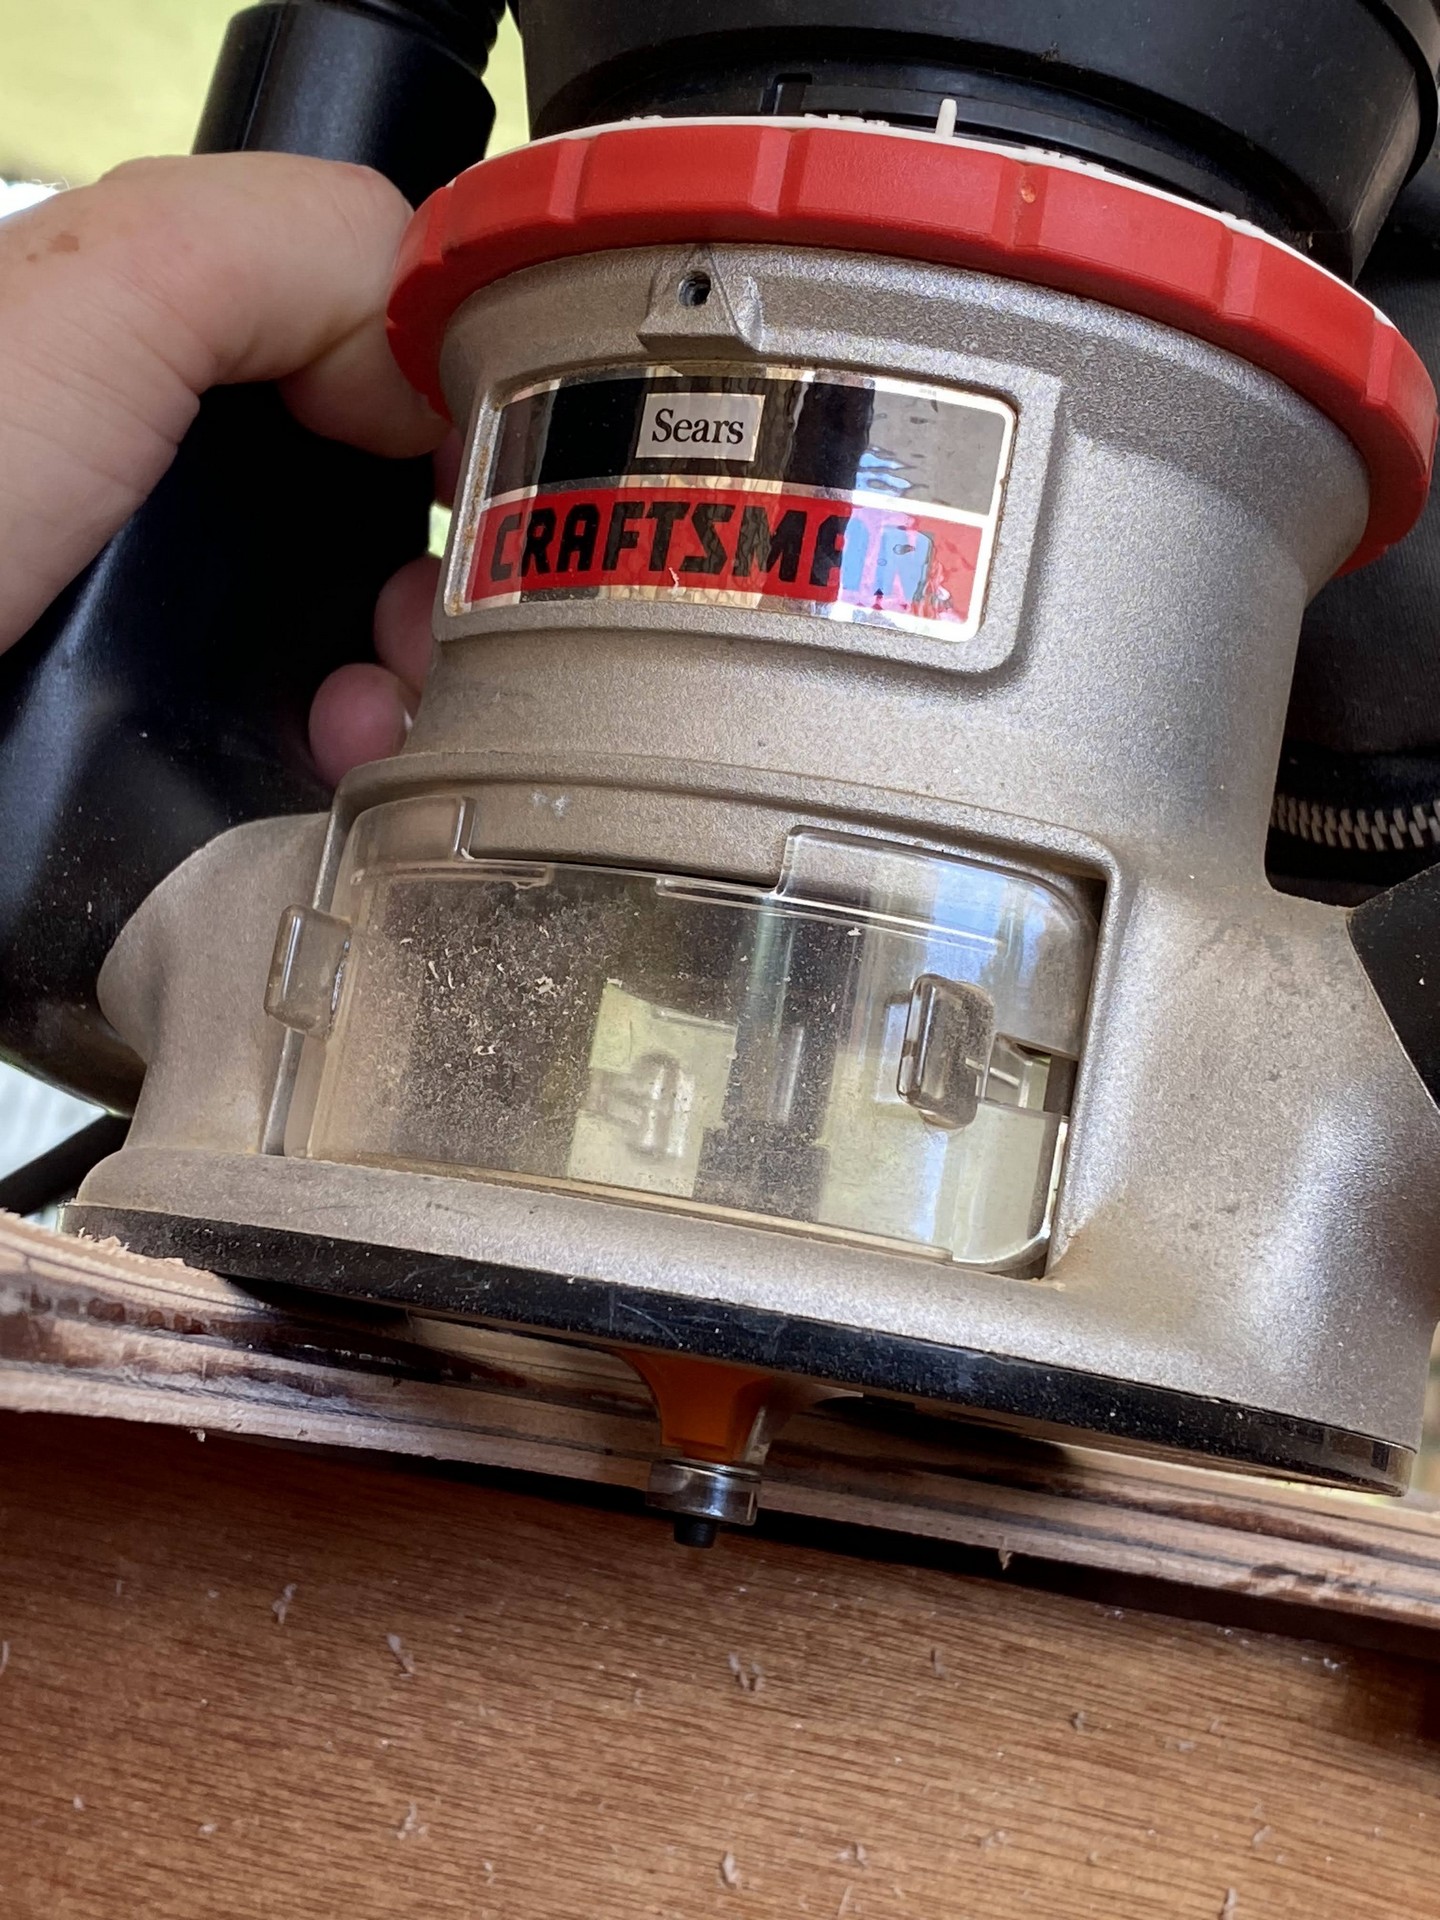
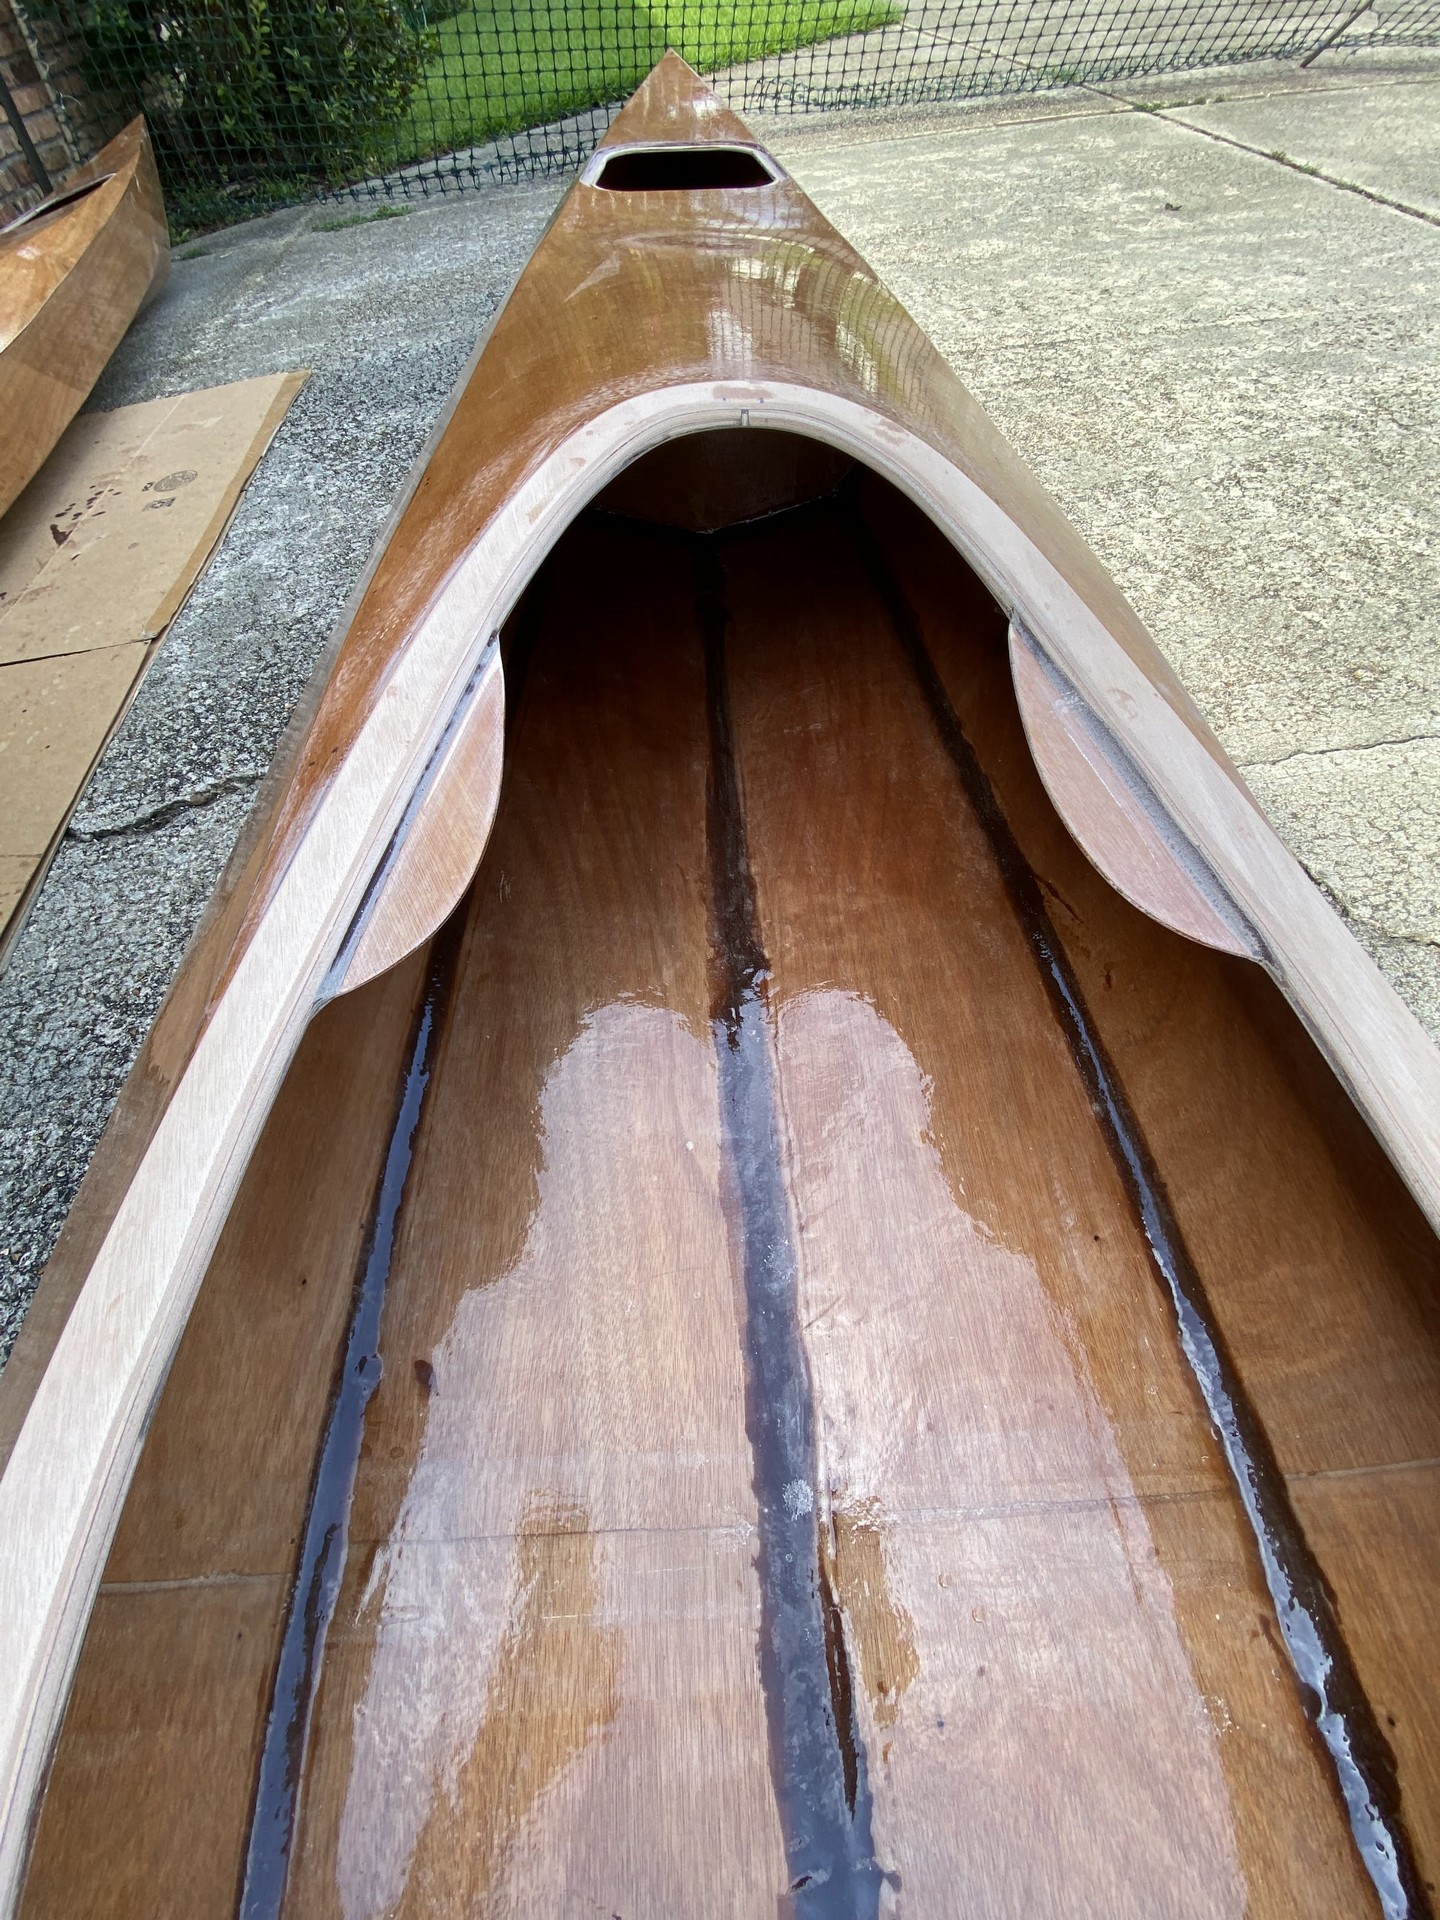
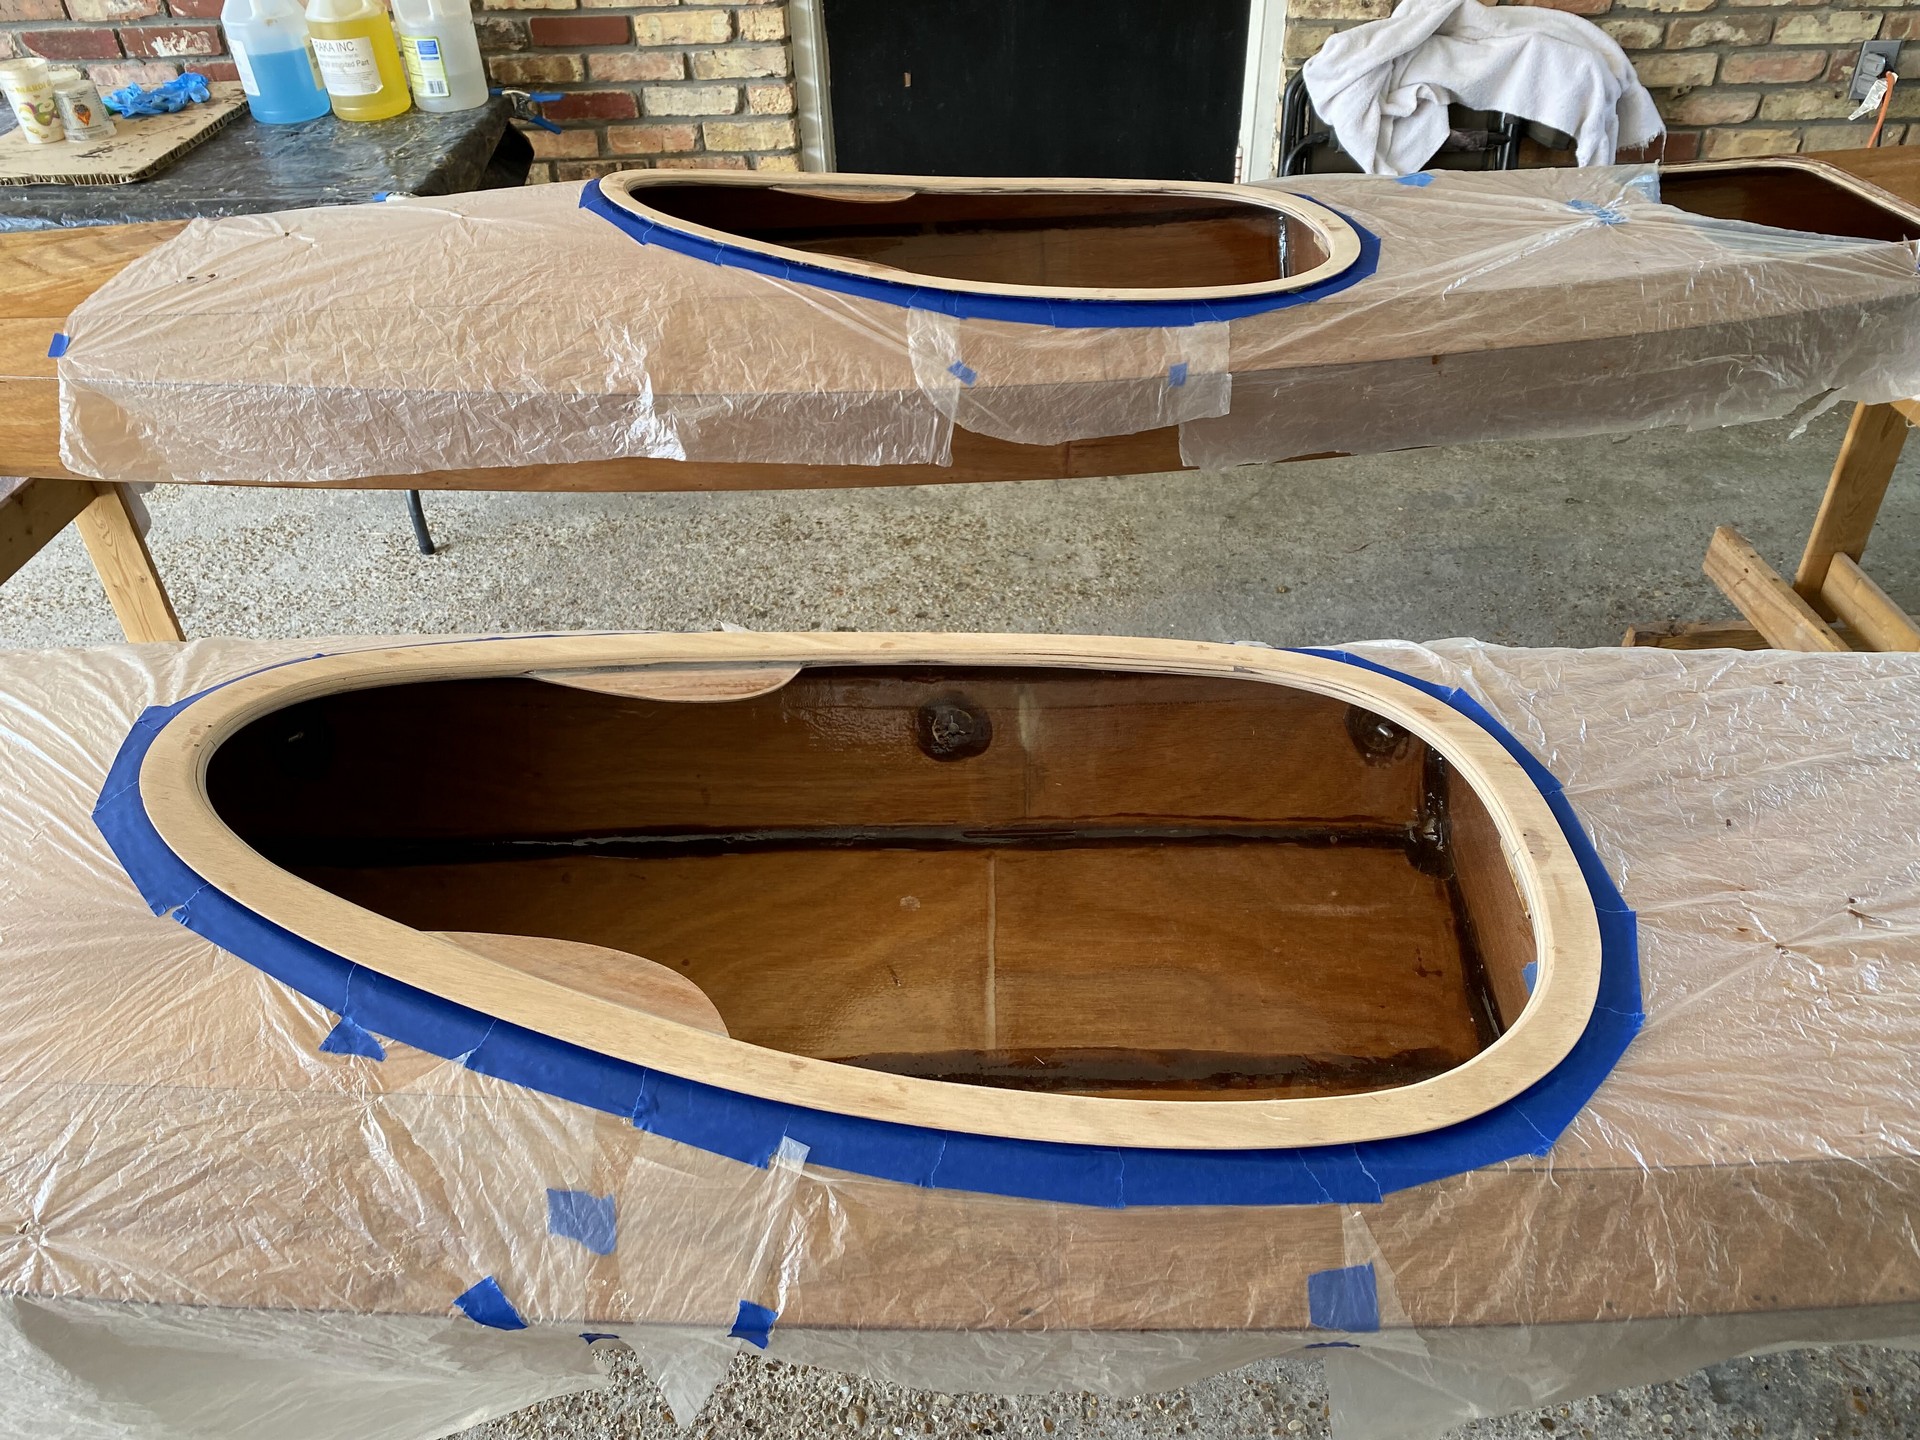
Cockpit Combing
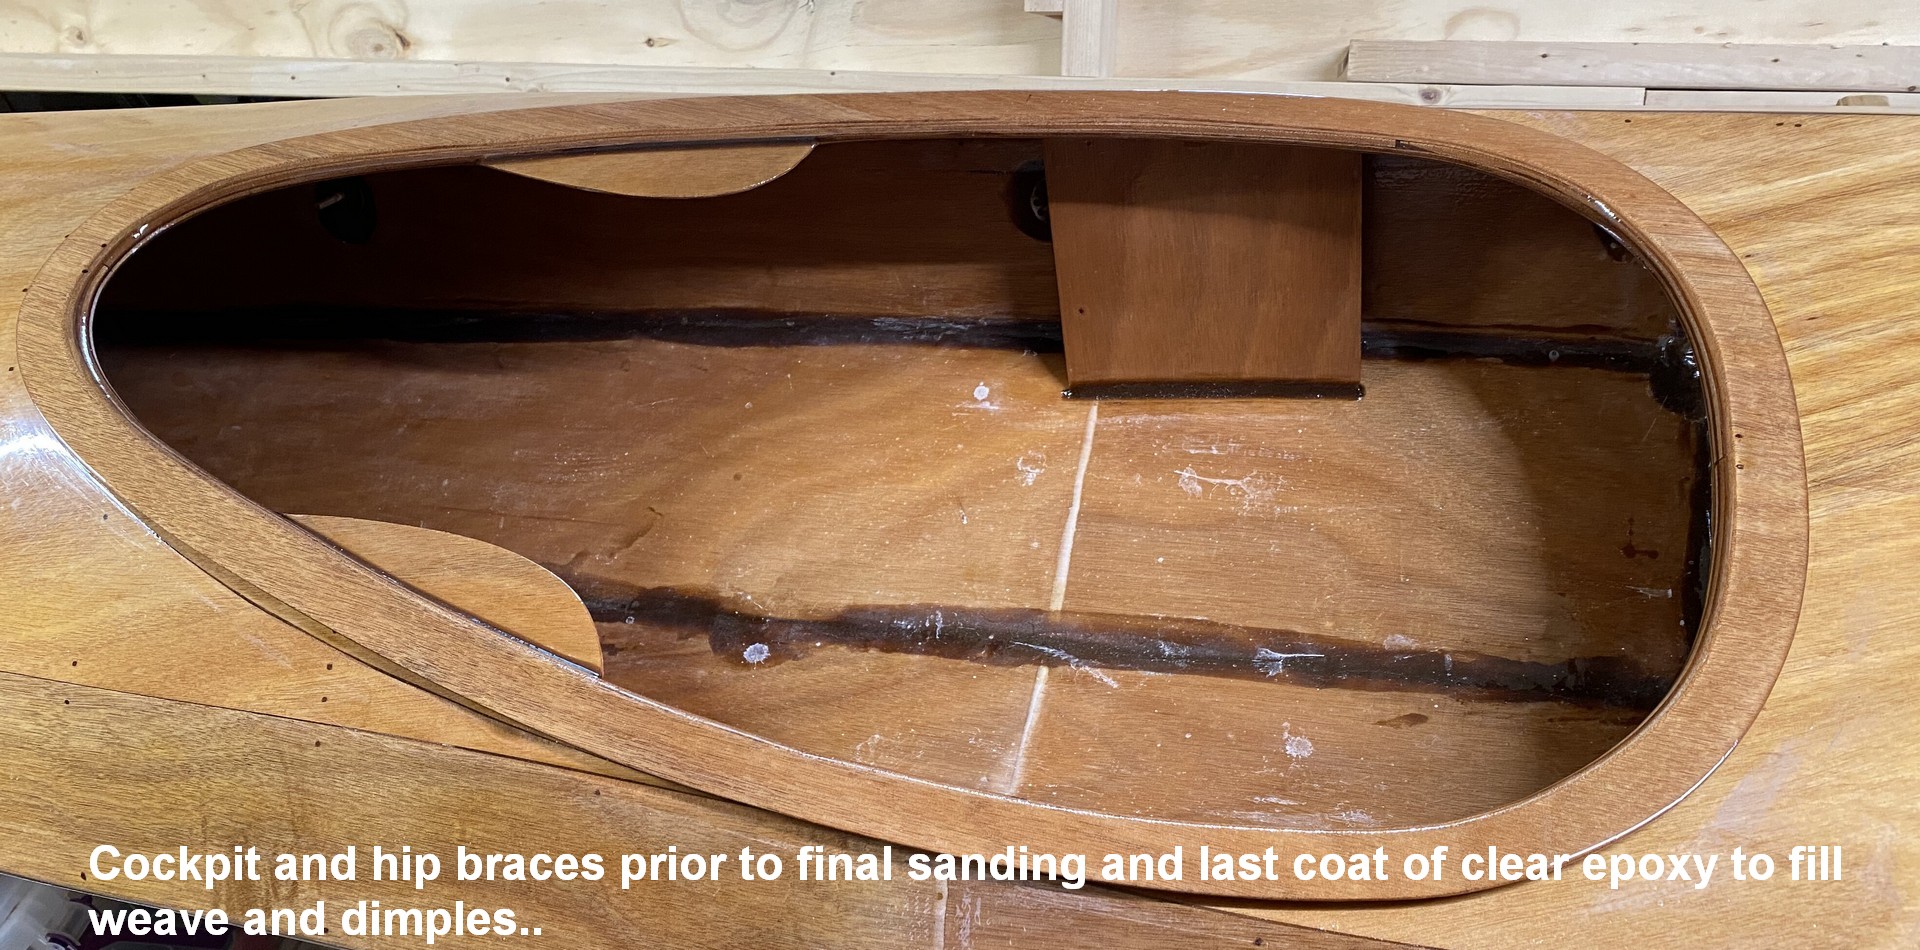
I’ve found that the final carpentry and gluing details take time. That, and other commitments over the Independence Day weekend distracted me from finishing up the intended steps on our three kayaks. I suppose installing a car stereo with your son qualifies as quality time too?
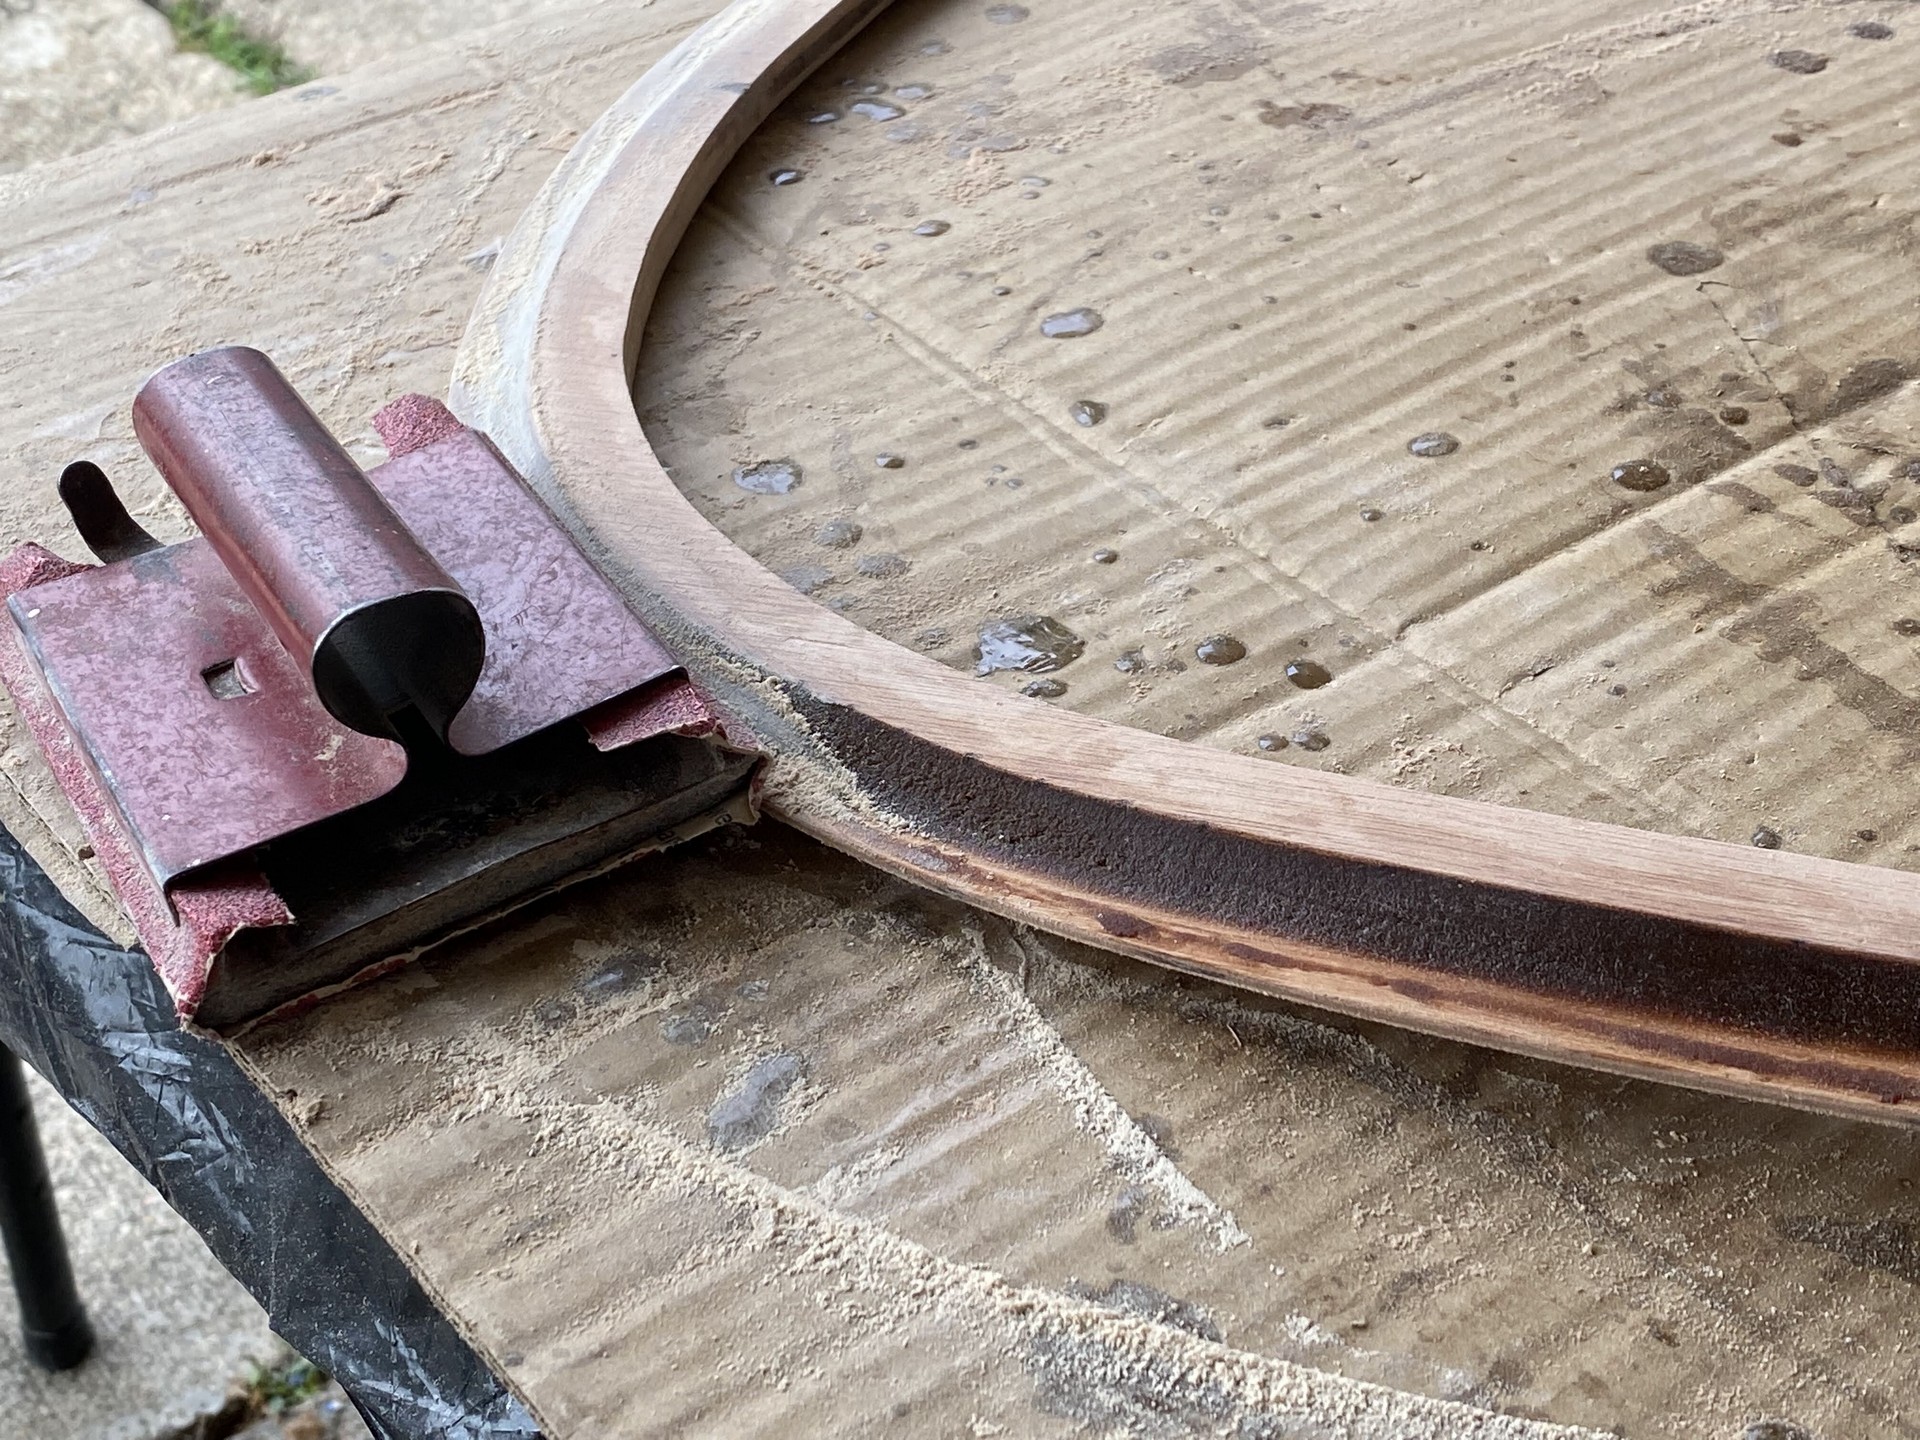
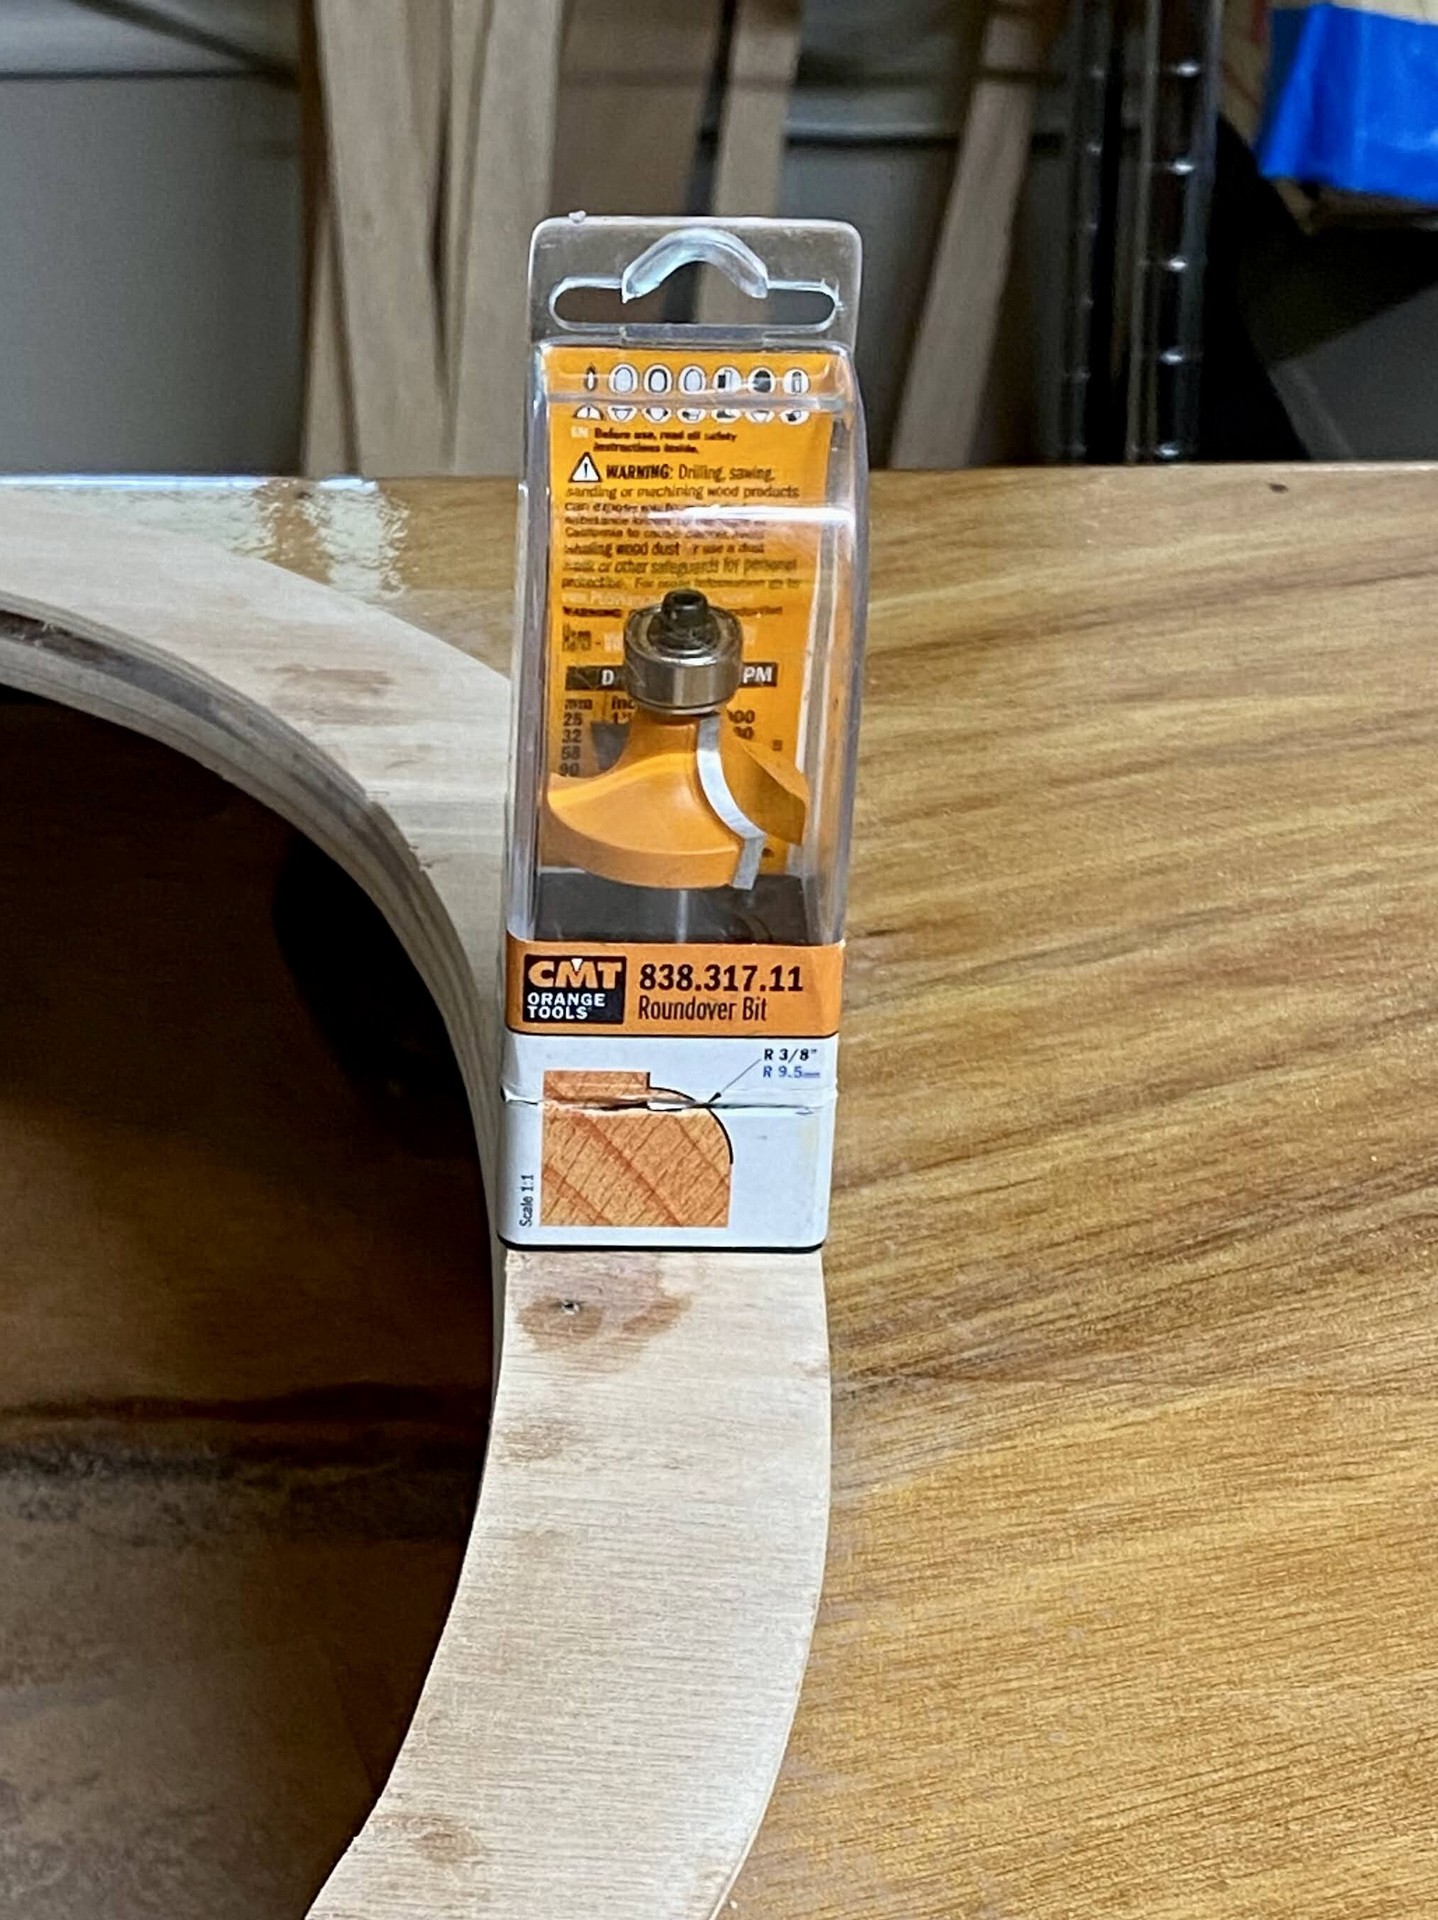
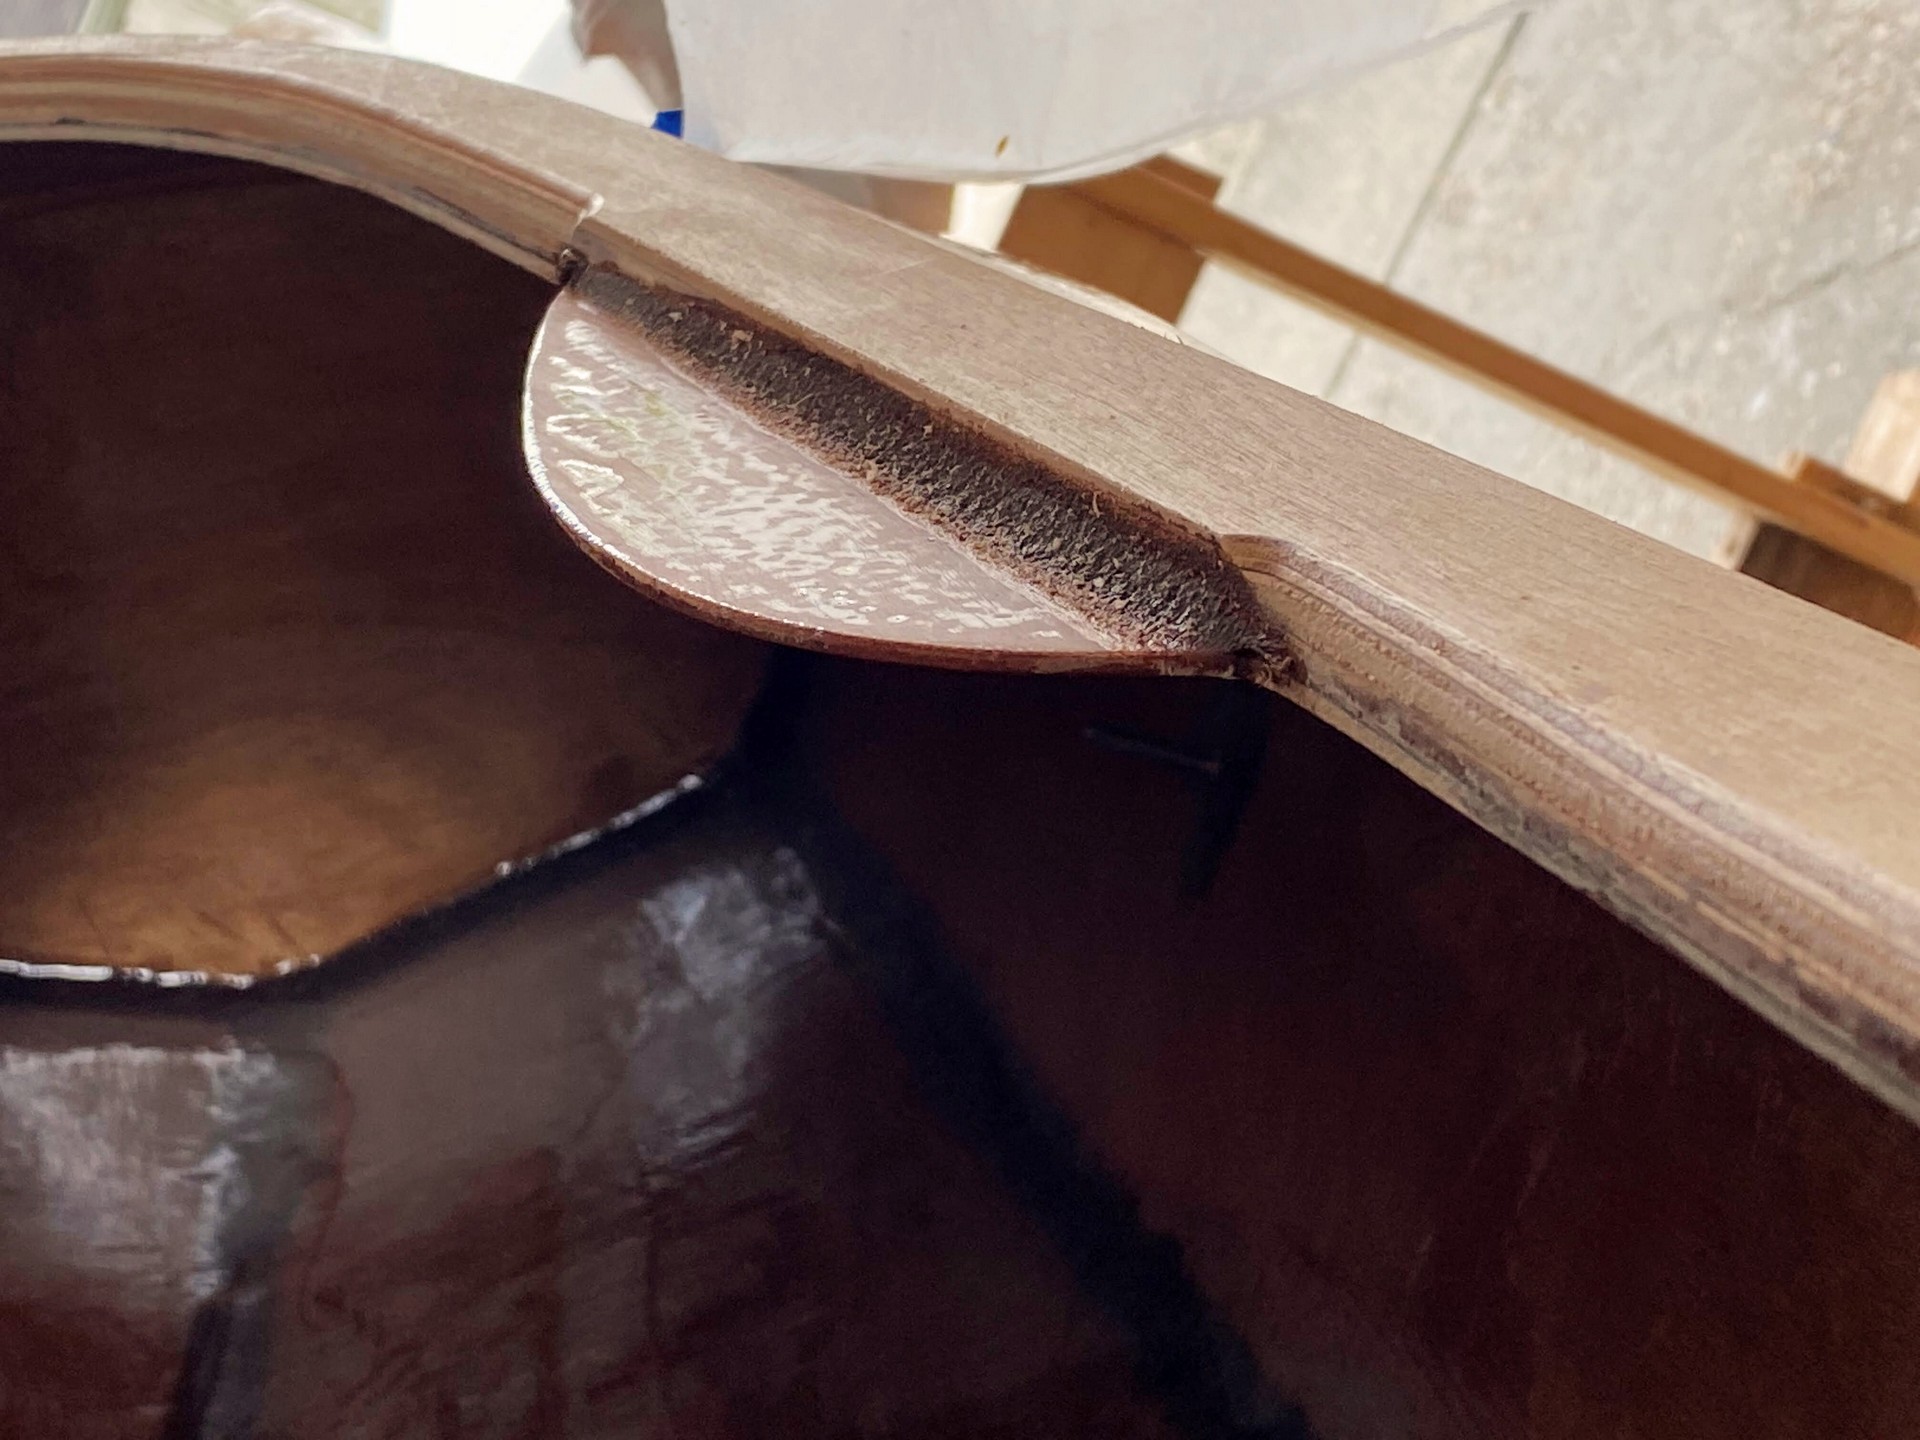
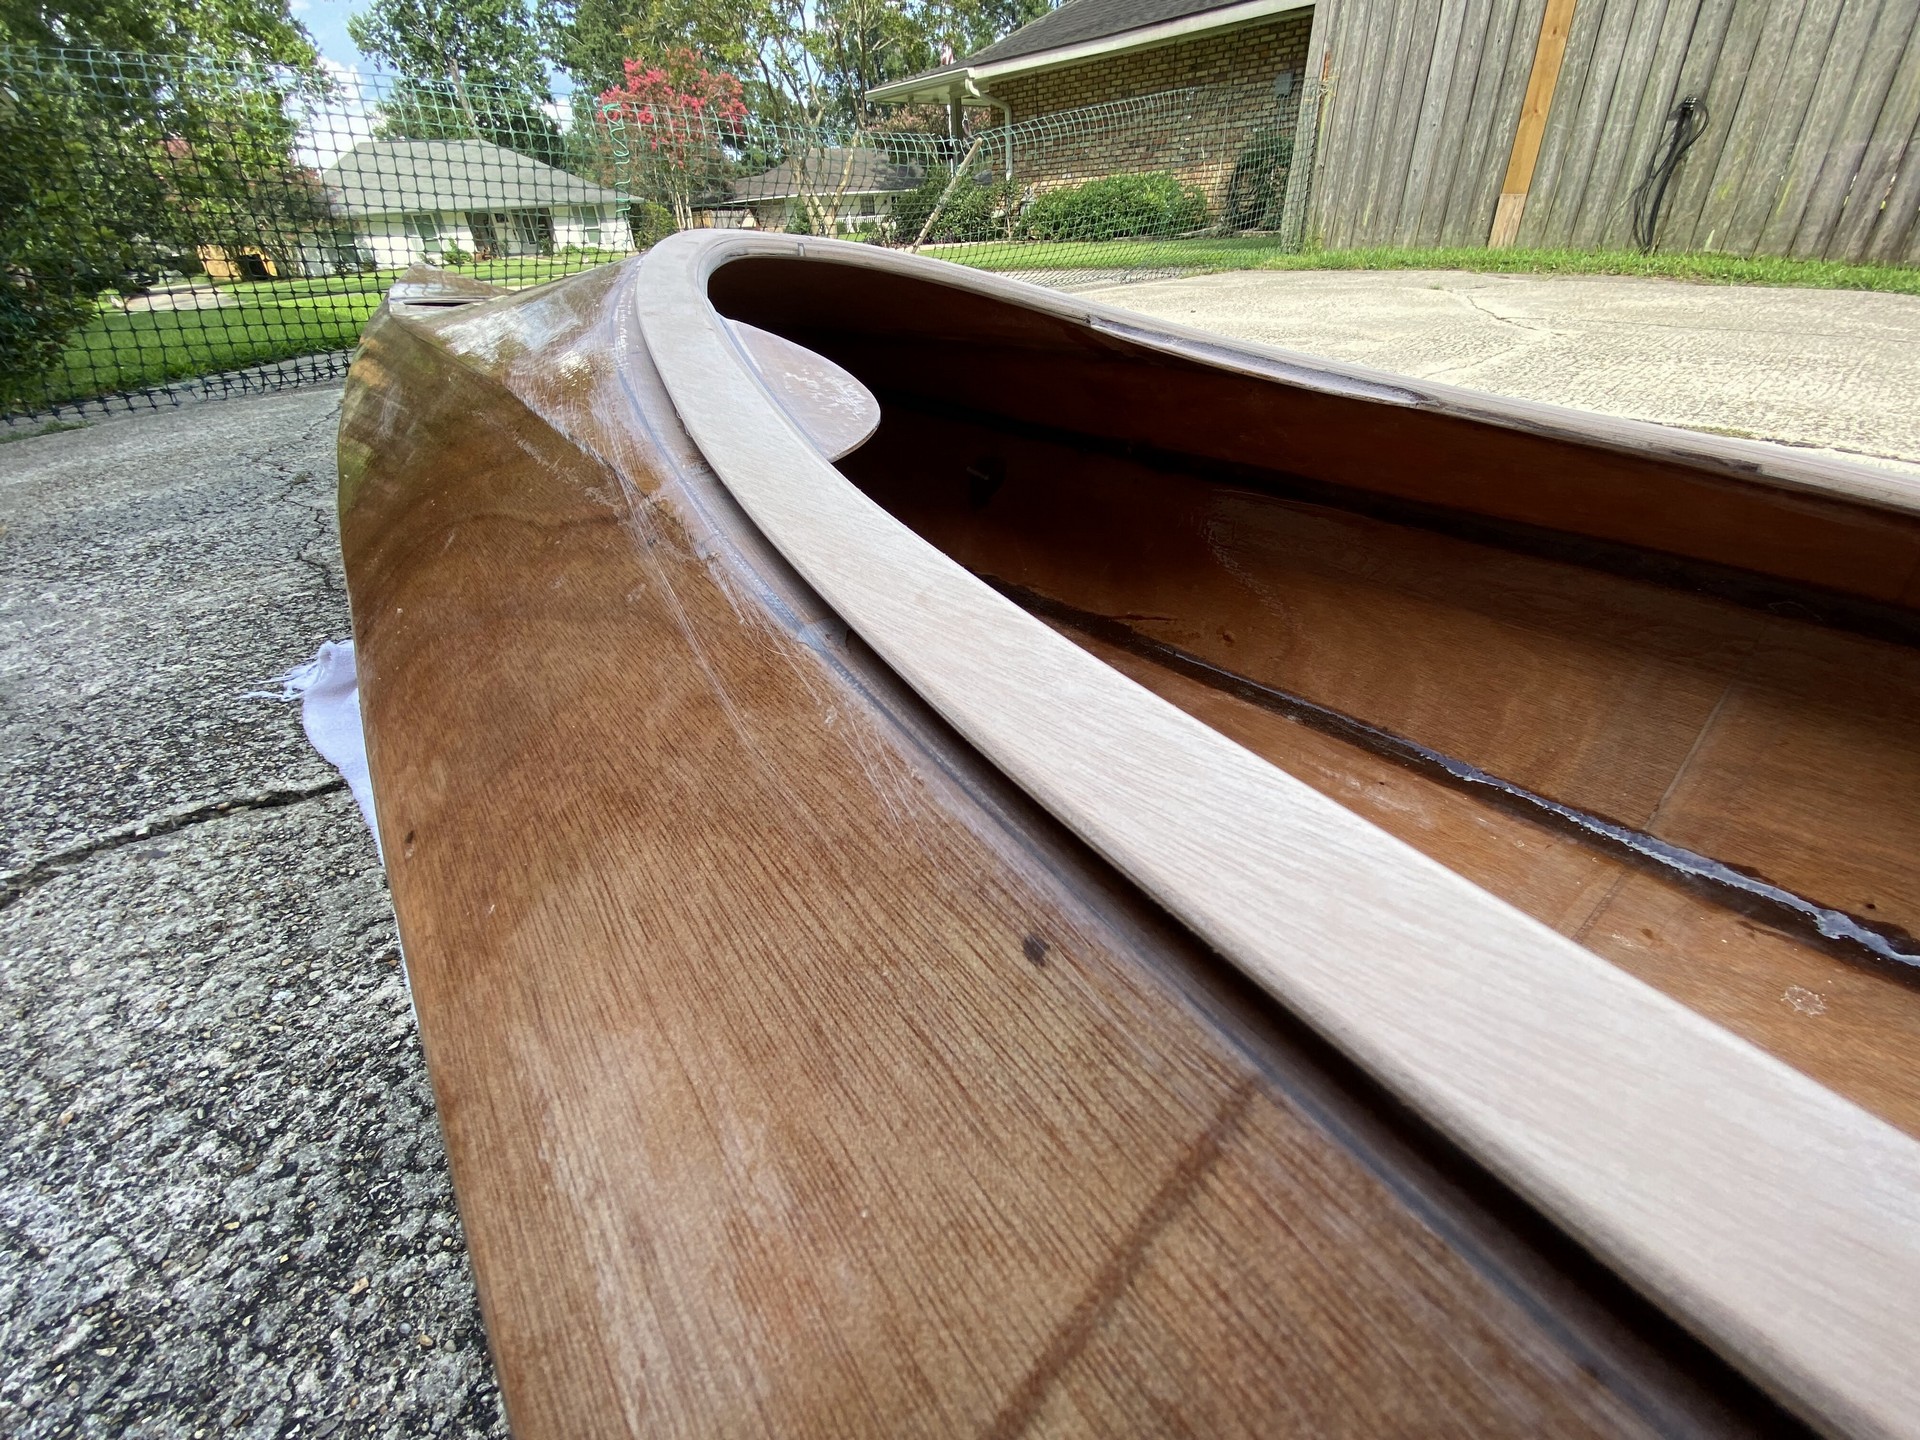
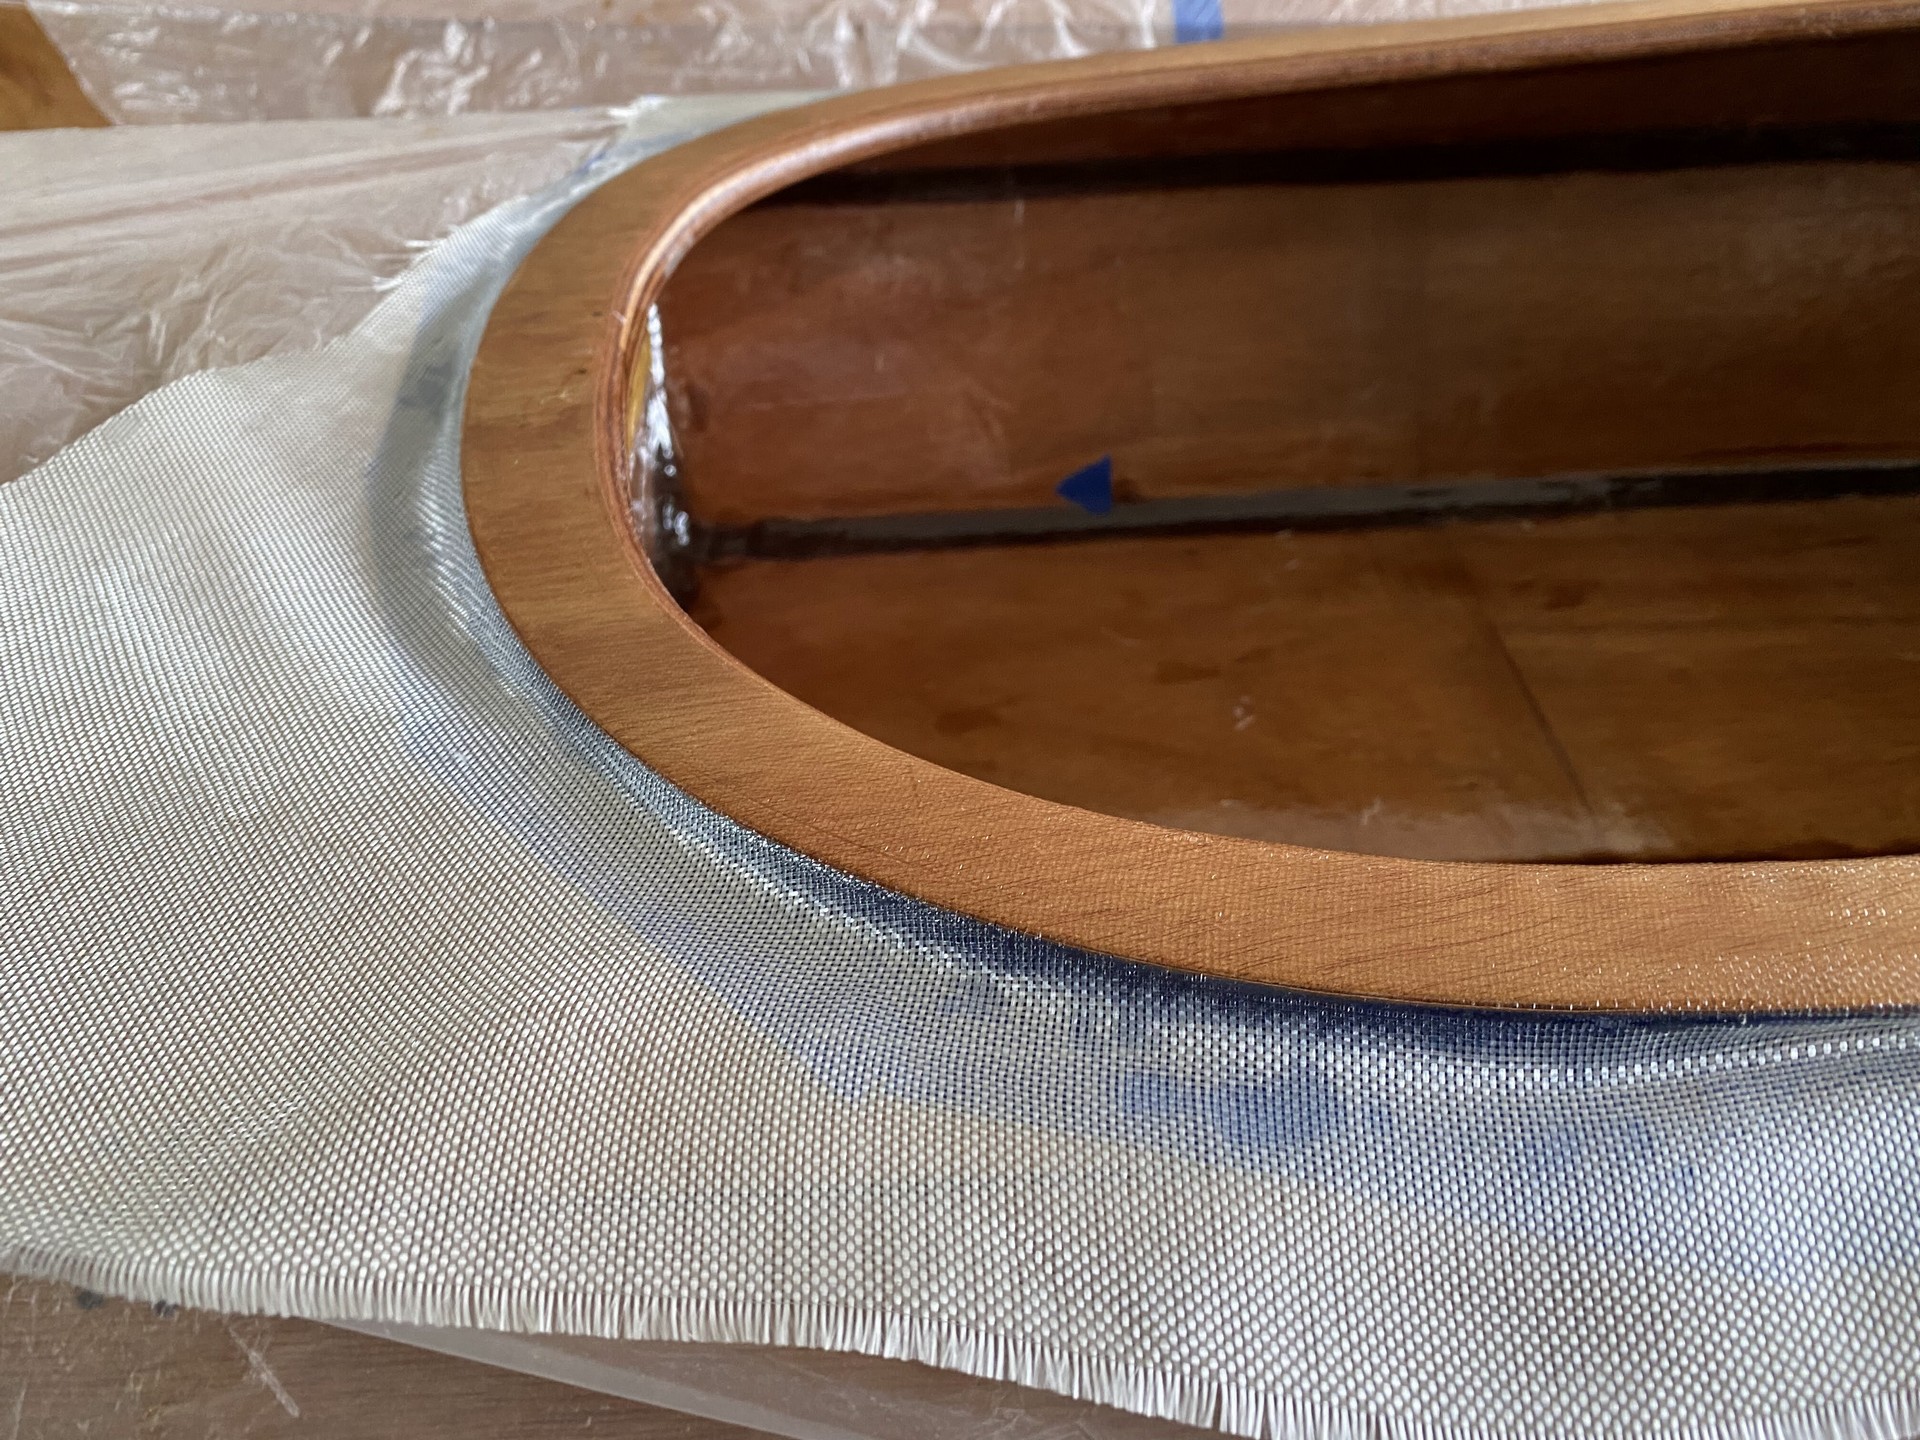
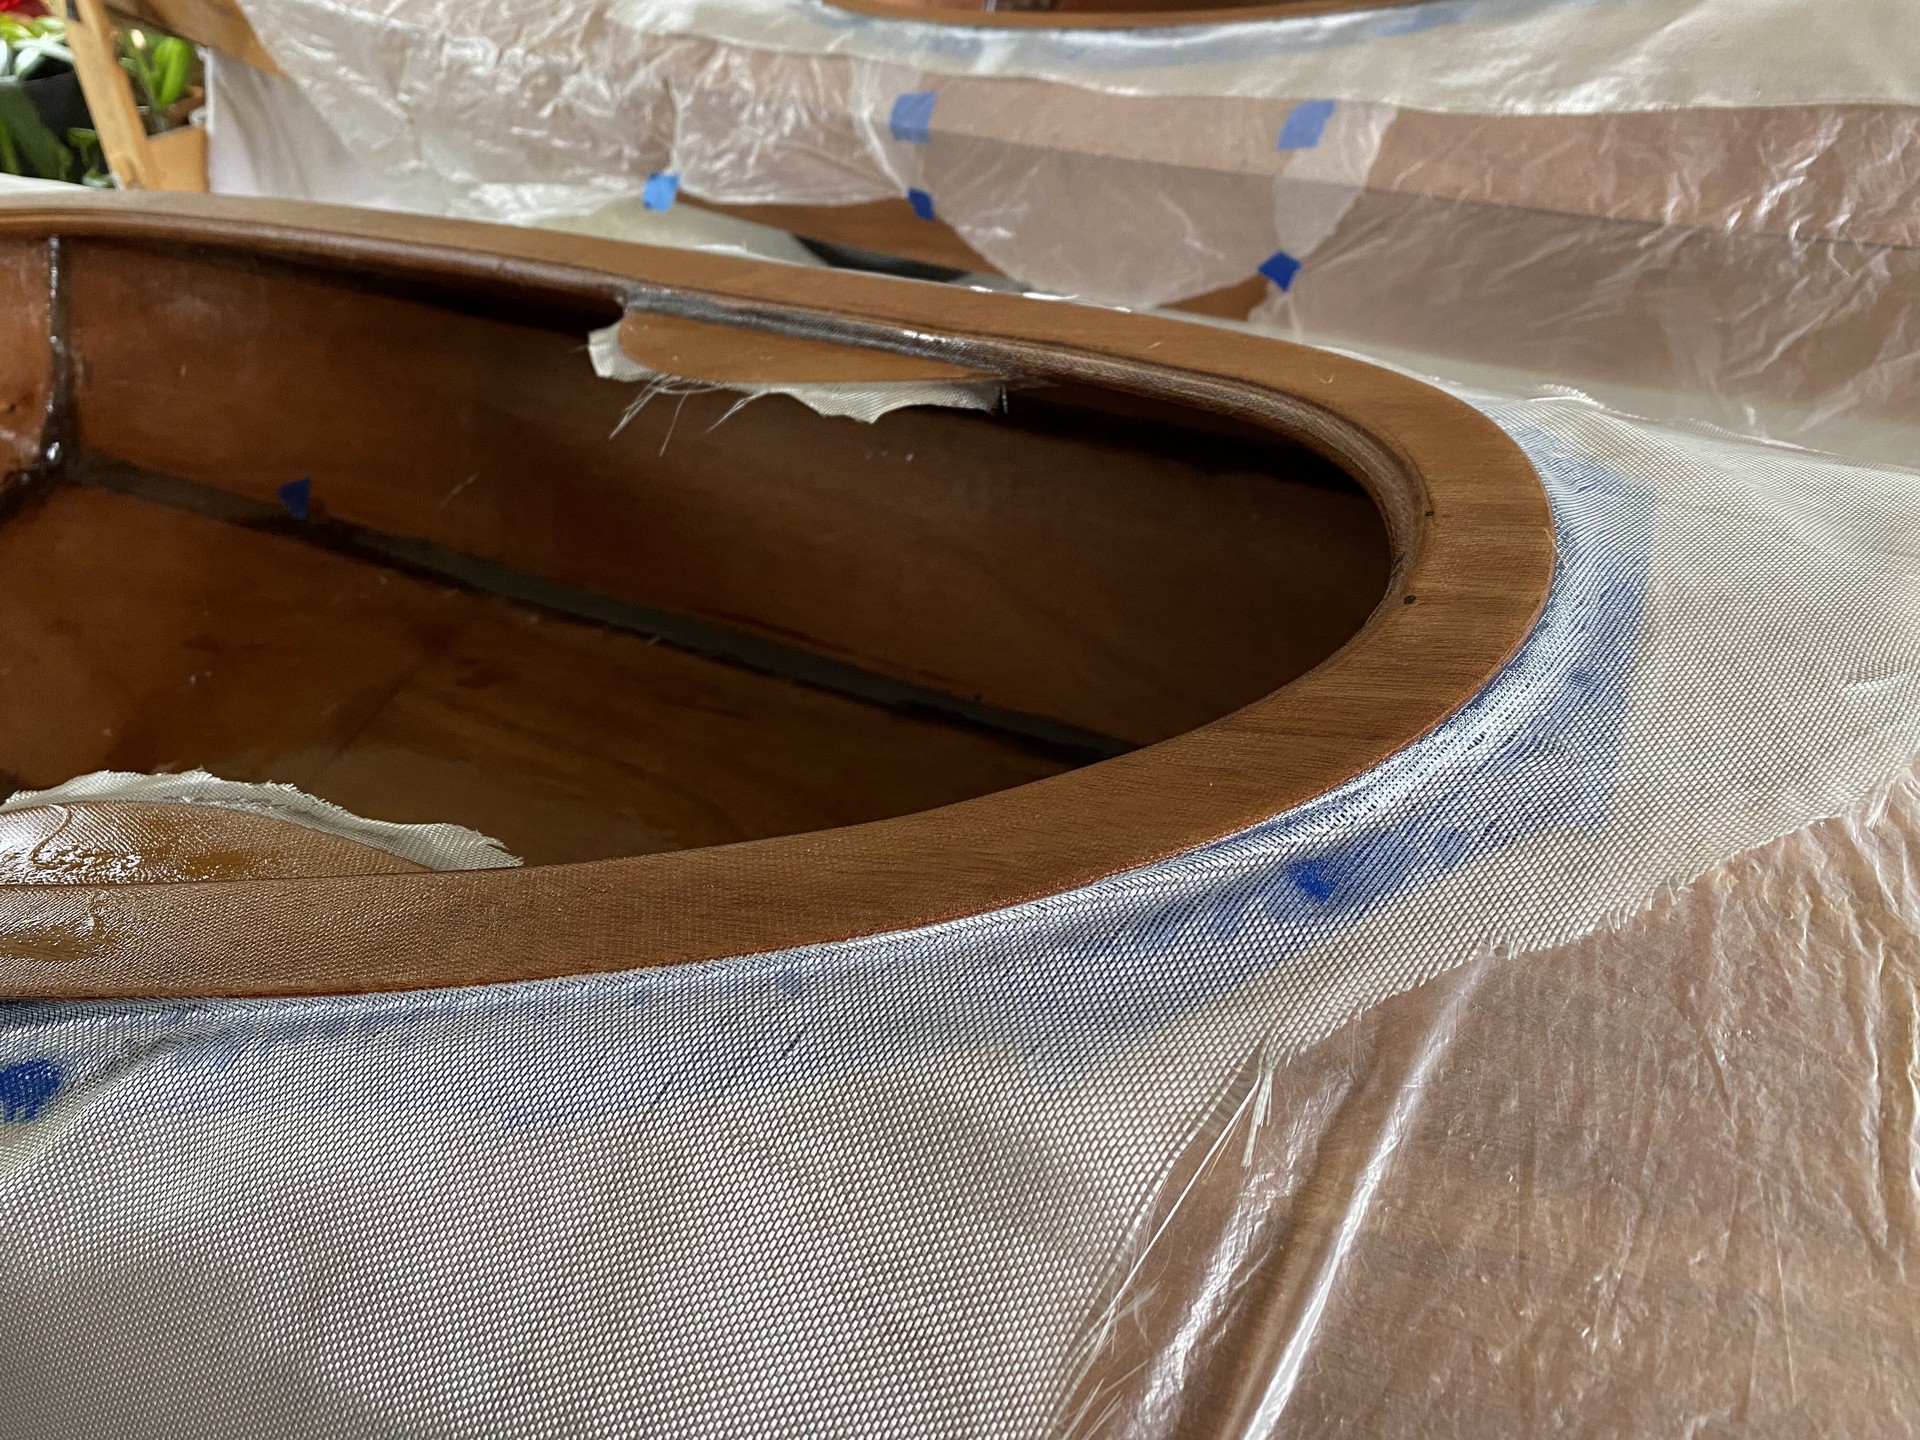
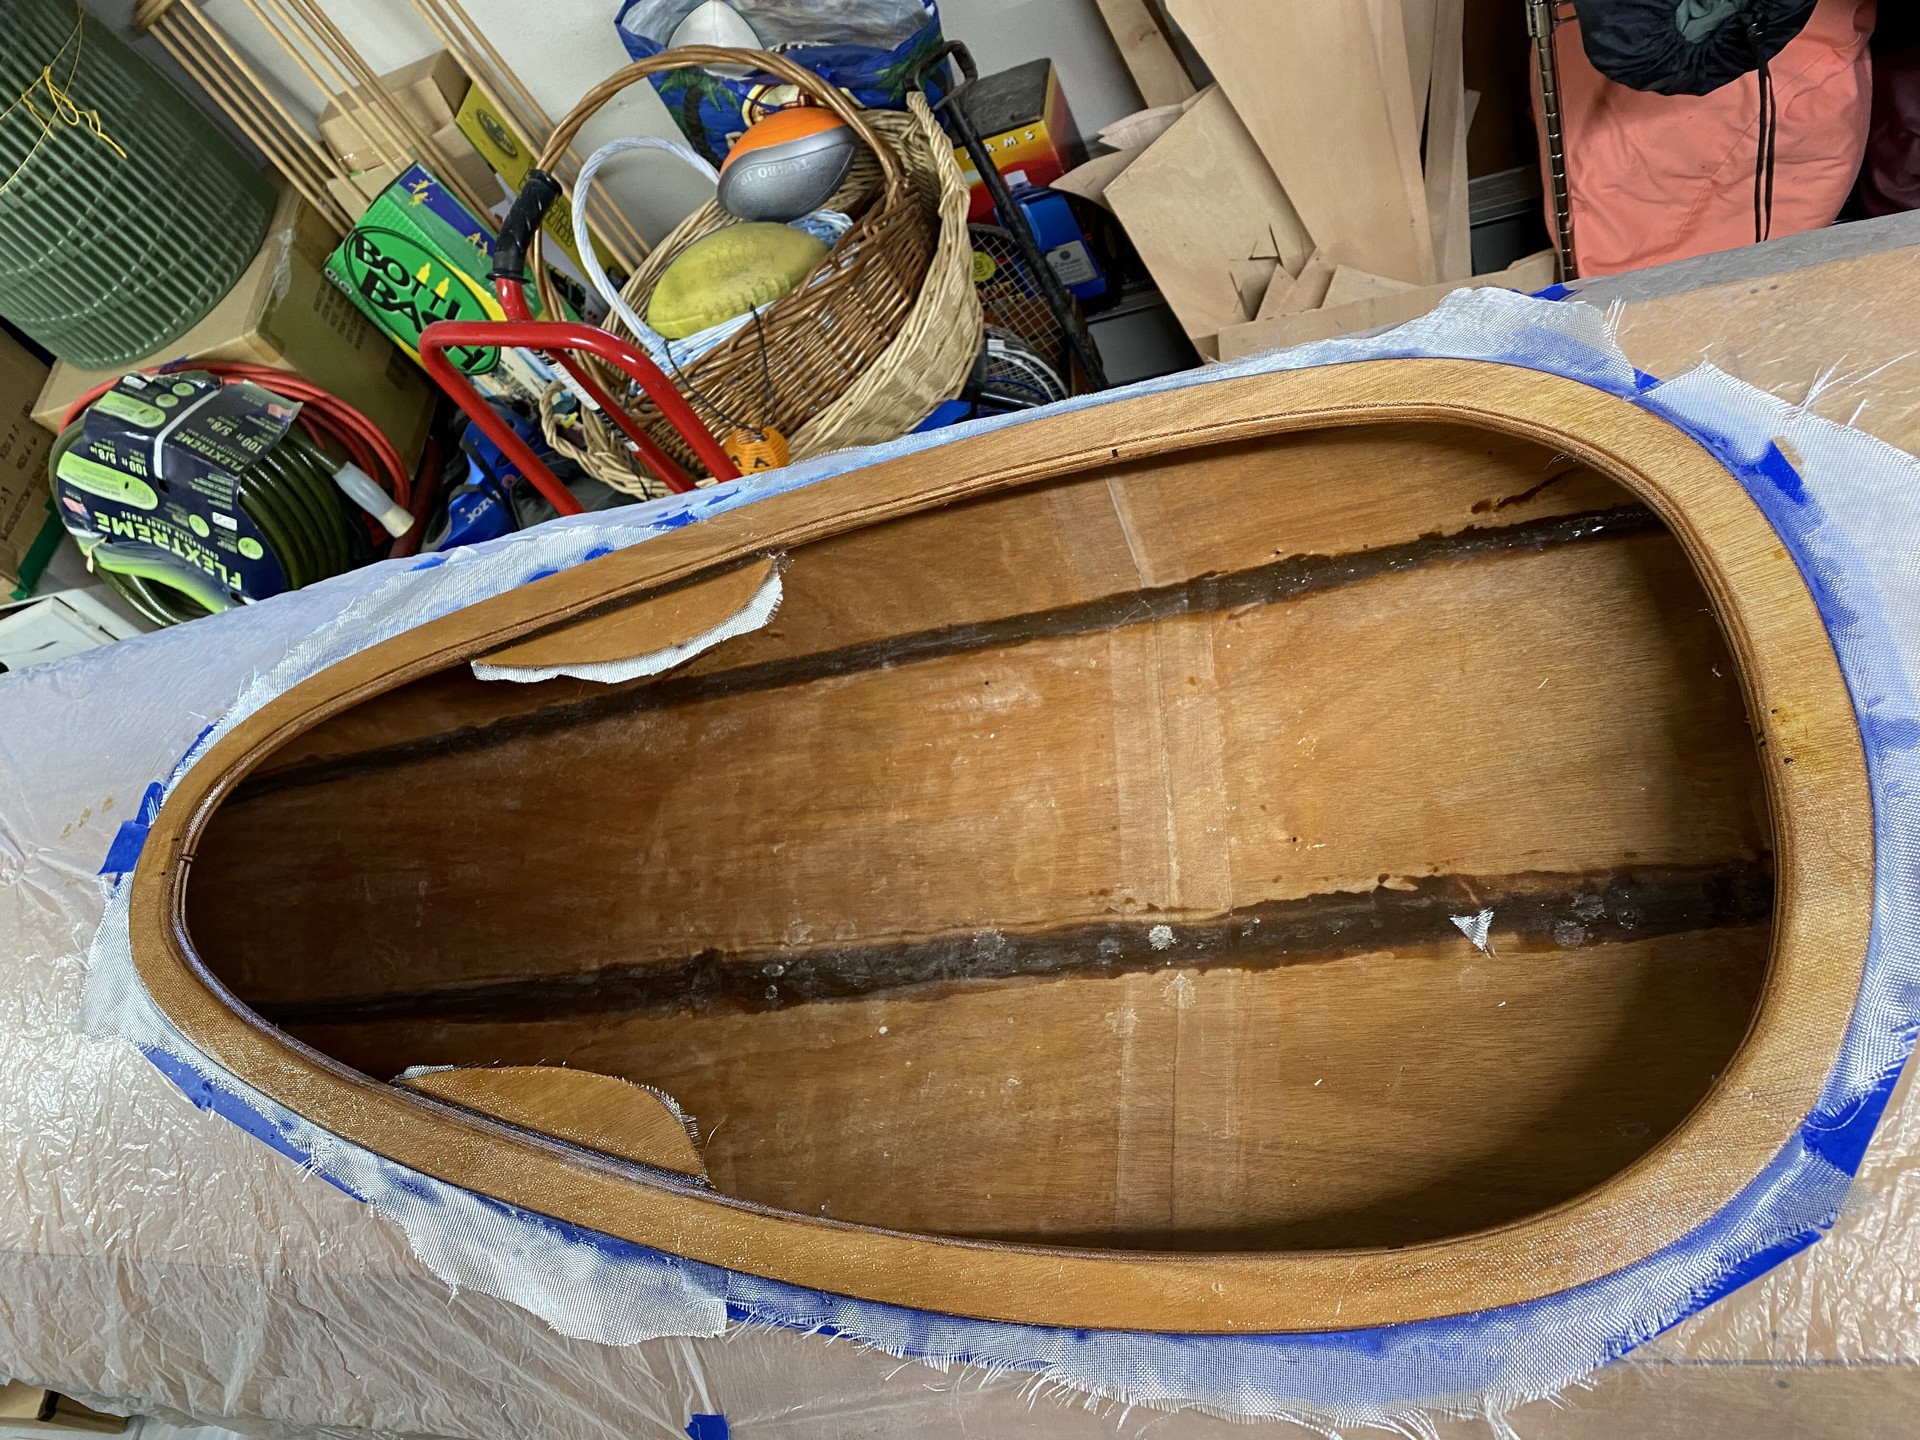
The gallery of images below depicts my progress over three weekends, beginning with the shaping and bonding of the combing layup to the boats on weekend #1. Next, I spent an entire day sanding and shaping the fully cured combing with a router, a rasp, and sandpaper. The router could not reach the areas where the knee brace tabs were located, so I had to shape that by hand with a sureform tool and sandpaper.
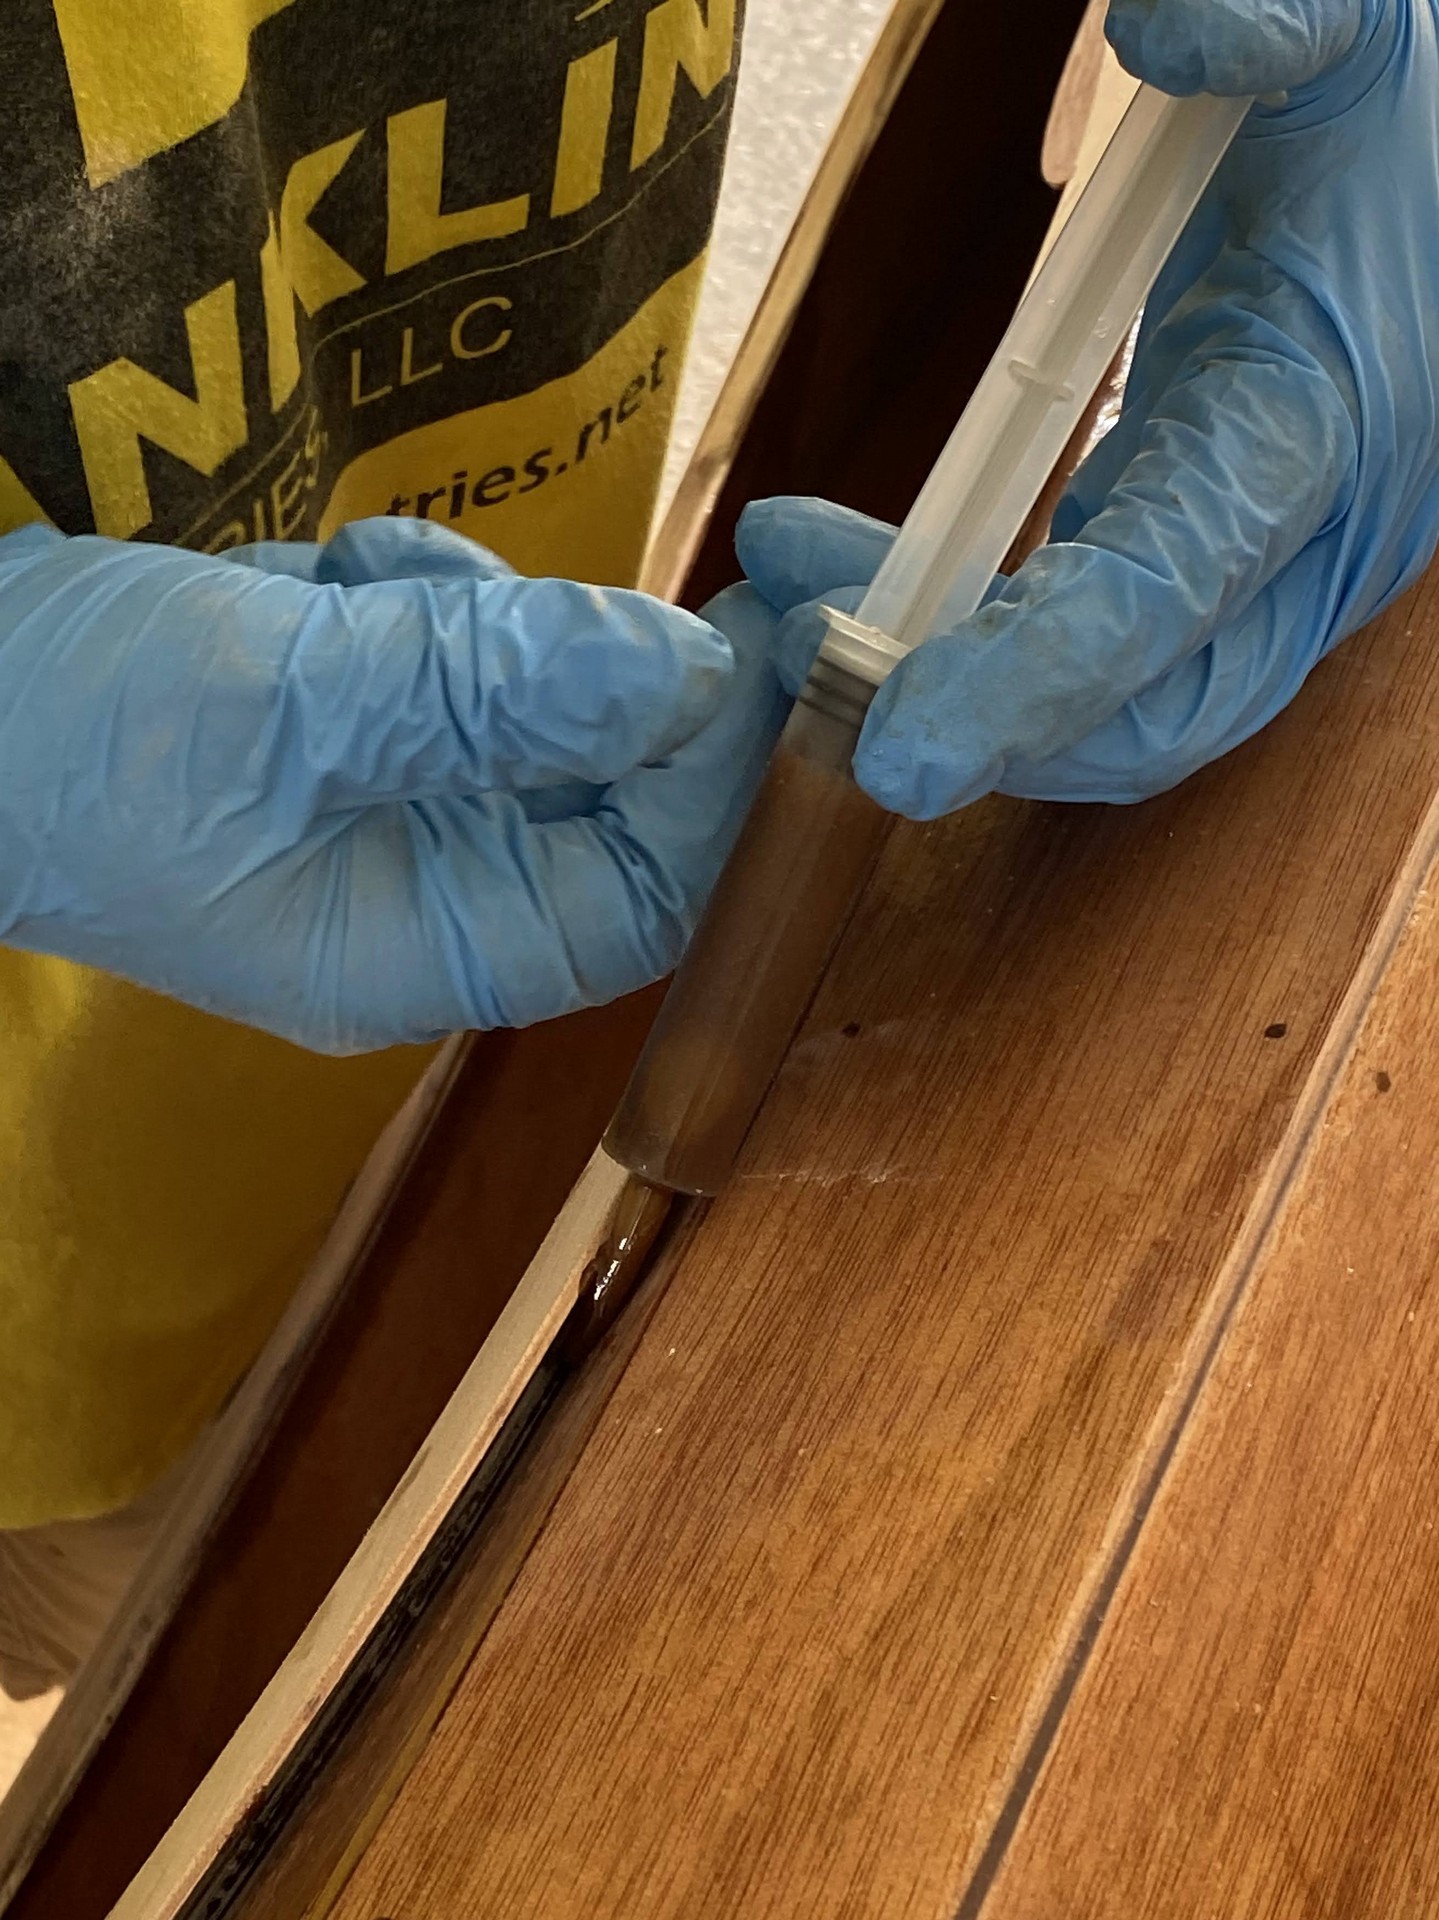
The following day I masked the boats with tape and plastic, and used syringes to apply a bead of wood flour thickened epoxy beneath the lip of the combing, waterproofing that sandwich of plywood against the deck. Mid-week I managed to get the boats out, remove the tape masking, and sand smooth this newly applied epoxy bead. This cleaned up the surfaces around and beneath the combing rim. The cockpit combings were now ready for fiberglassing.
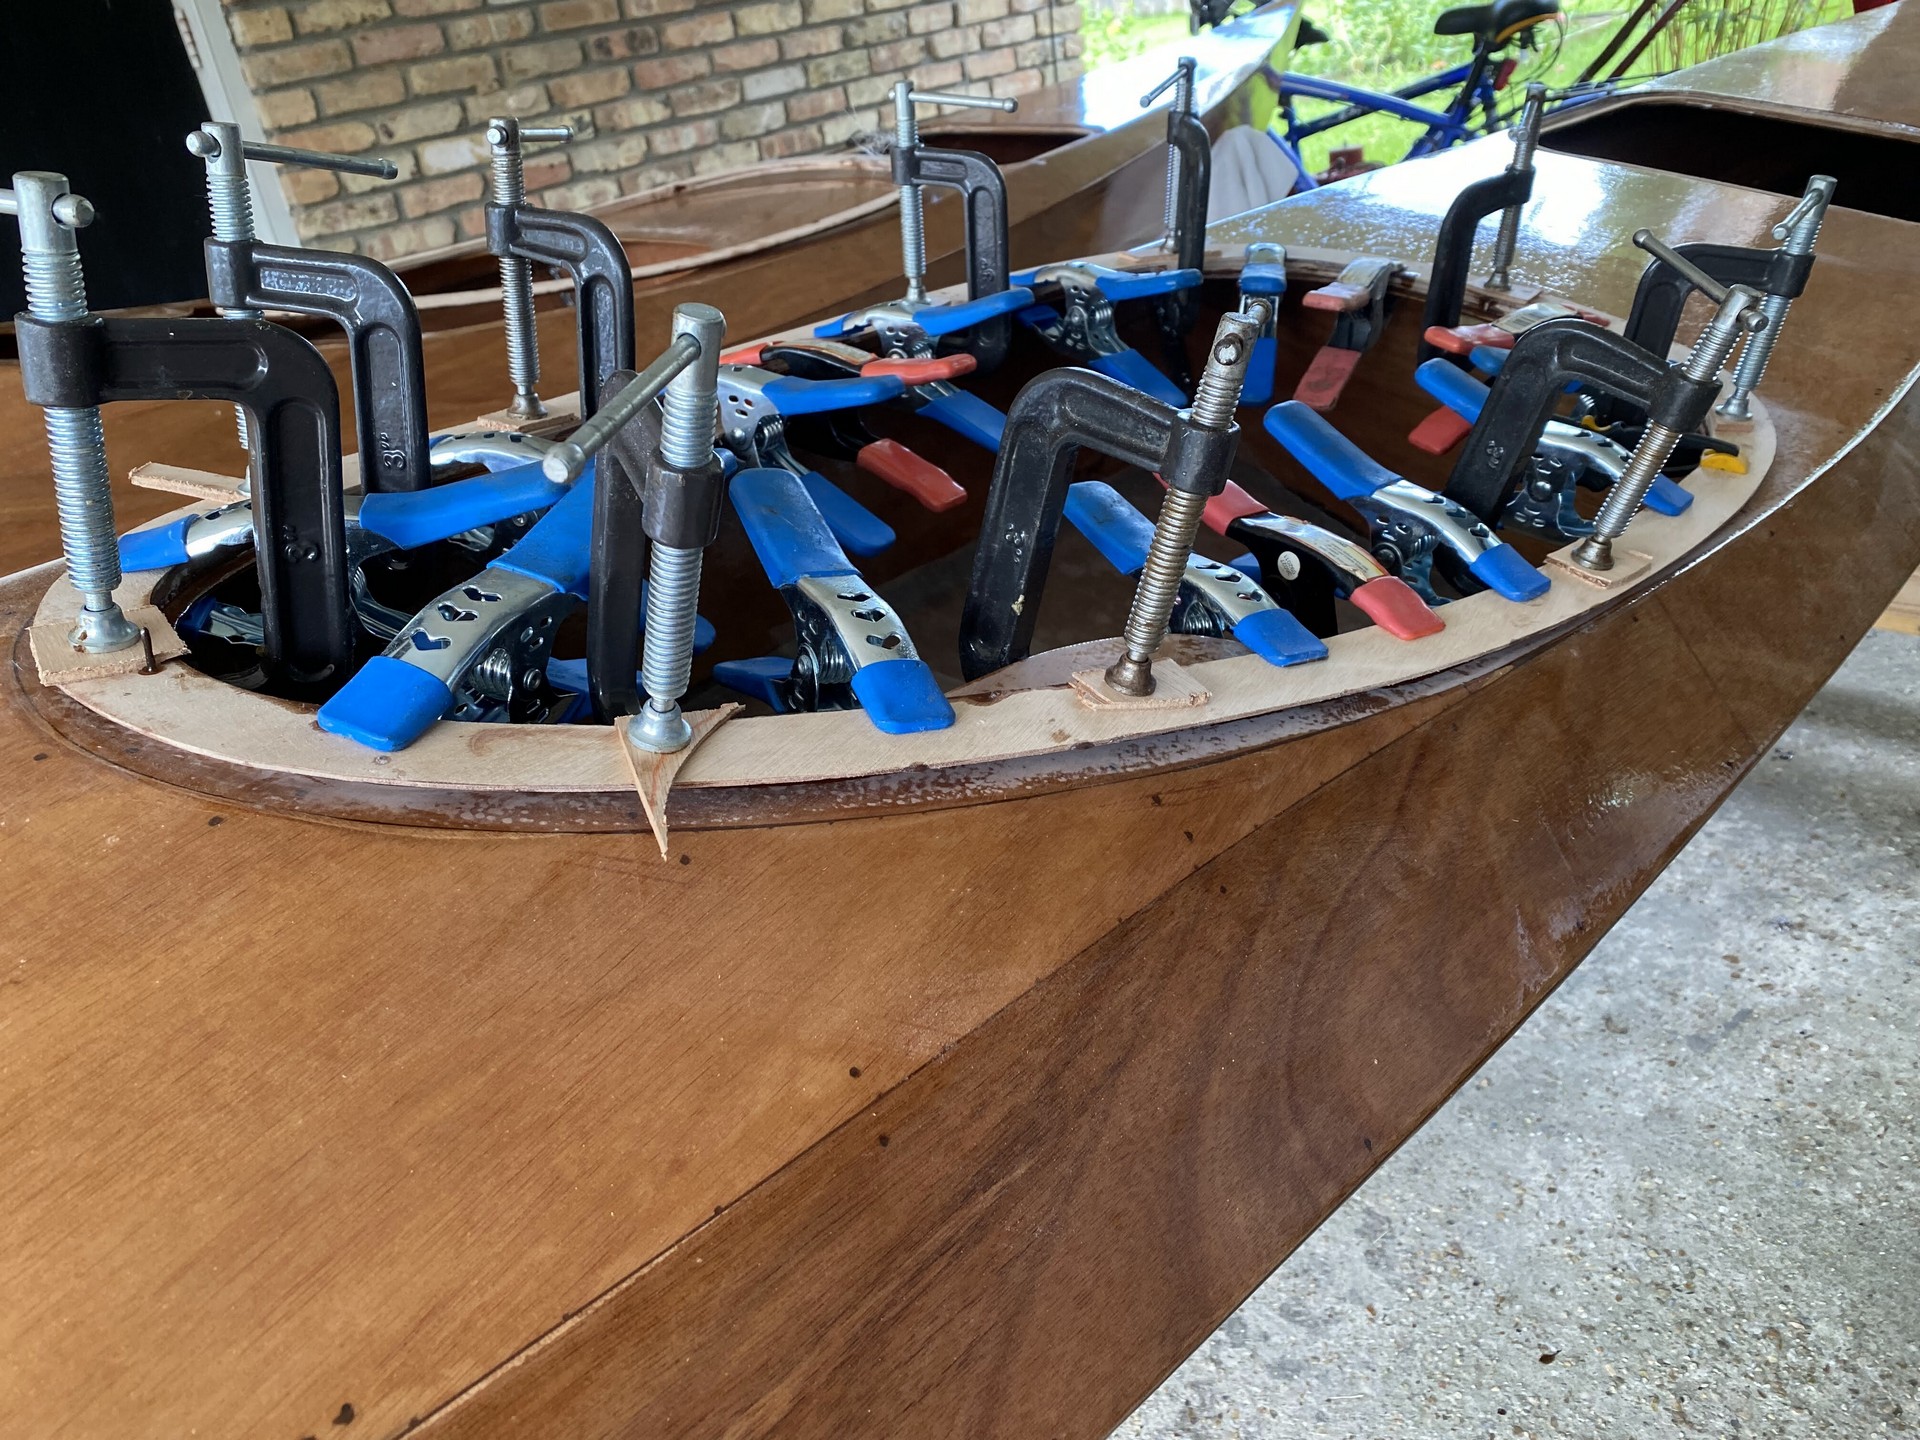
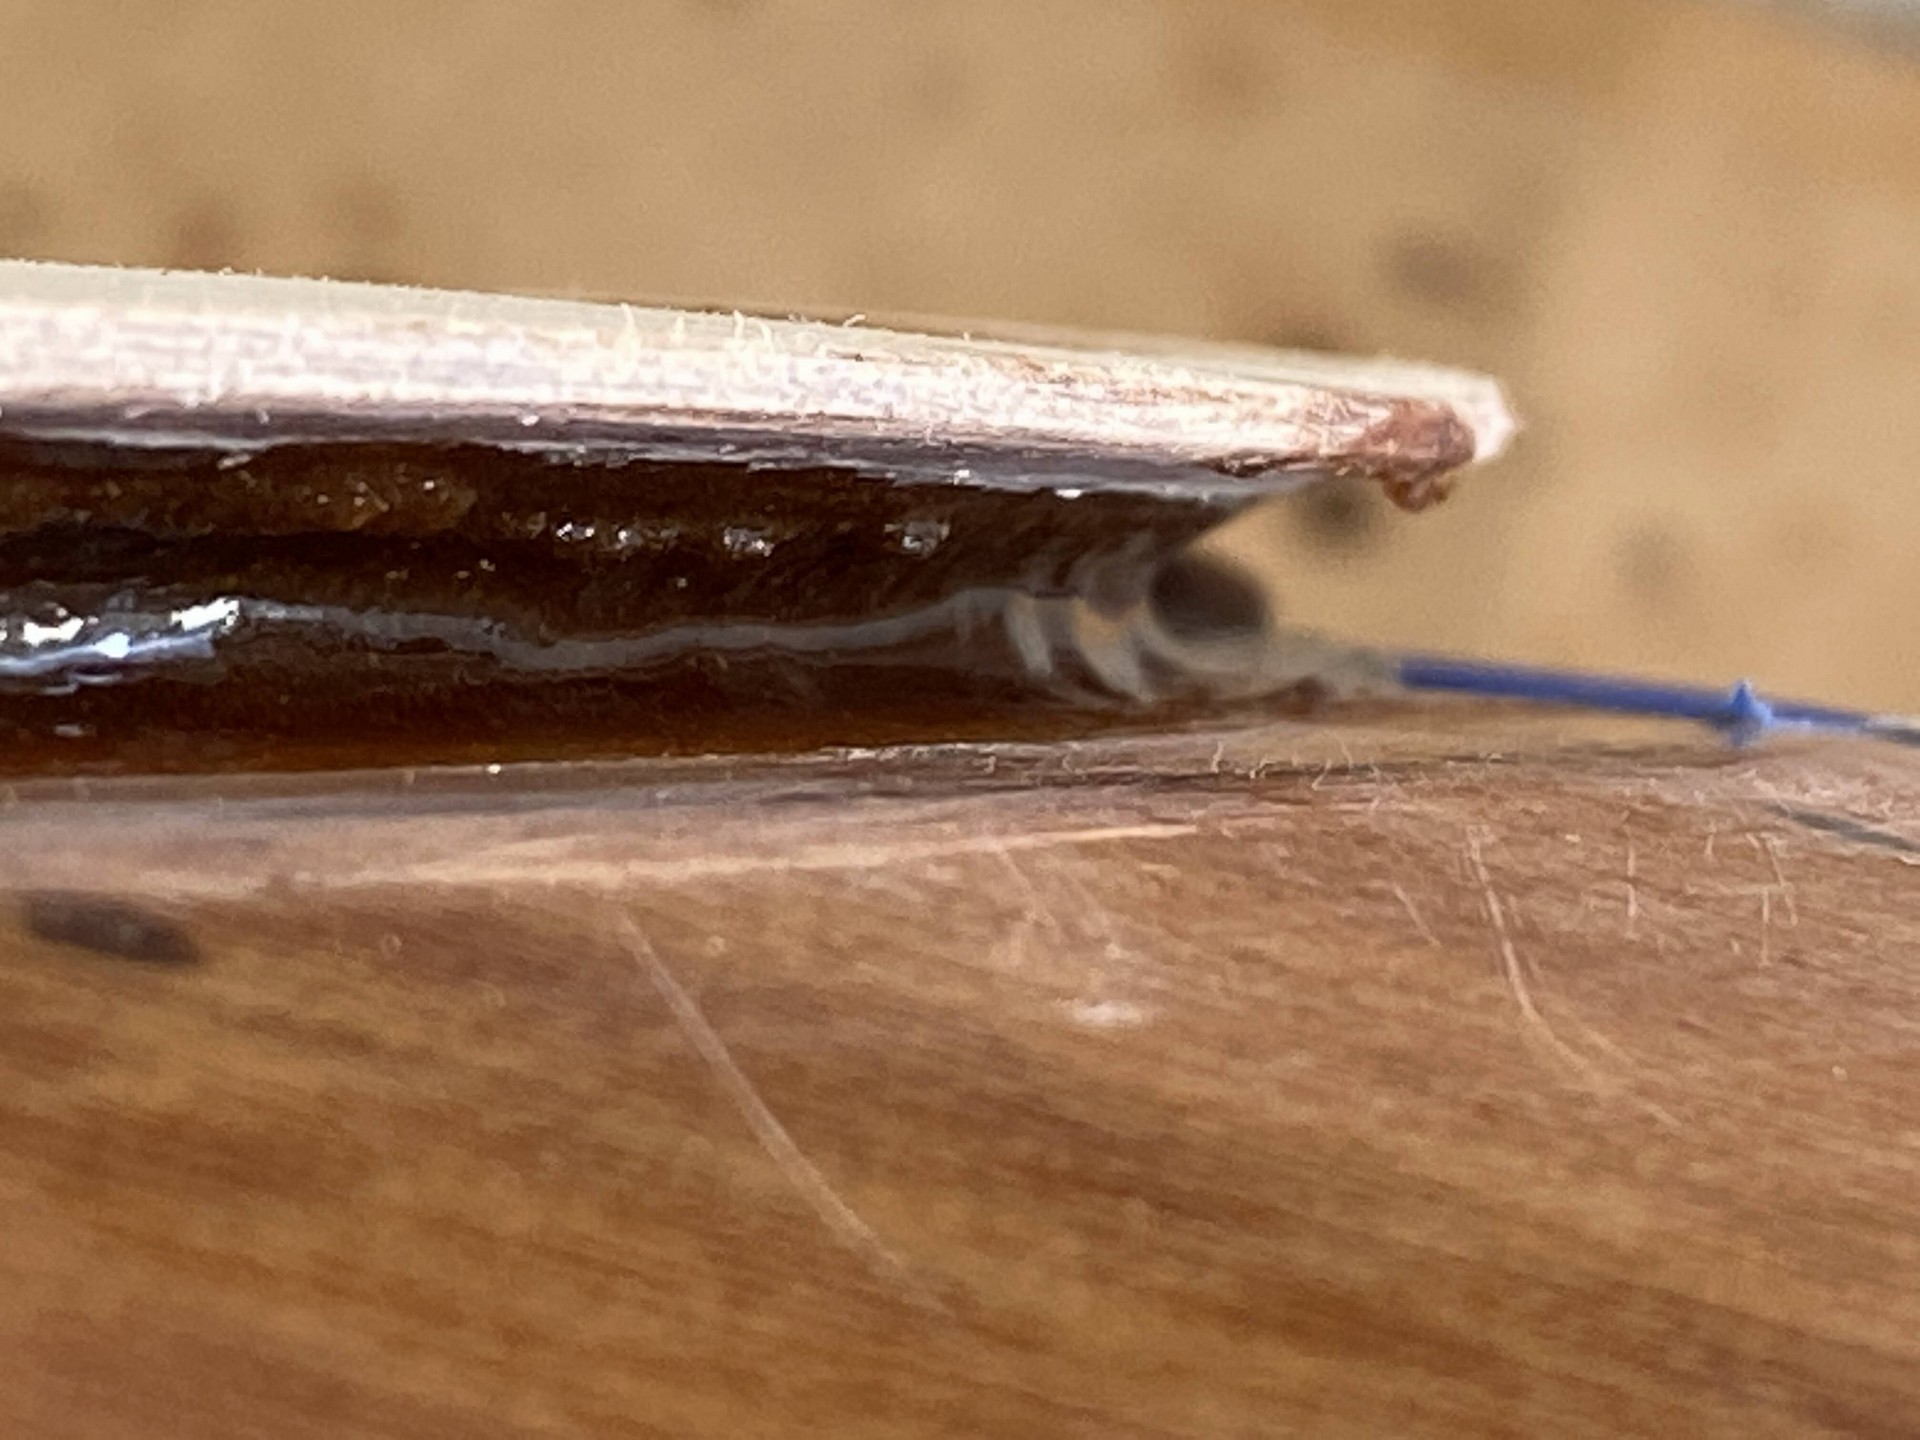
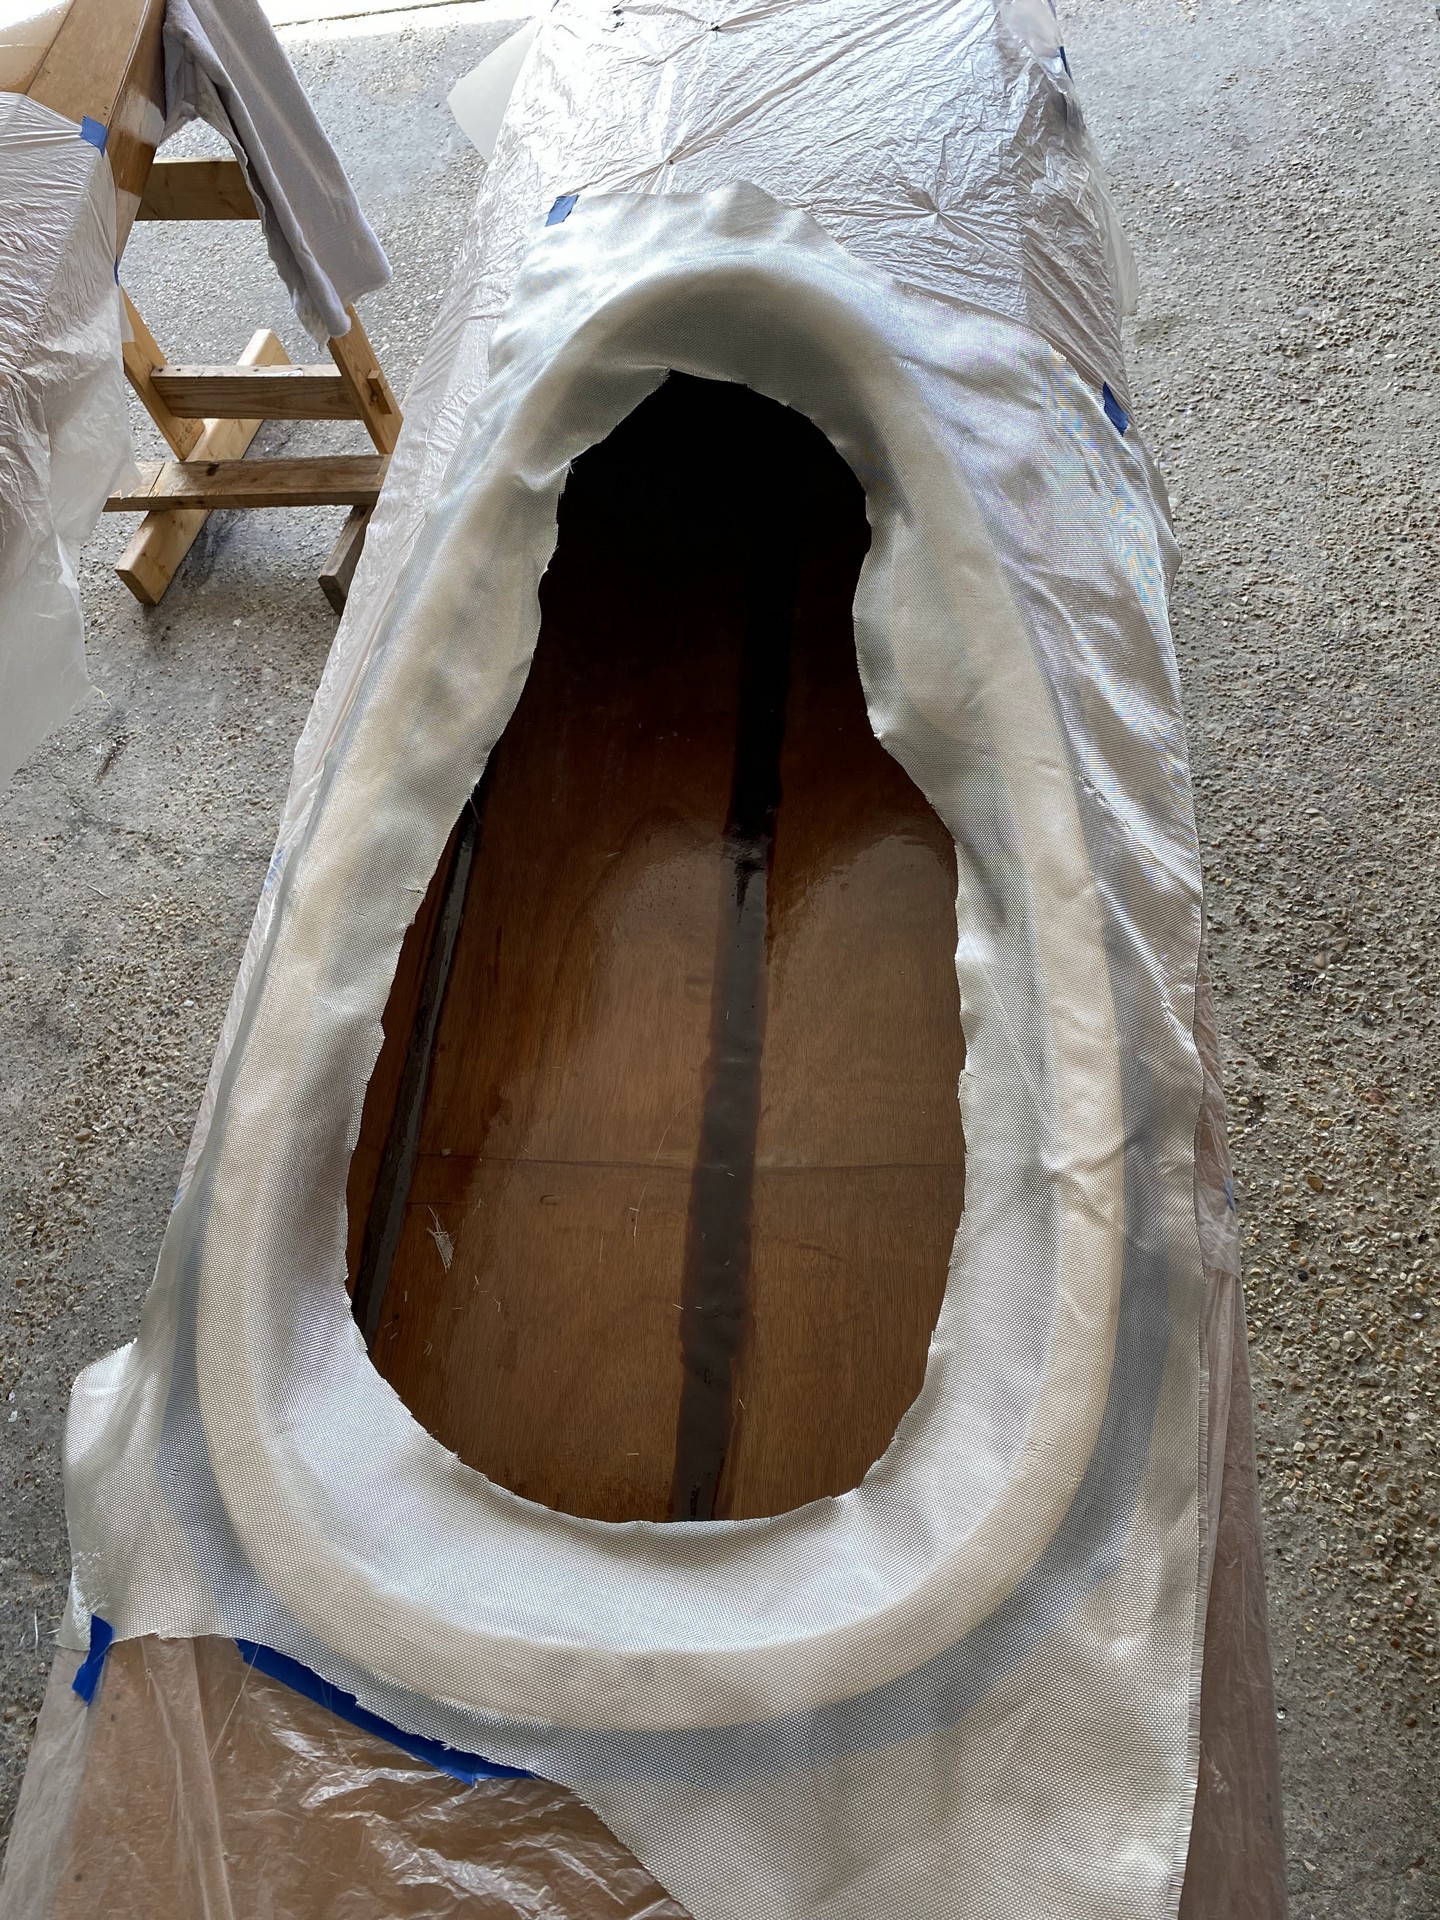
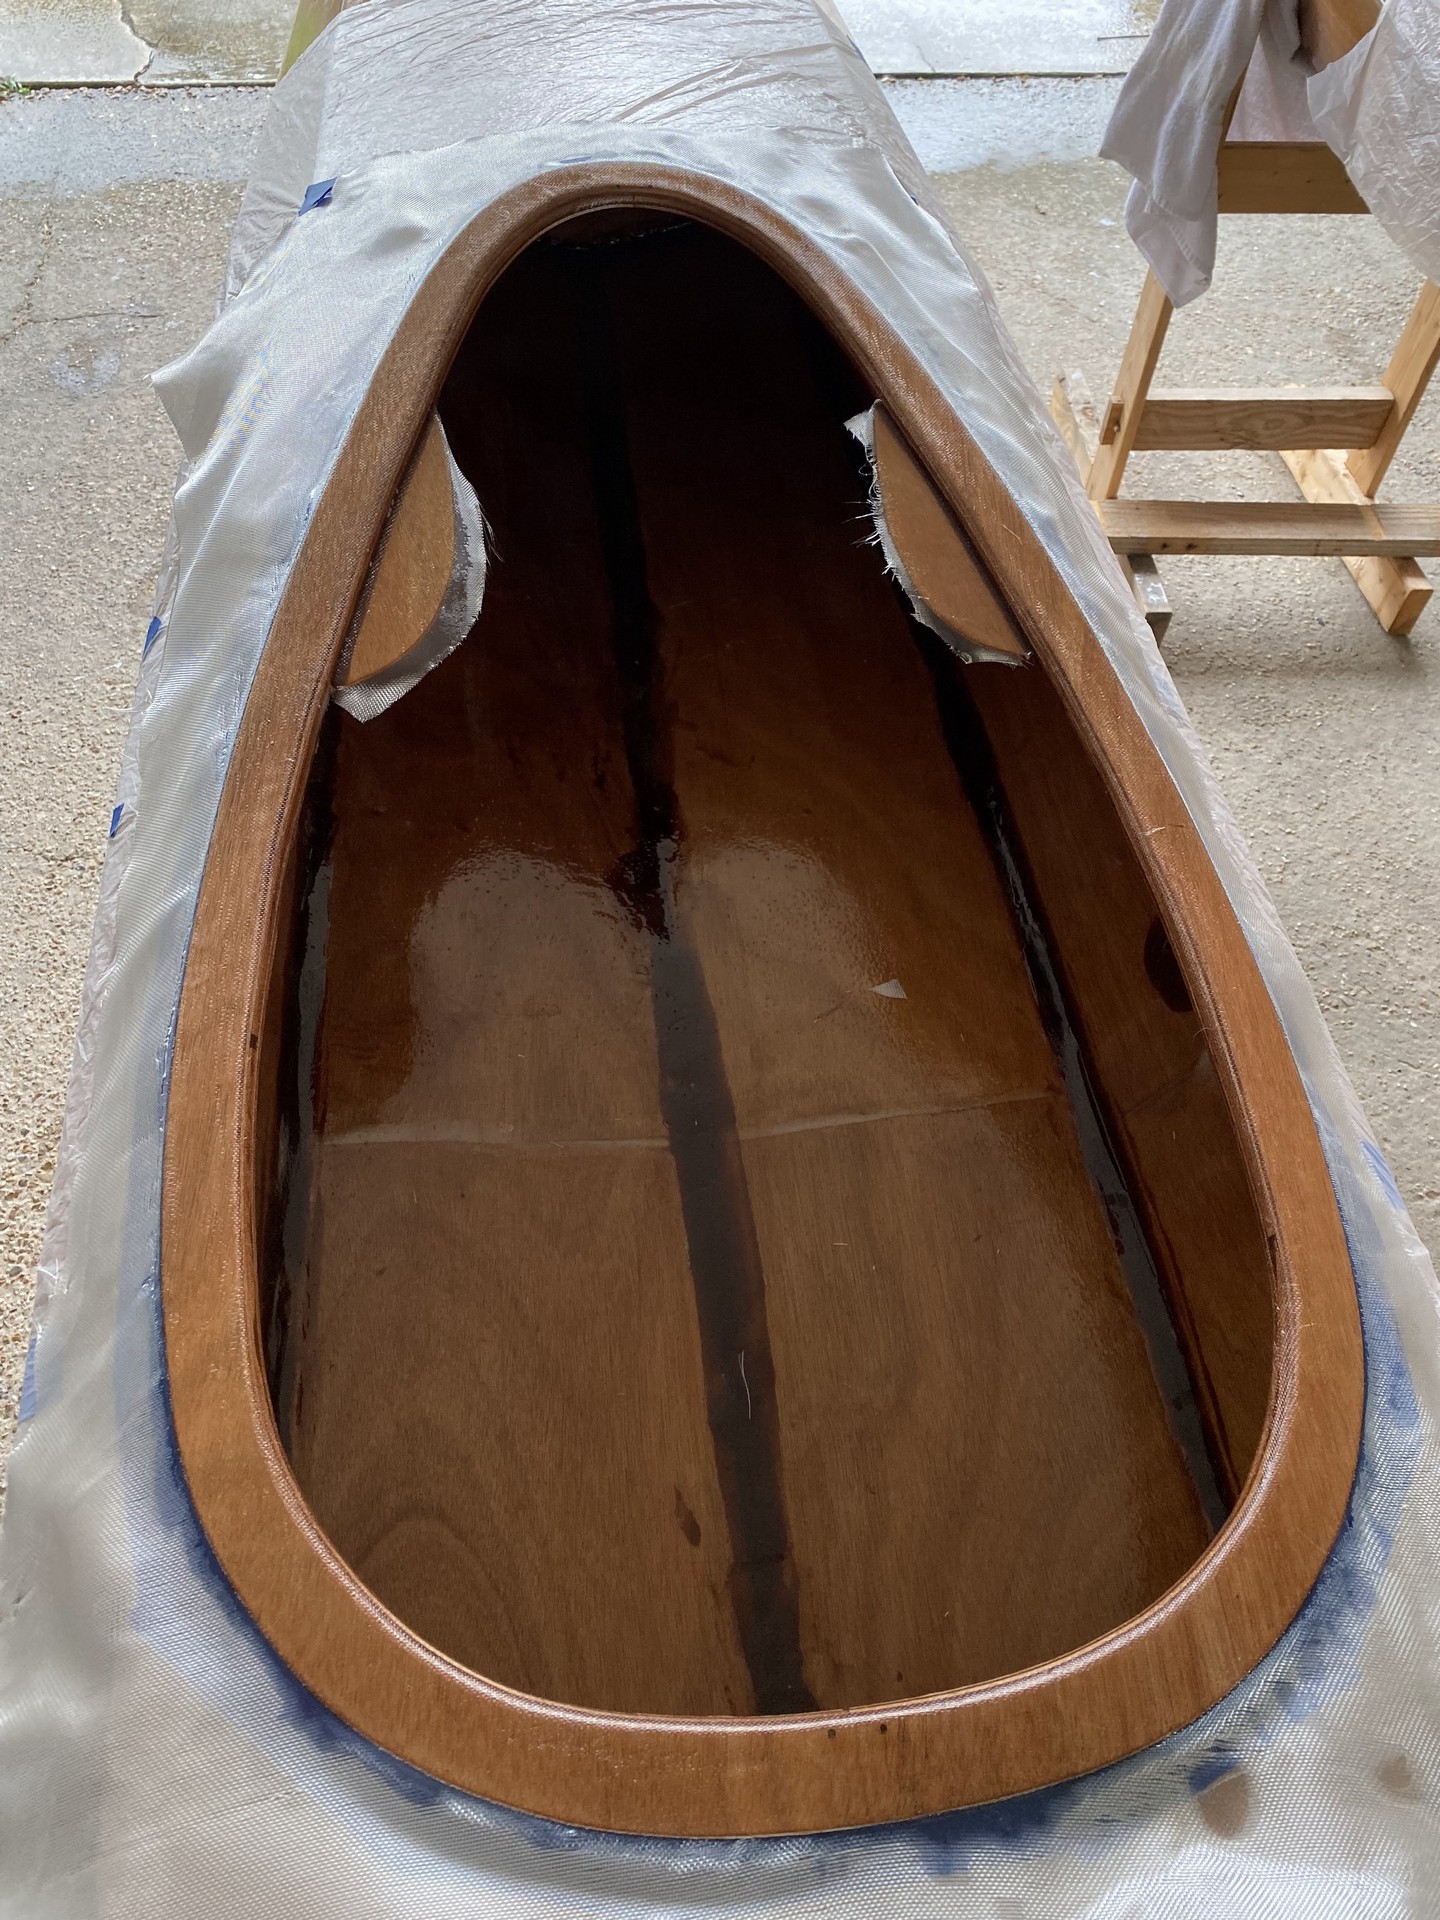
On weekend #3 I again masked the deck of the boats around the cockpits and then applied the fiberglass to the top and inside of the combing, wetting it out with unthickened epoxy and wrapping it beneath the deck. Scissors were used to trim the fiberglass to around 2" hanging down inside, and then I cut darts all around the curved areas to allow the fabric to wrap up beneath the deck. After curing overnight the excess fiberglass was trimmed away with a razor and then the combing was sanded smooth. During the final weekend of the month I applied a clear coat of epoxy - first to the underside of the combing lip with the boats upside down - and after that dried to the top of the sanded combing to fill the weave.

Lift Loops
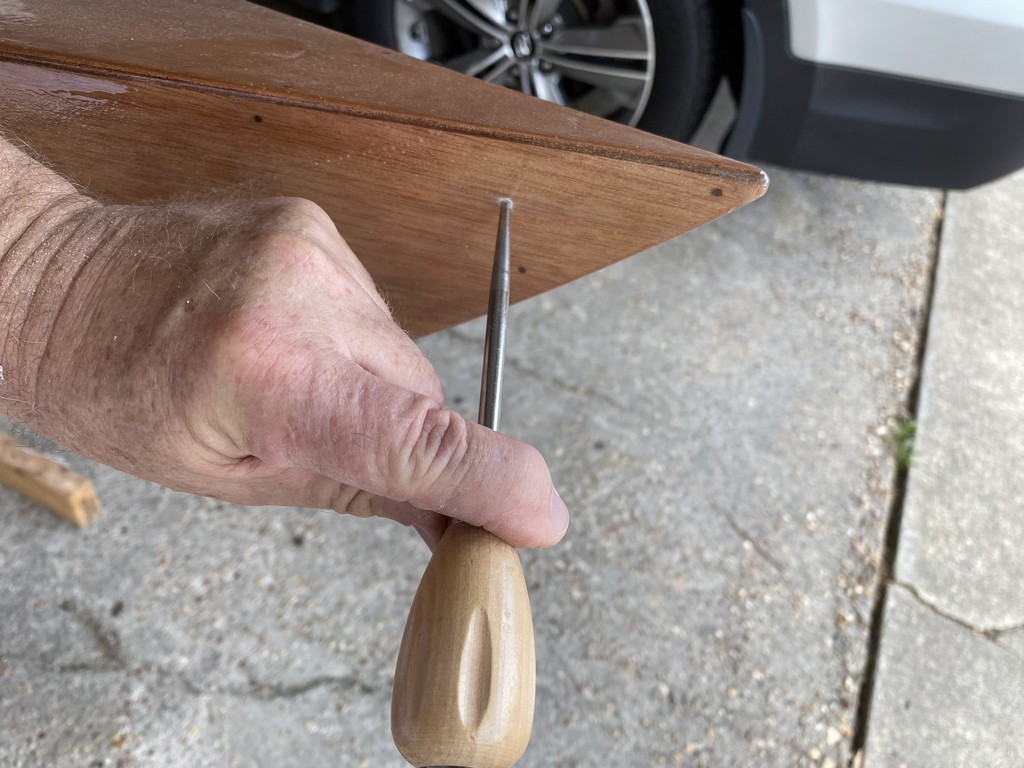
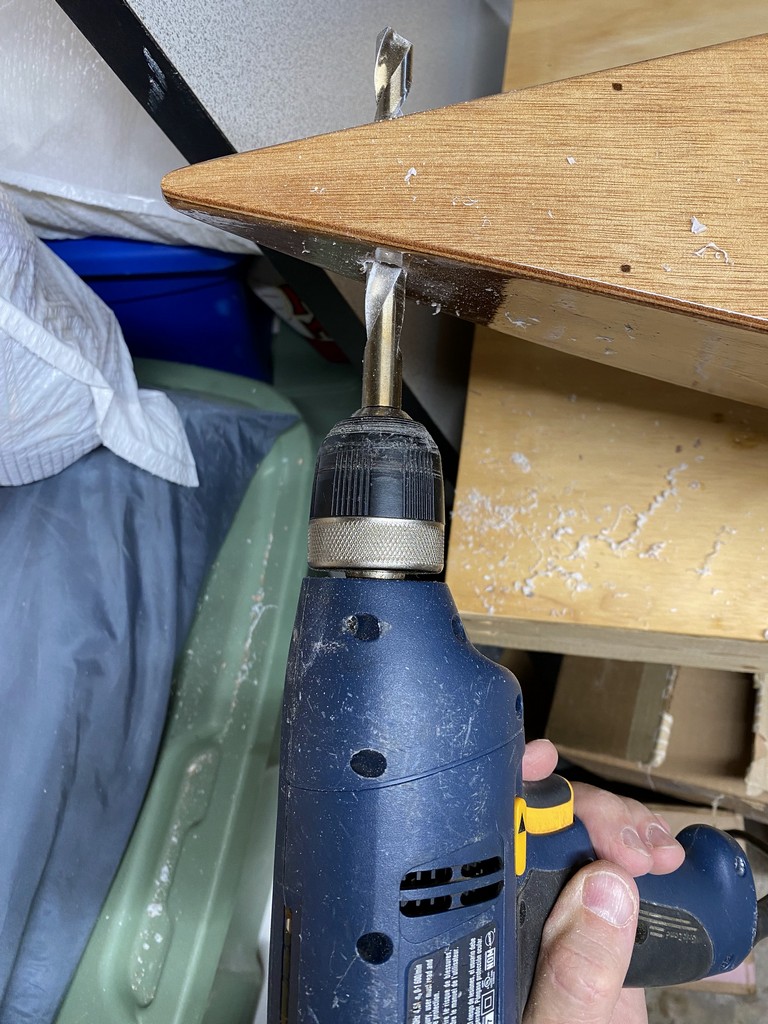
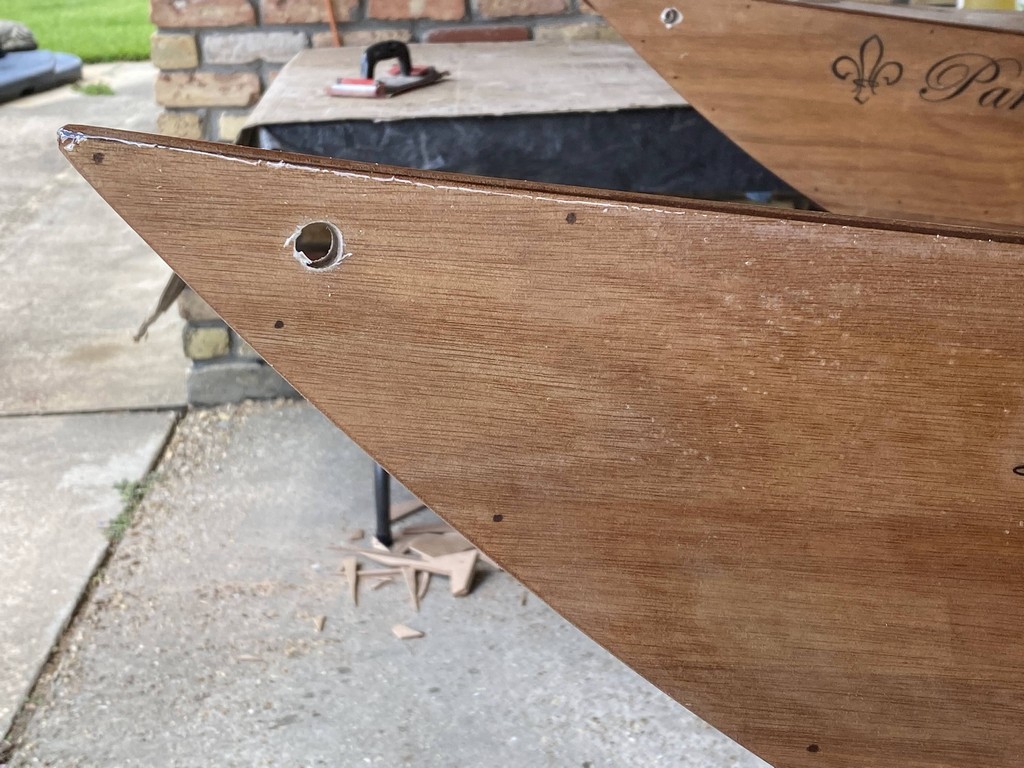
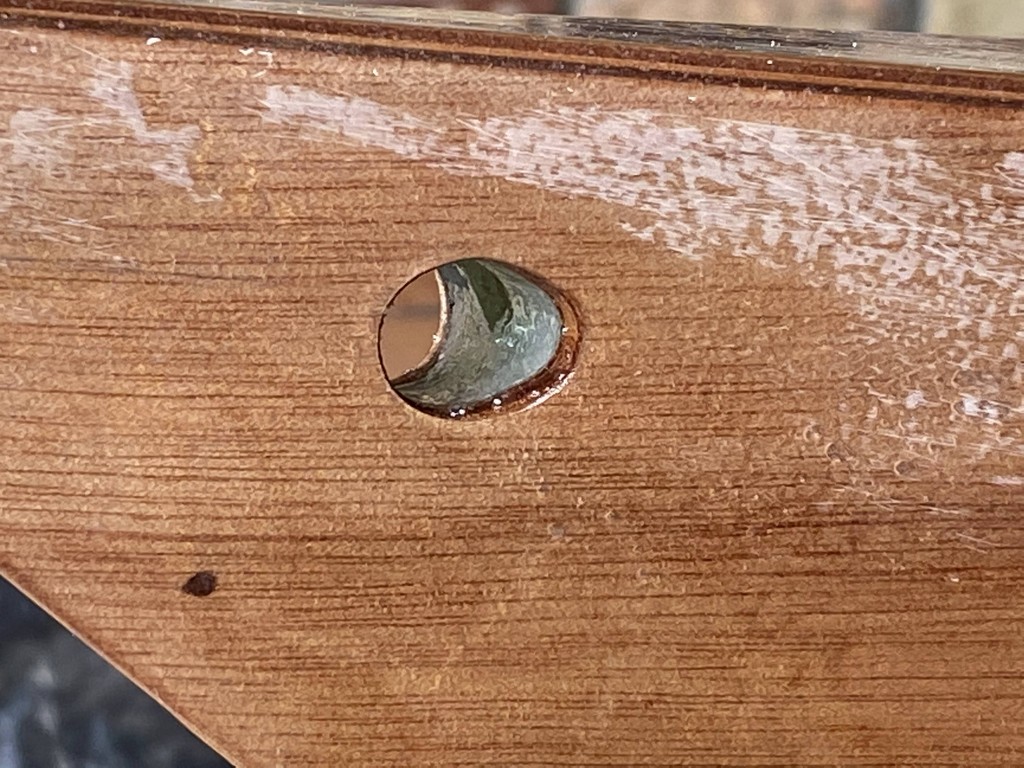
I’ve got to say that drilling holes through the beautiful plywood hulls of these kayaks was nerve wracking. I used a punch to make an indention where the hole was to be drilled. This dimple prevented the bit from drifting during the process. After drilling through the epoxy end pour with a 1/2" bit I smoothed it out with sandpaper and then used an old tooth brush to coat the insides of each hole with clear epoxy. After varnishing, I’ll tie rope through these holes as hand holds for carrying the kayaks.
I’ve been researching exactly how to handle the rope lift loops through these holes bored through the bow and stern. CLC’s build manual suggests either tying a simple knot or fabricating wooden handles. The knot appeared bulky and (to me) unattractive. The wooden handles didn’t seem to be comfortable for carrying the boat and I also don’t like the idea of them constantly bumping against the hull or deck. Turning once again to YouTube I learned how to unravel ends of the nylon rope and re-weave (braid) it back together as a splice. This leaves a thickened area of rope suggesting a grab handle, and there is nothing hard to bump against the kayak.
Click below to watch the instructional video “Beginner Friendly Splicing - How To Splice 3 Stranded Rope Together” by WhyKnot.
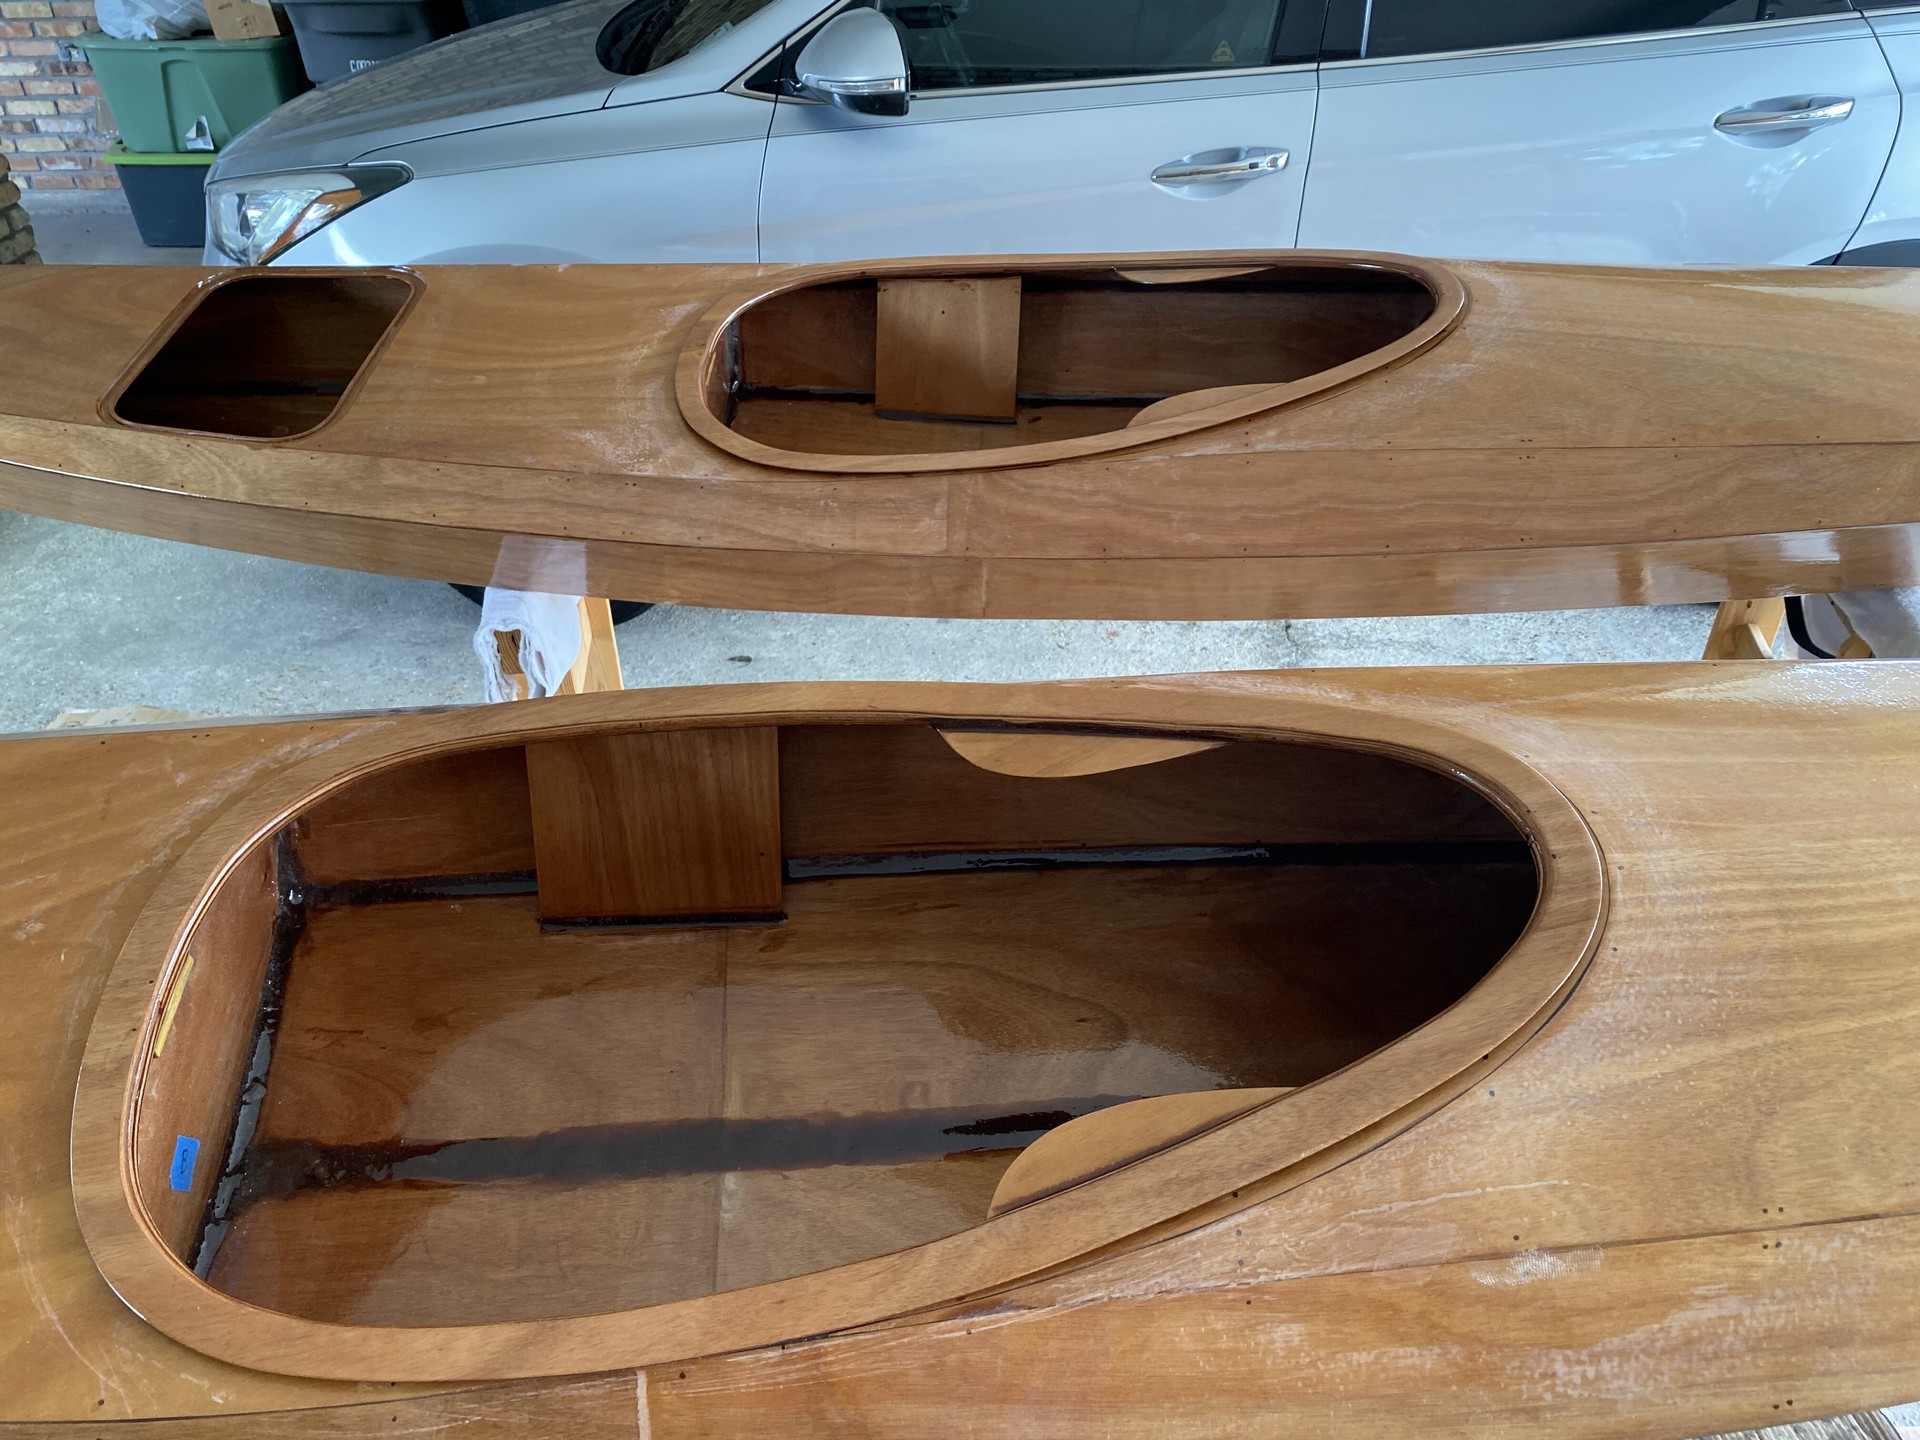
Hip Braces
The hip braces are coming along. A scrap of 3/4" thick by 3/4" wide by 5" long hardwood was glued to the back with thickened epoxy in a previous step. They’ve now been fiberglassed on the front faces, received a second filler coat, and fully coated in clear epoxy on the back face and edges to waterproof them. Now, I’ve bonded them into the kayaks with a filet of thickened epoxy along the top and bottom edges. The dual purpose of the hip braces is to fill out the sides of the seat at one’s hips, allowing for a snug fit - and secondly as mounting points for the straps holding the seat backband in place.
More Sanding Before Varnish
With cockpit combing installed the next step is another round of sanding of the entire kayak in preparation for a final coat of clear epoxy. This is necessary to clean up some runs, globs and bubbles that occurred during early epoxy coats. It is also necessary to fully fill the weave of fiberglass fabric in a few places. I purchased $65 worth of bronze hardware from Fairwind Fasteners for all of the storage hatch toggles, deck bungie line anchors and seat-back installation straps. Unfortunately, now is also the time for me to fork over some cash for a gallon of varnish! Additional research has confirmed my decision to purchase Pettit Z Spar Flagship 2015 Varnish. The Pettit Paint “Ask an Expert” video from May 2020 (linked below) provides an informative comparison of their products.
Unfortunately, the audio is a little challenging to hear when the speaker stands behind the desk, but the information he provides is worthwhile.
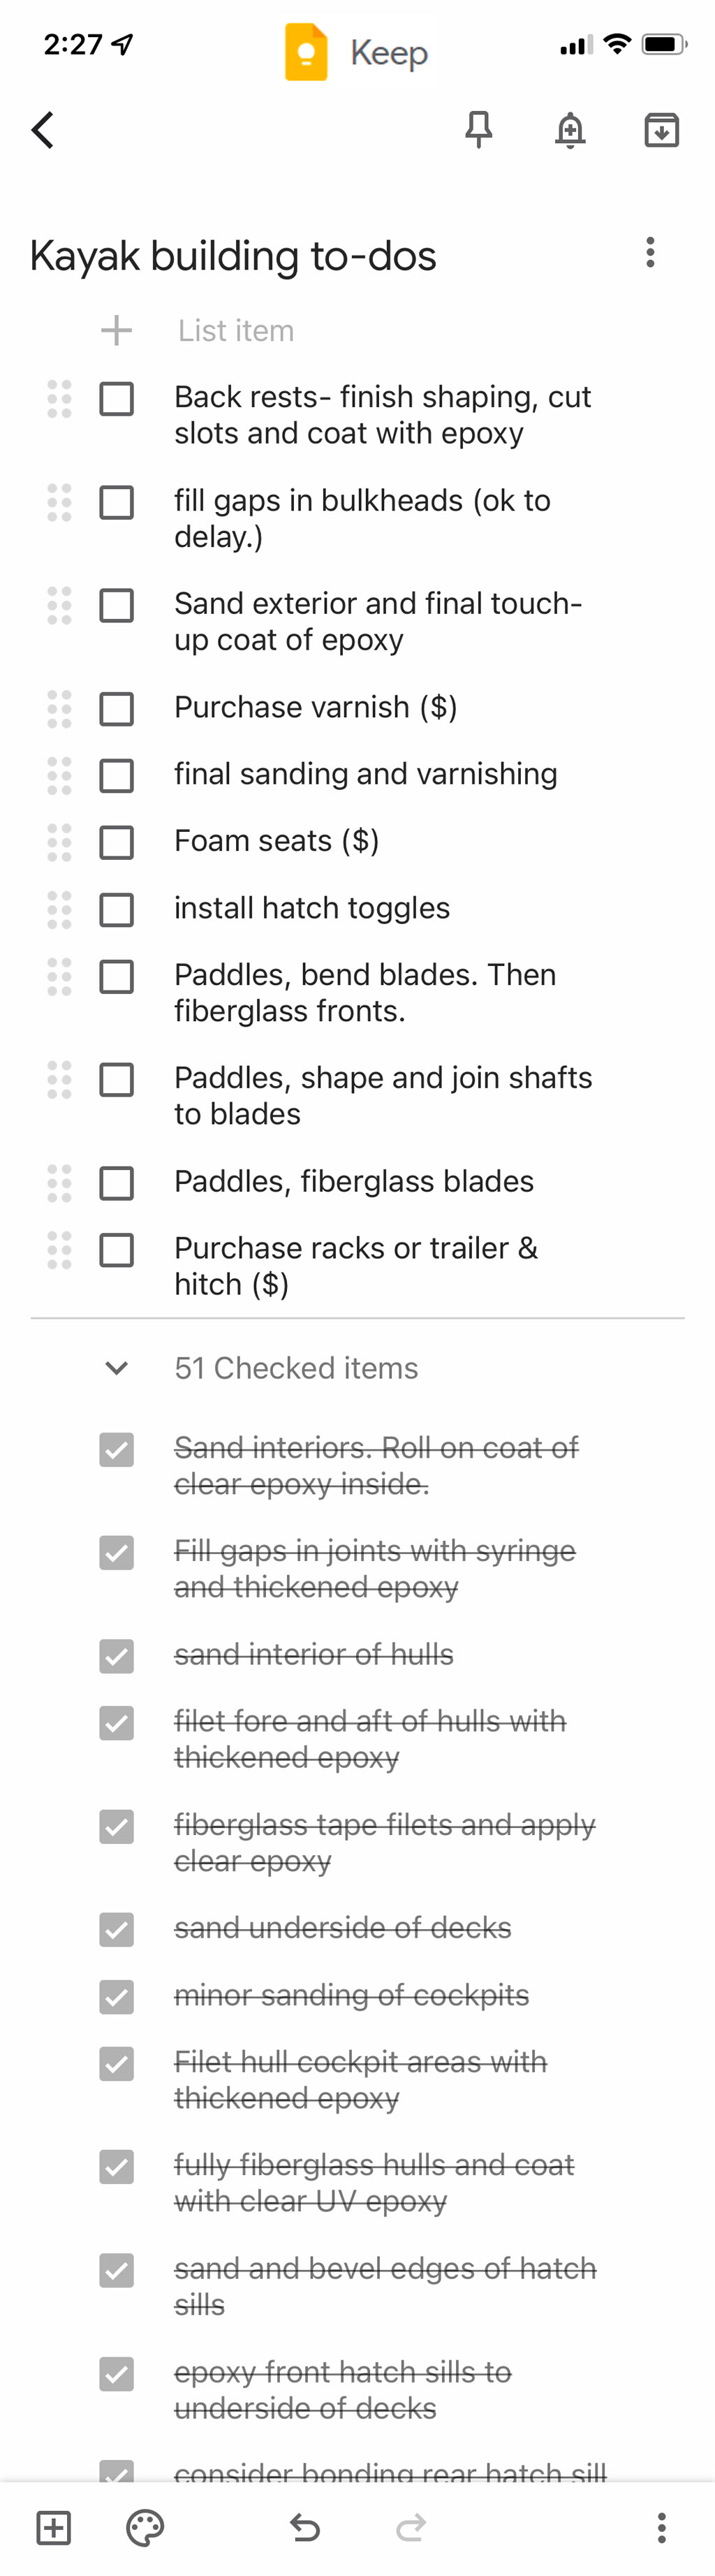
To-Do List
Obviously working your way through the CLC assembly manual keeps builders on track, but I found there are numerous additional tasks that end up being overlooked or falling by the wayside, and I don’t carry the manual around with me. I use the Google Keep note taking app to maintain a checklist of tasks as I work on my kayak project. Because it is so easy to add new or rearrange the checklist items, I have found Keep useful in prioritizing my work. Since I only get to work on weekends and holidays, keeping track of the sequence and priority of tasks is necessary to prevent me from wasting time. With the App, Google Keep is always with me on my phone as well as my computers, so as ideas come to mind I can quickly update my kayak-building to-do list. I find it useful that Keep preserves the list of your completed tasks, so you can always go back and refer to them or uncheck them if you realize that they weren’t fully complete.